Aquarists have been testing for various elements and components for a long as we all can remember. We test different elements as a way to monitor the quality of our water and ensure that our tank inhabitants have the best possible environment to thrive.
Now that your KH Guardian has arrived, let’s make sure that everything is included and nothing is missing from the box.
The box should include:
- KH Guardian Unit
- Power adapter
- pH Probe
- 500 micron filter Check valves
- LCD connection cable
- Concentrated reagent solution
- pH Calibrating Solution
Before we start the installation, there are a few things that we need to have available.
- Ethernet cable to connect the KH Guardian to your home router
- 1500ml of RODI water to create reagent solution
- 1000ml of RODI water to create sodium bicarbonate solution
- 65 grams of Sodium Bicarbonate
- A level
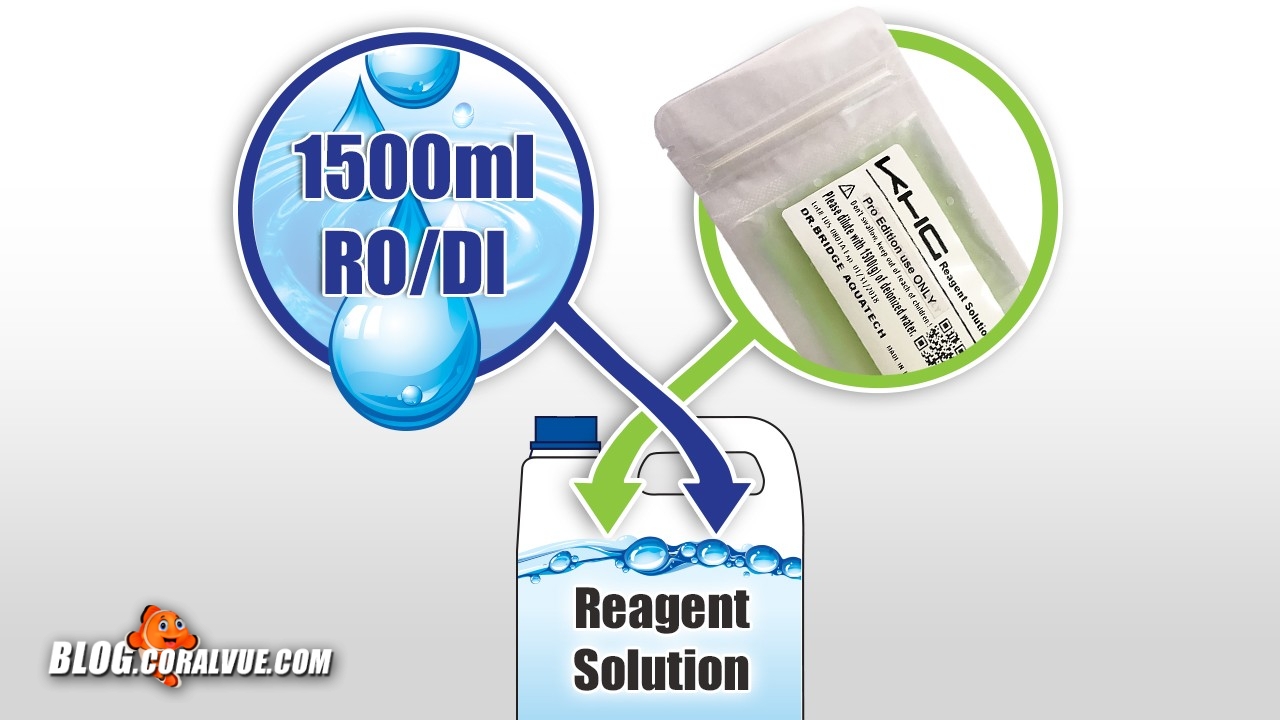
Creating Reagent Solution
The KH Guardian comes with a pocket of concentrated reagent that must be diluted at the right concentration to ensure accuracy of testing. All you need to do is take 1500ml of RODI water (or for increased accuracy, you can weight 1500 grams of RODI) and mix in the reagent. The newly created solution does not need to be refrigerated and the reagent will usually last around 45-60 days if testing once every 4 hrs.
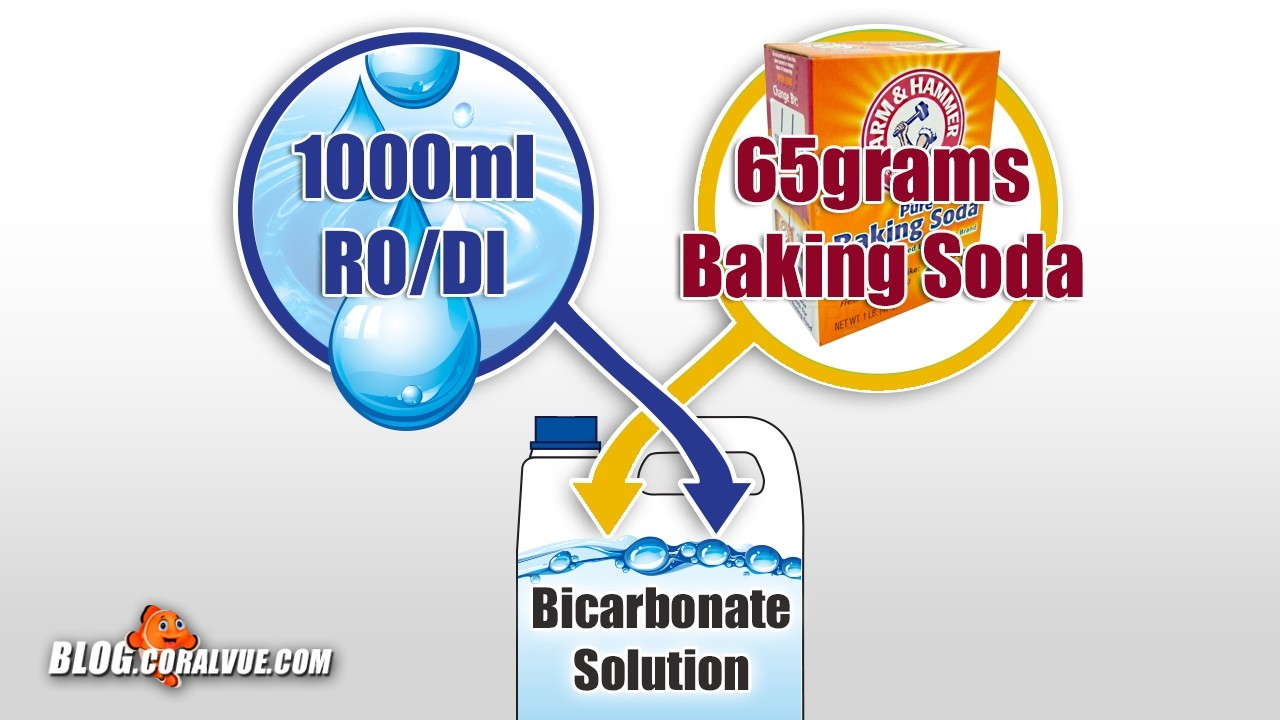
Creating Sodium Bicarbonate Solution
One of the great features of the KH Guardian is that in addition to monitoring your KH, it can also add alkaline solution if needed to maintain a desired level. To create a stock solution of sodium bicarbonate at the precise concentration, add 65g of dry Sodium Bicarbonate to 1L of RODI water.
Assembling and Installing the KH Guardian
Assembling the unit is fairly straight forward and simple. The dosing pumps are already set up and the lines have already been installed.
When assessing the optimal location for the KH Guardian you need to keep in mind the following important criteria:
- The KH Guardian should be installed within 3 feet of your water source. This means that the intake line that pulls water from your tank to the unit must not be more than 3 feet long.
- The KH Guardian must be placed in a flat and level surface.
- The KH Guardian must have access to Ethernet cable and connected to your home network. While a connection is not required for day-to-day operation, a connection is required to configure the unit and access historical data.
- The KH Guardian is not water proof.
To assemble the unit, start by connecting the LCD display to the KH Guardian main body using the provided white connection cable. Connect the cable to the bottom of the LCD monitor and then connect the other end to the TOP Ethernet jack on the side of the KH Guardian.

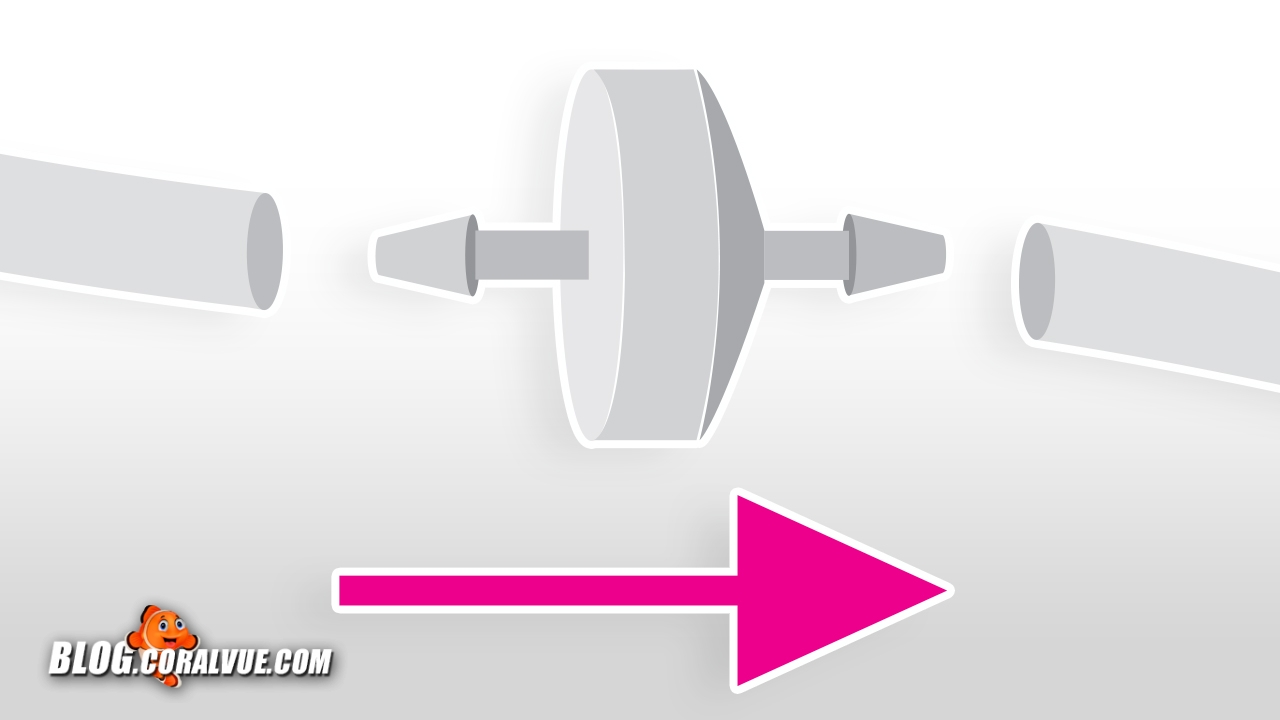
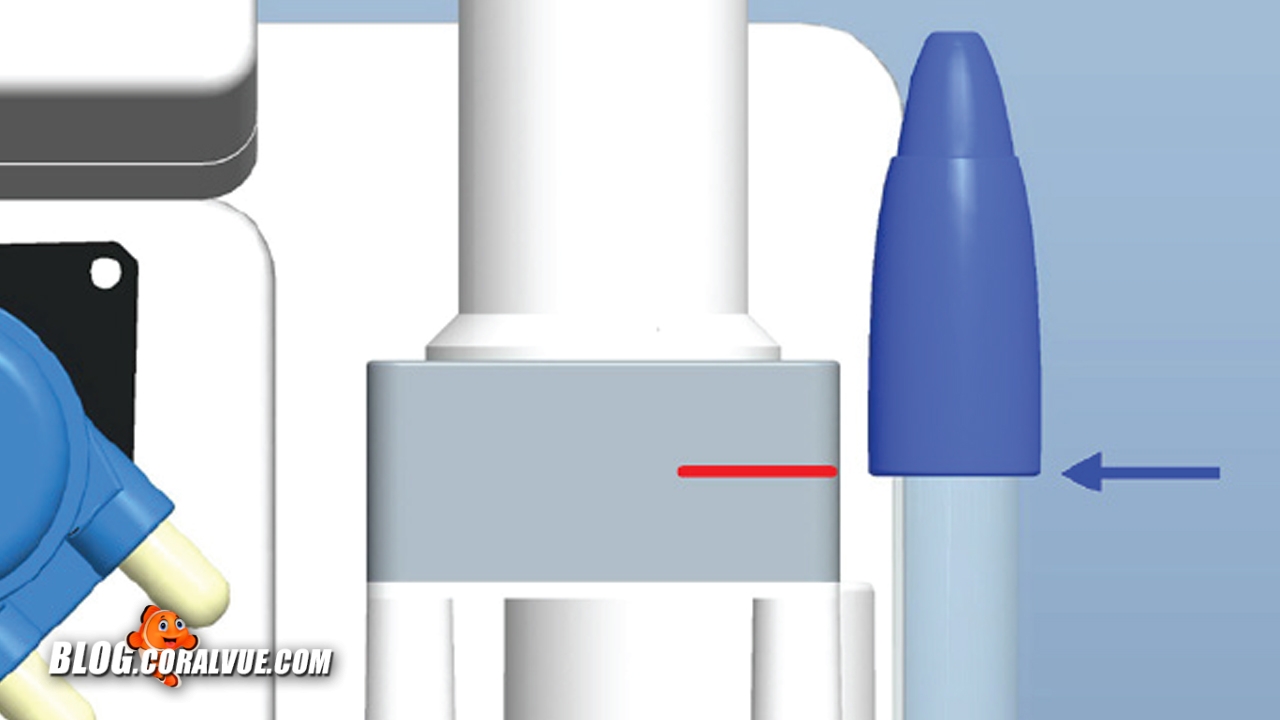
Install the included 500 micro filter check valves to both the SW IN (Salt Water In) and Salt Water Out (SW OUT) lines. Be sure to install the check valves in the correct direction.
Now, place the KH Guardian on a flat surface. Place the SW IN line in your tank and secure it in place. Be sure to avoid any kinks and that the end of the line is clear all around. You don’t want the end of the line touching the bottom of the sump where it can pull in detritus and throw off the results.
Next, go ahead and setup the SW OUT line. This is the line that will discard of the old testing solution. The reagent is 100% safe so it can be safely returned back to your tank. Now we understand that some people may not feel comfortable so you can also connect the line to a waste collector for later removal. At the end of the day, it is your choice.
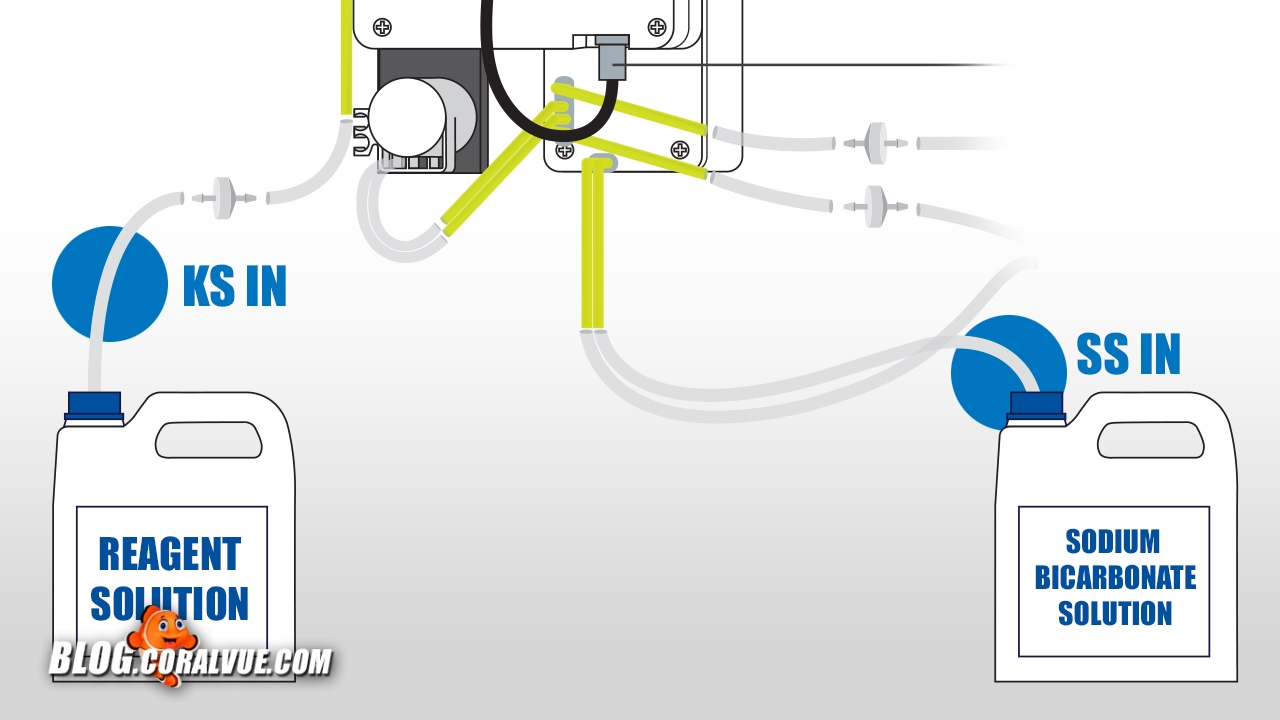
Connect the “Sodium Bicarbonate Solution IN” marked as SS IN to your sodium bicarbonate storing container.
Now, connect the reagent solution line, labeled KS, to your reagent solution bottle.
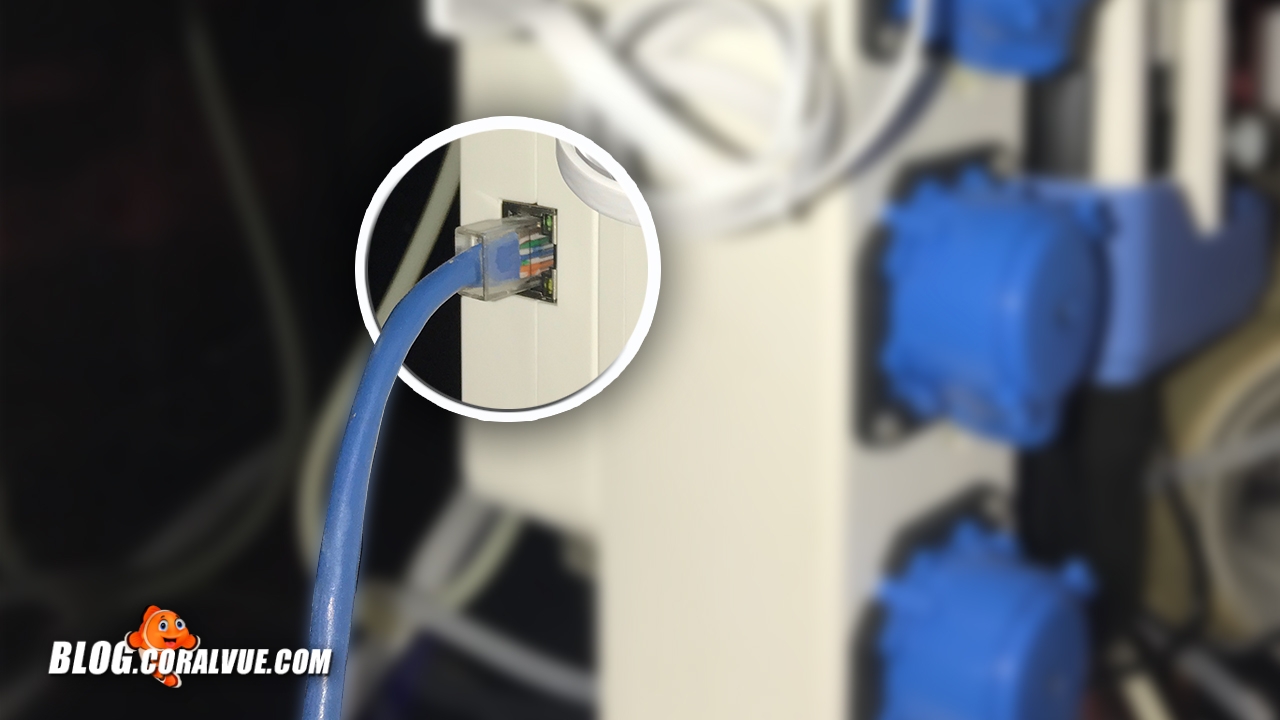
We are almost there. Connect the KH Guardian unit to your home router by using an Ethernet cable and connecting it to the bottom jack on the side of the unit. Make sure that your home network is running DHCP. If you aren’t sure about your network setup, please refer to your router’s user guide.
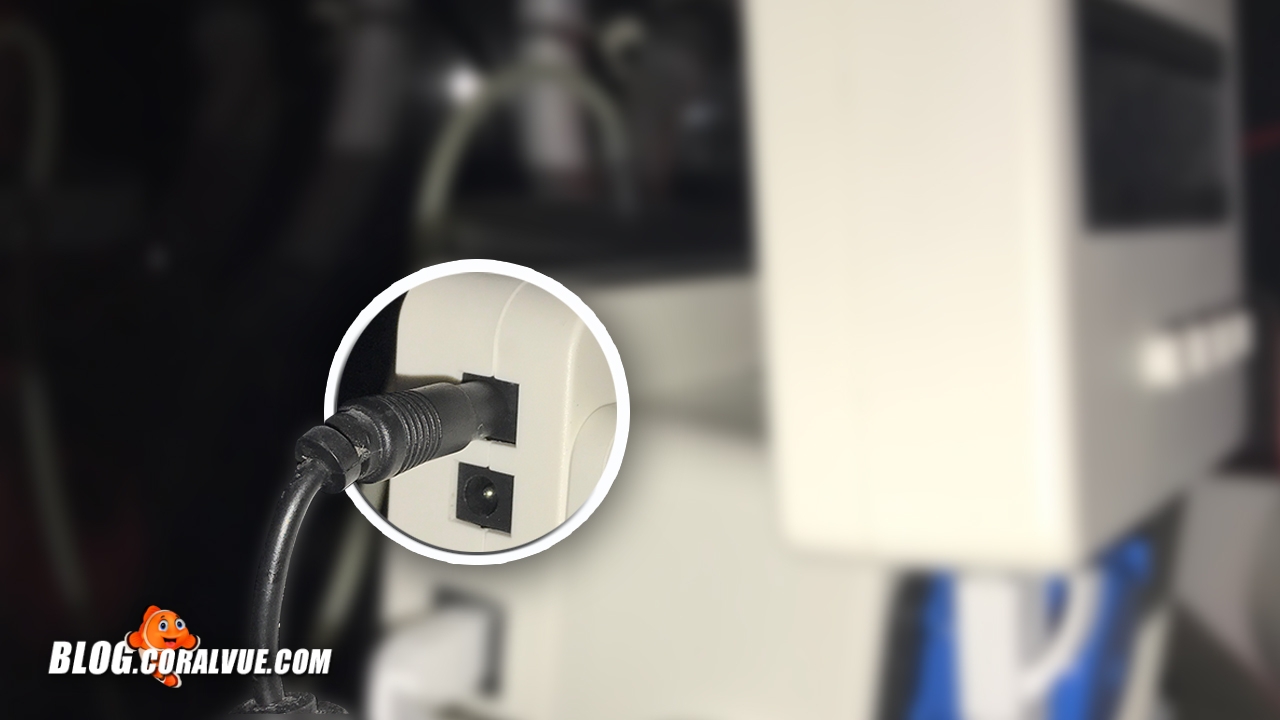
Last, connect the power supply to the side of the KH Guardian and then to your electrical outlet. Be sure to install the power supply using proper drip loops to prevent the unit from getting wet.
Calibrating and Installing the pH Probe
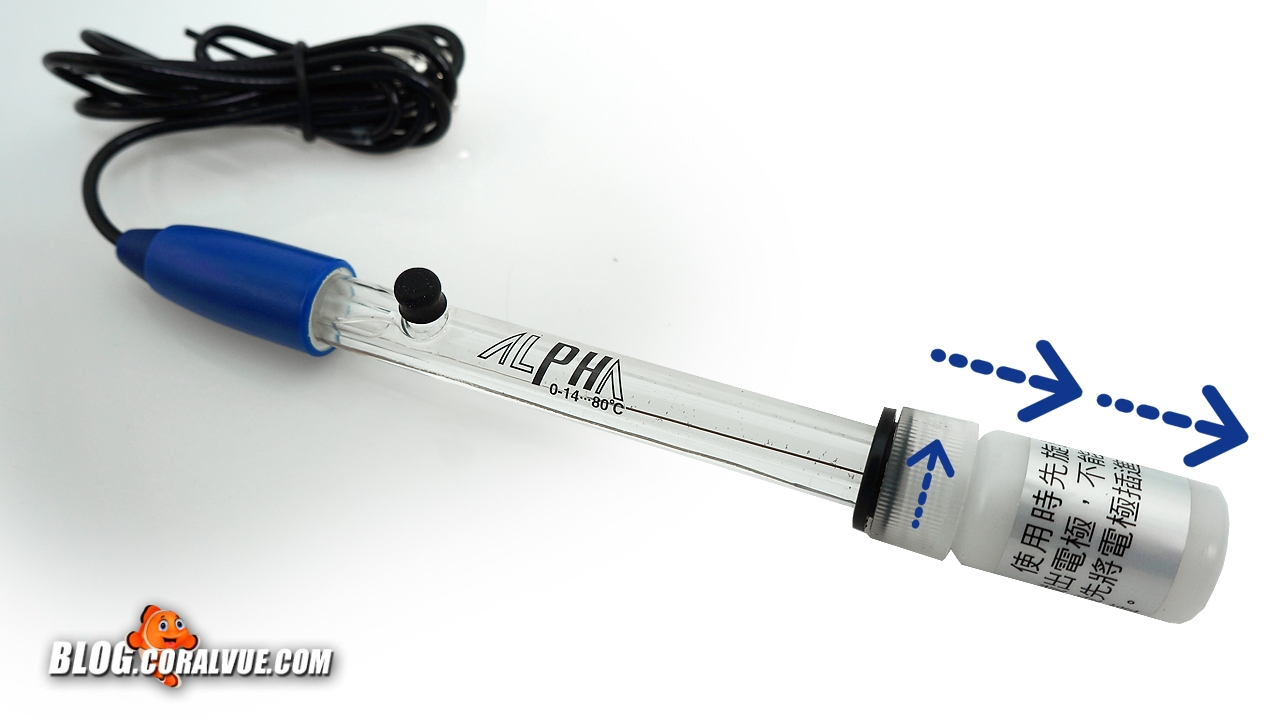
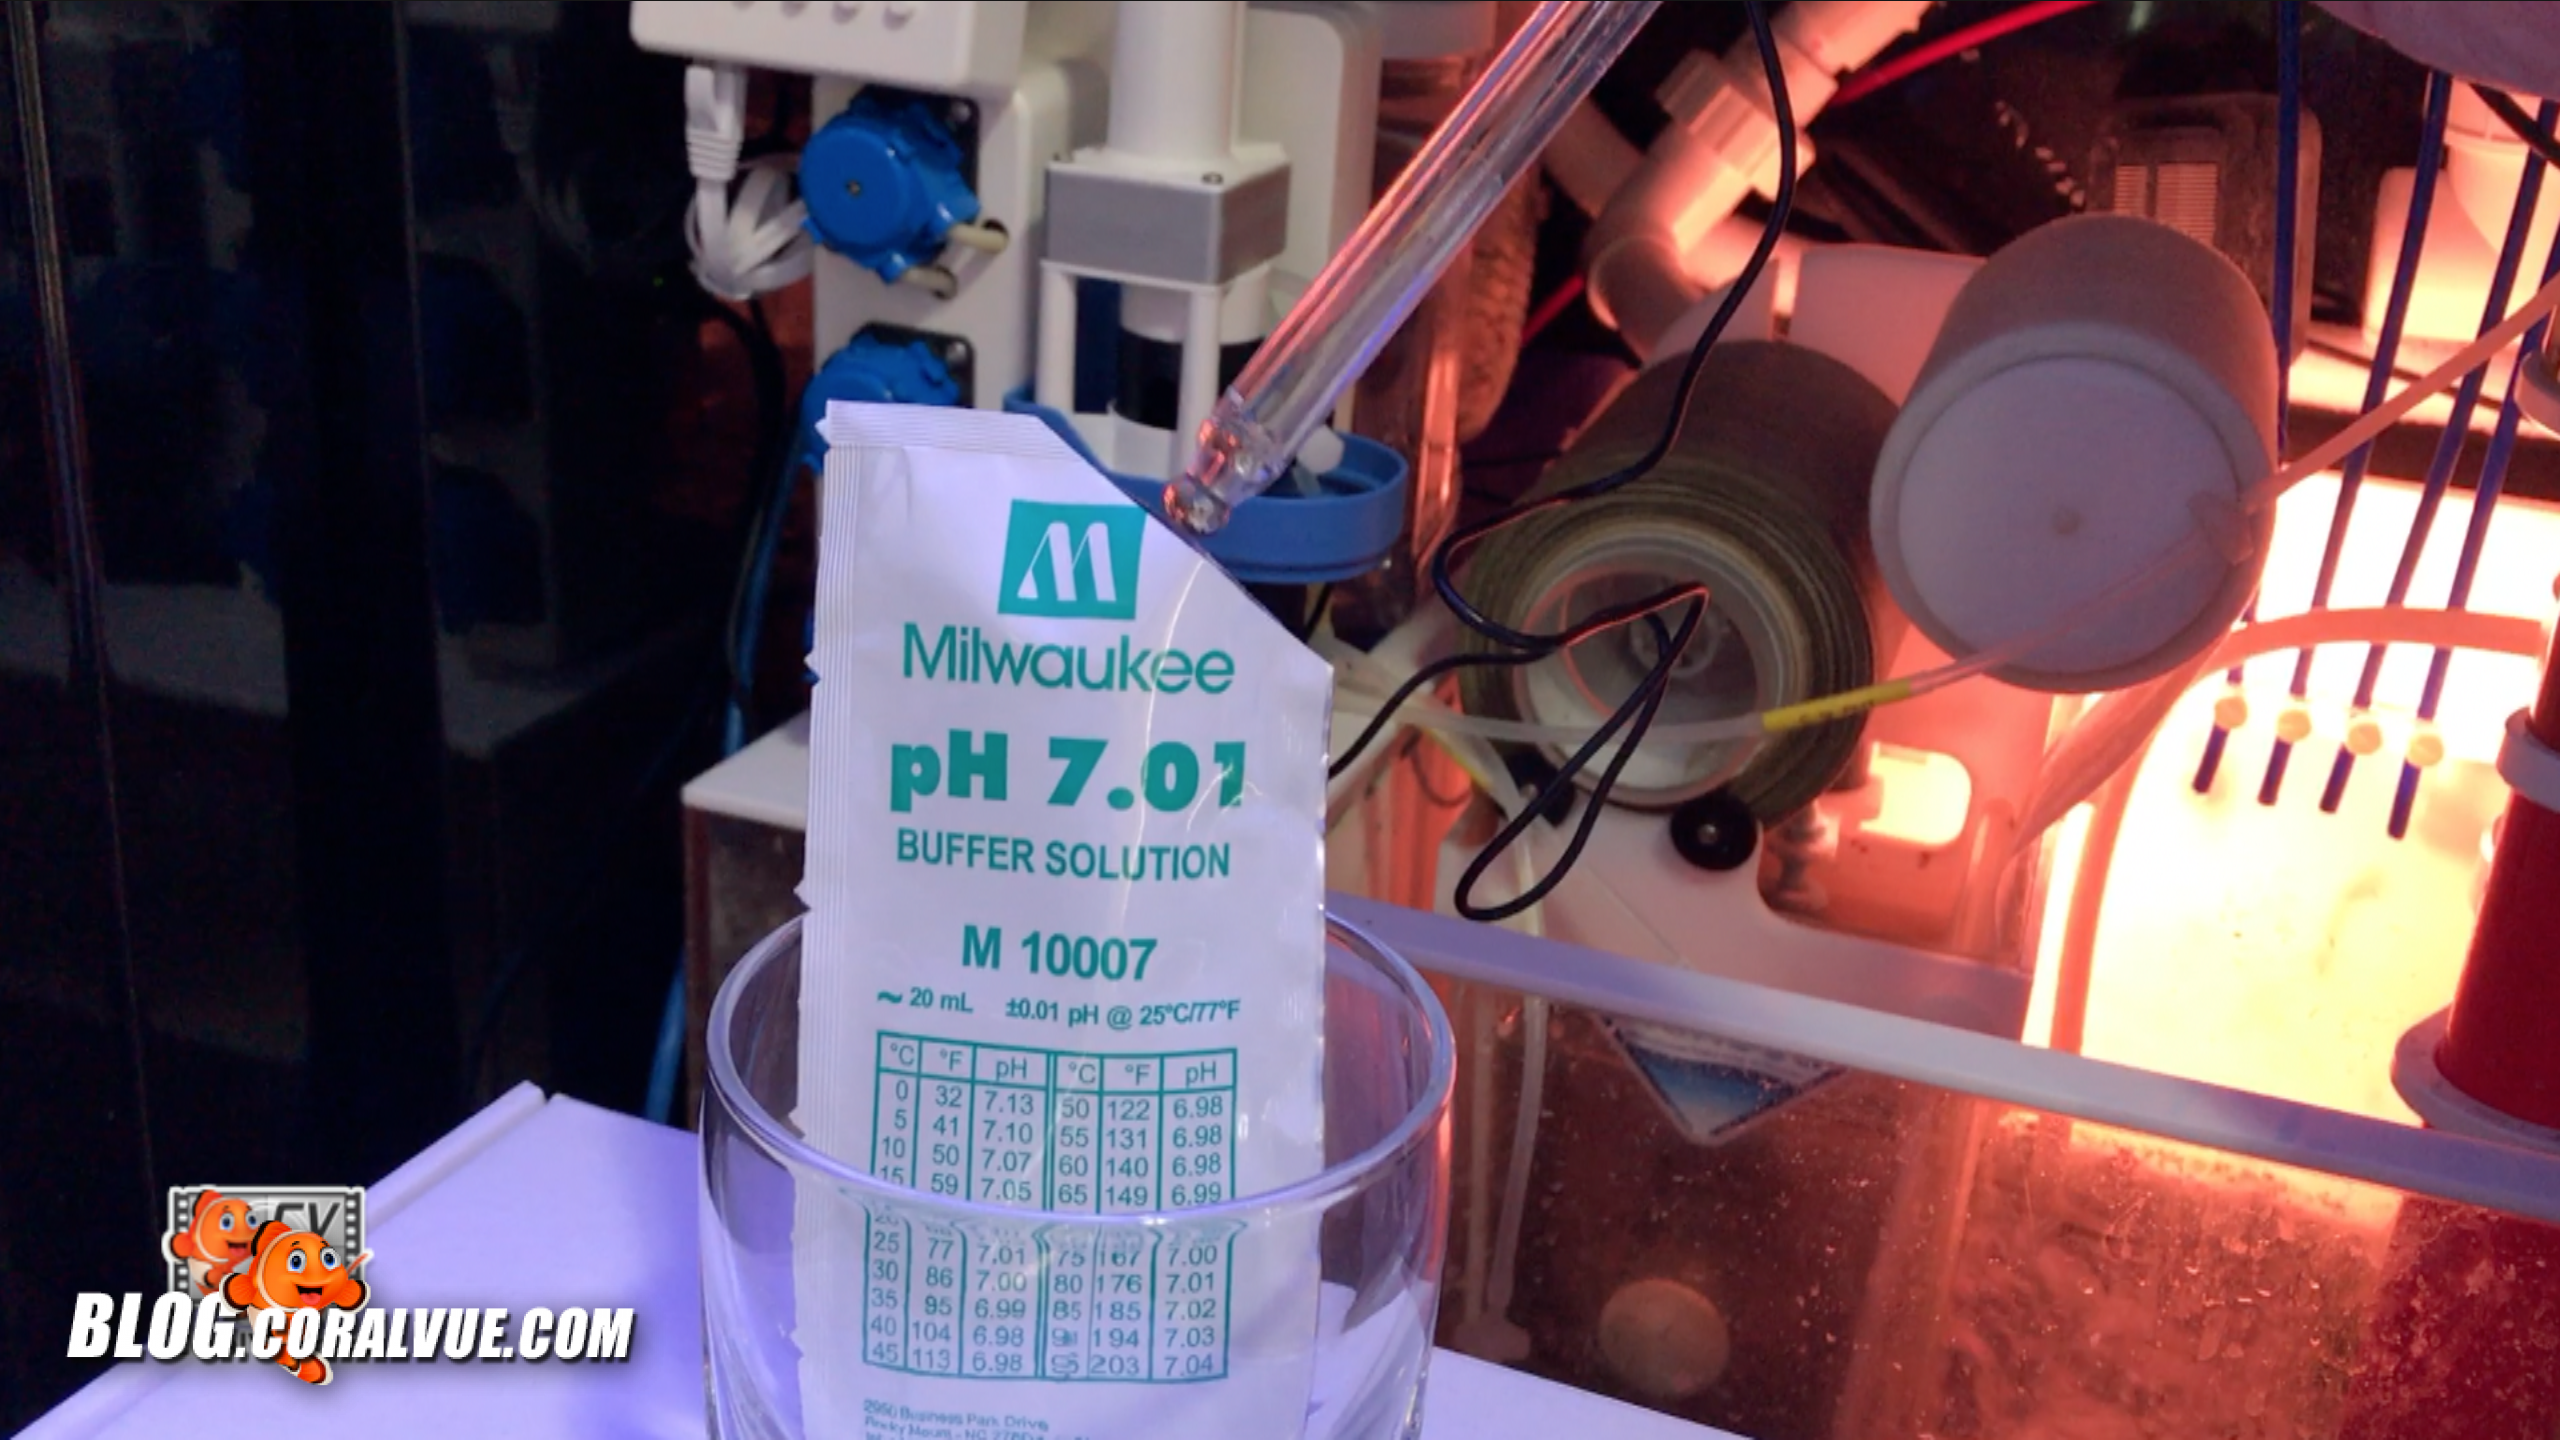
Take the pH probe included with the unit and remove the small storing container attached to it. Once the pH sensor is exposed, rinse it with RO water and then pat dry with a towel. Do not twist dry the probe as it may damage the sensor and render the probe inaccurate.
Place the probe into the pH 7 calibration solution and ensure that the sensor is fully submerged. Press and hold LCD buttons 2 and 4 simultaneously for 3 seconds until you hear a beep. Release the buttons to complete the high calibration step.

Now, before proceeding to low calibration, rinse the probe with RO water and pat dry with towel. As before, do not twist and dry the sensor.
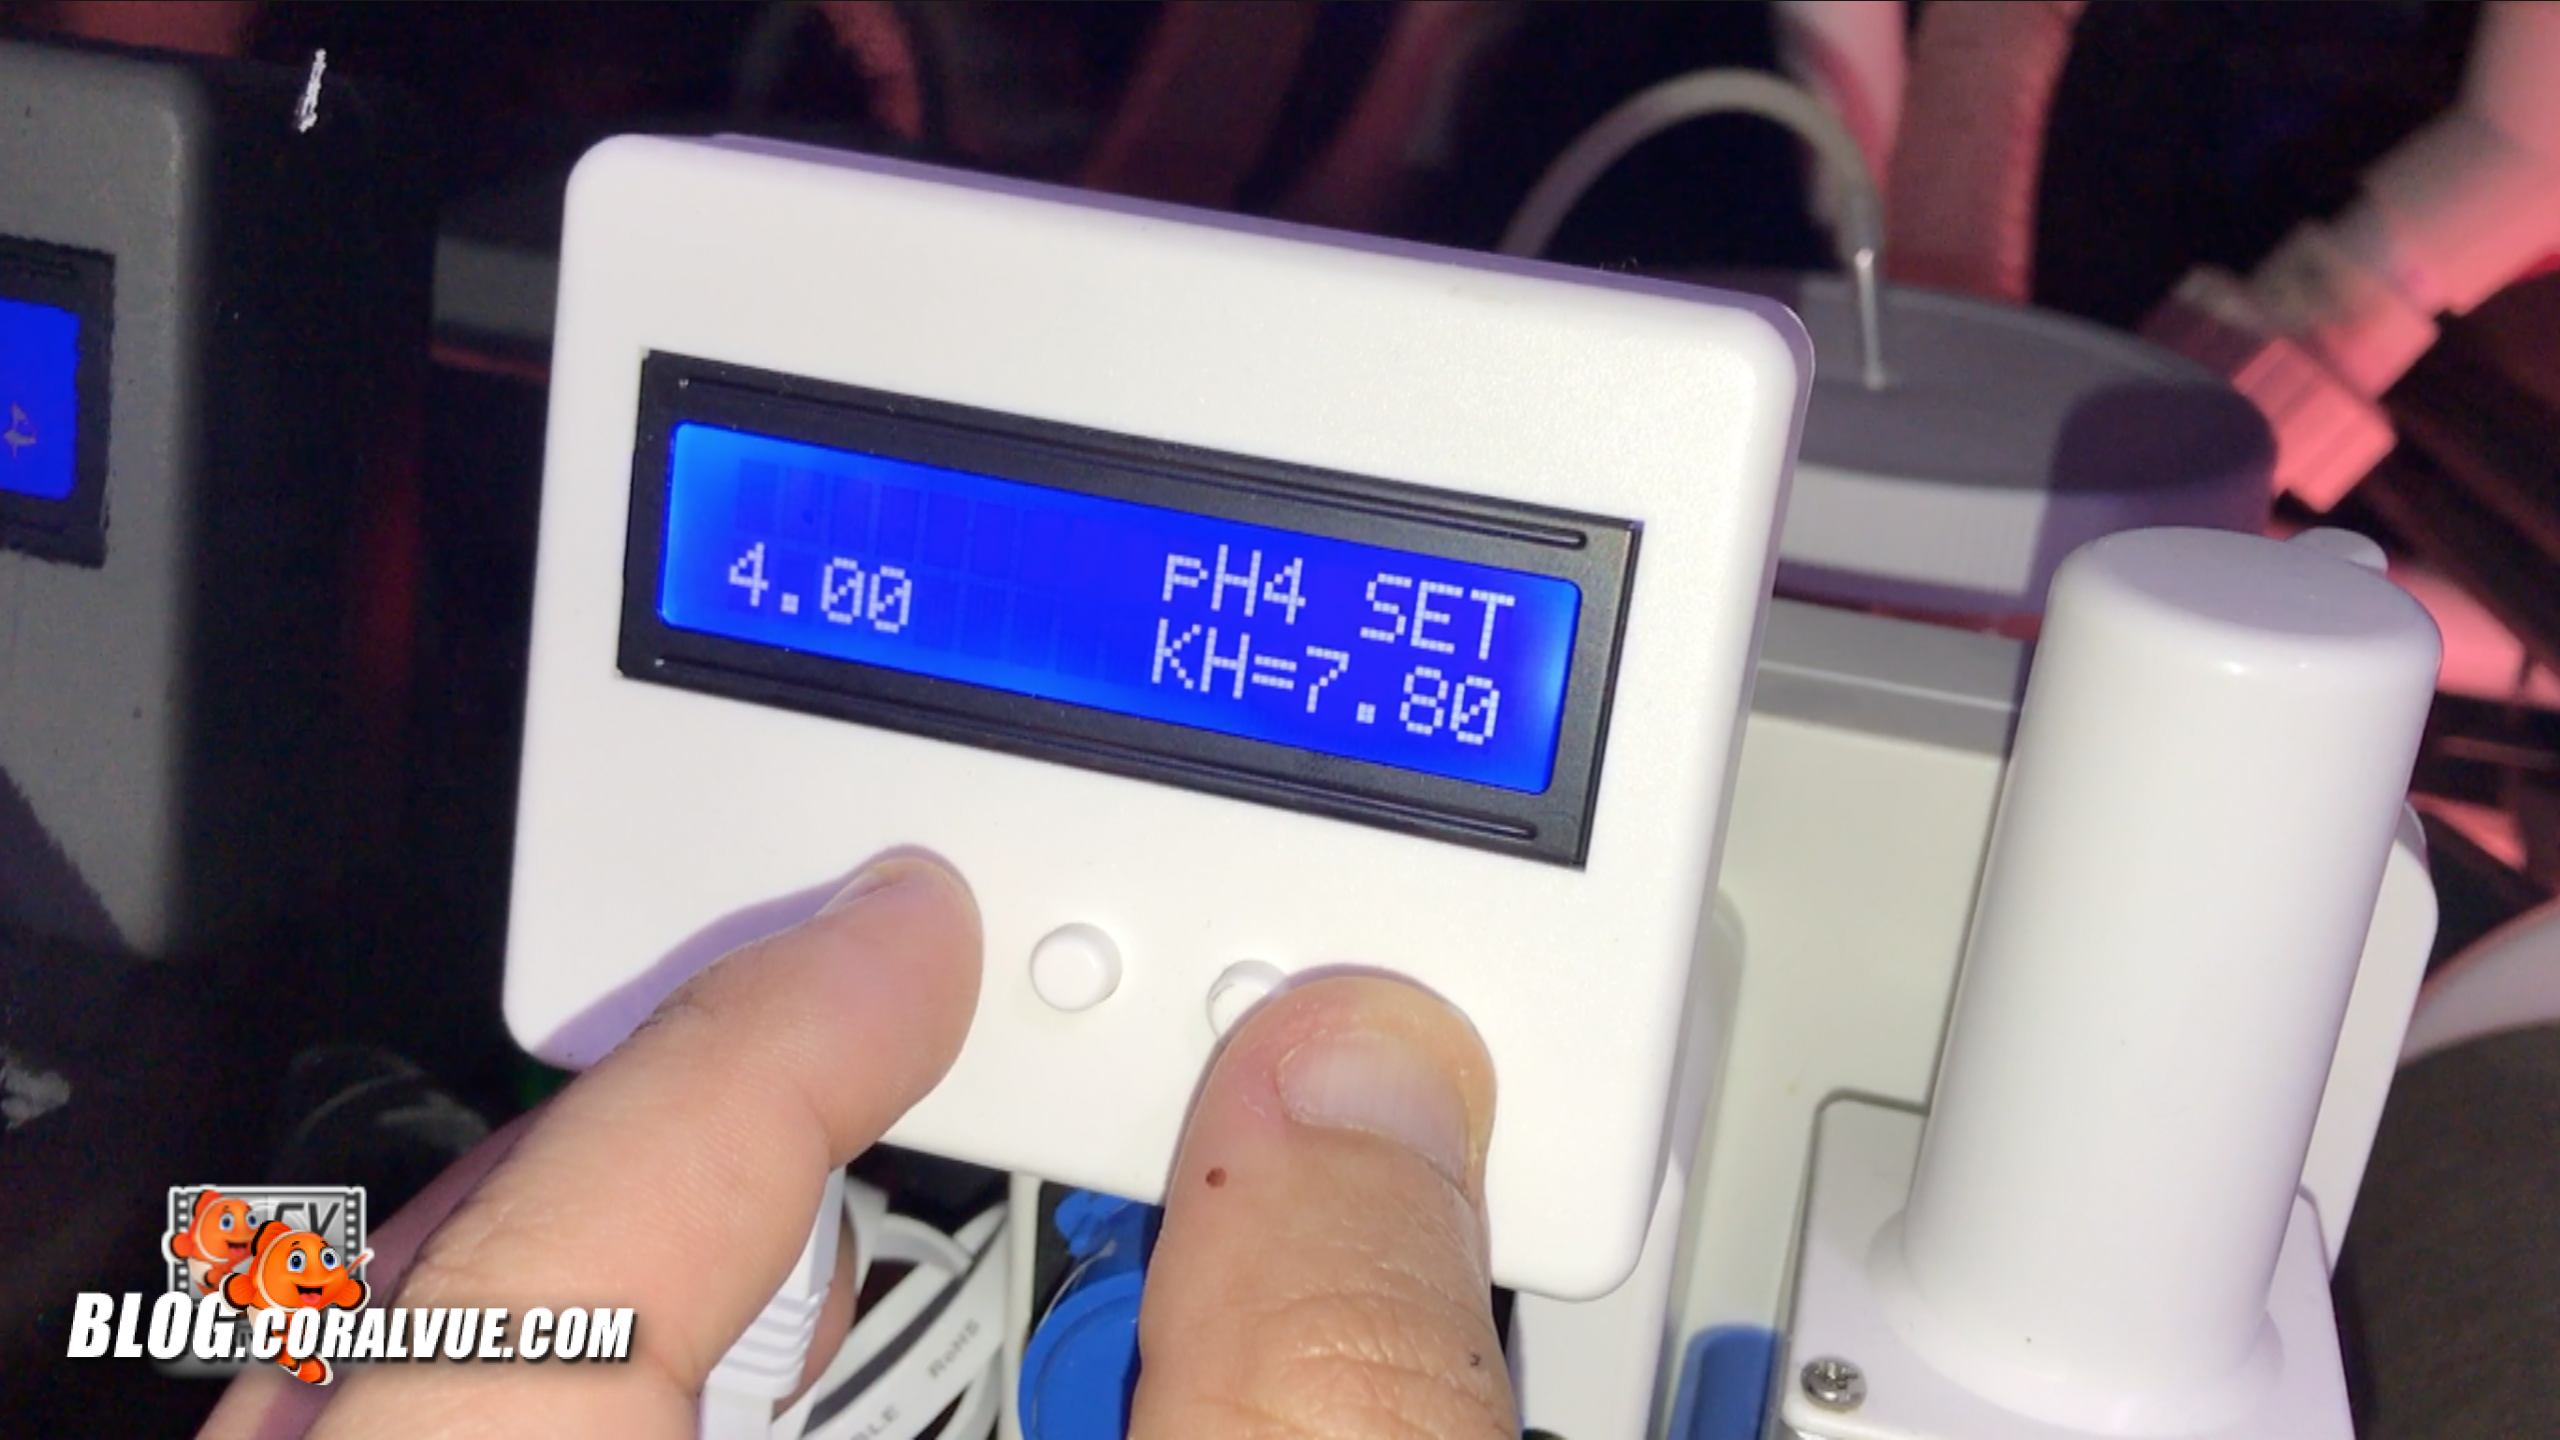
Insert the probe into the pH 4 calibration solution making sure that the sensor is fully submerged. Press and hold LCD buttons 1 and 4 for 3 seconds. Once you hear a beep, release both buttons and allow for the calibration to complete.
You must perform the 2-point calibration in order to use the KH Guardian. You will not be able to proceed to the next step until calibration is completed.
Now, go ahead and insert the pH probe into the KH Guardian’s probe holder. Line up the bottom edge of the pH probe rubber handle to half way up the titanium block on the KH Guardian unit. Tighten the thumb screw to hold the probe in place. DO NOT overtighten the thumb screw as it may break the probe. Complete the process by connecting the probe to the back of the KH Guardian.

Connecting to Your KH Guardian Web Interface
After switching on the KHG, the display panel will show the IP and port number automatically assigned by the network DHCP – Do not worry if you miss this initially – it will display in a cycle after fully booted.
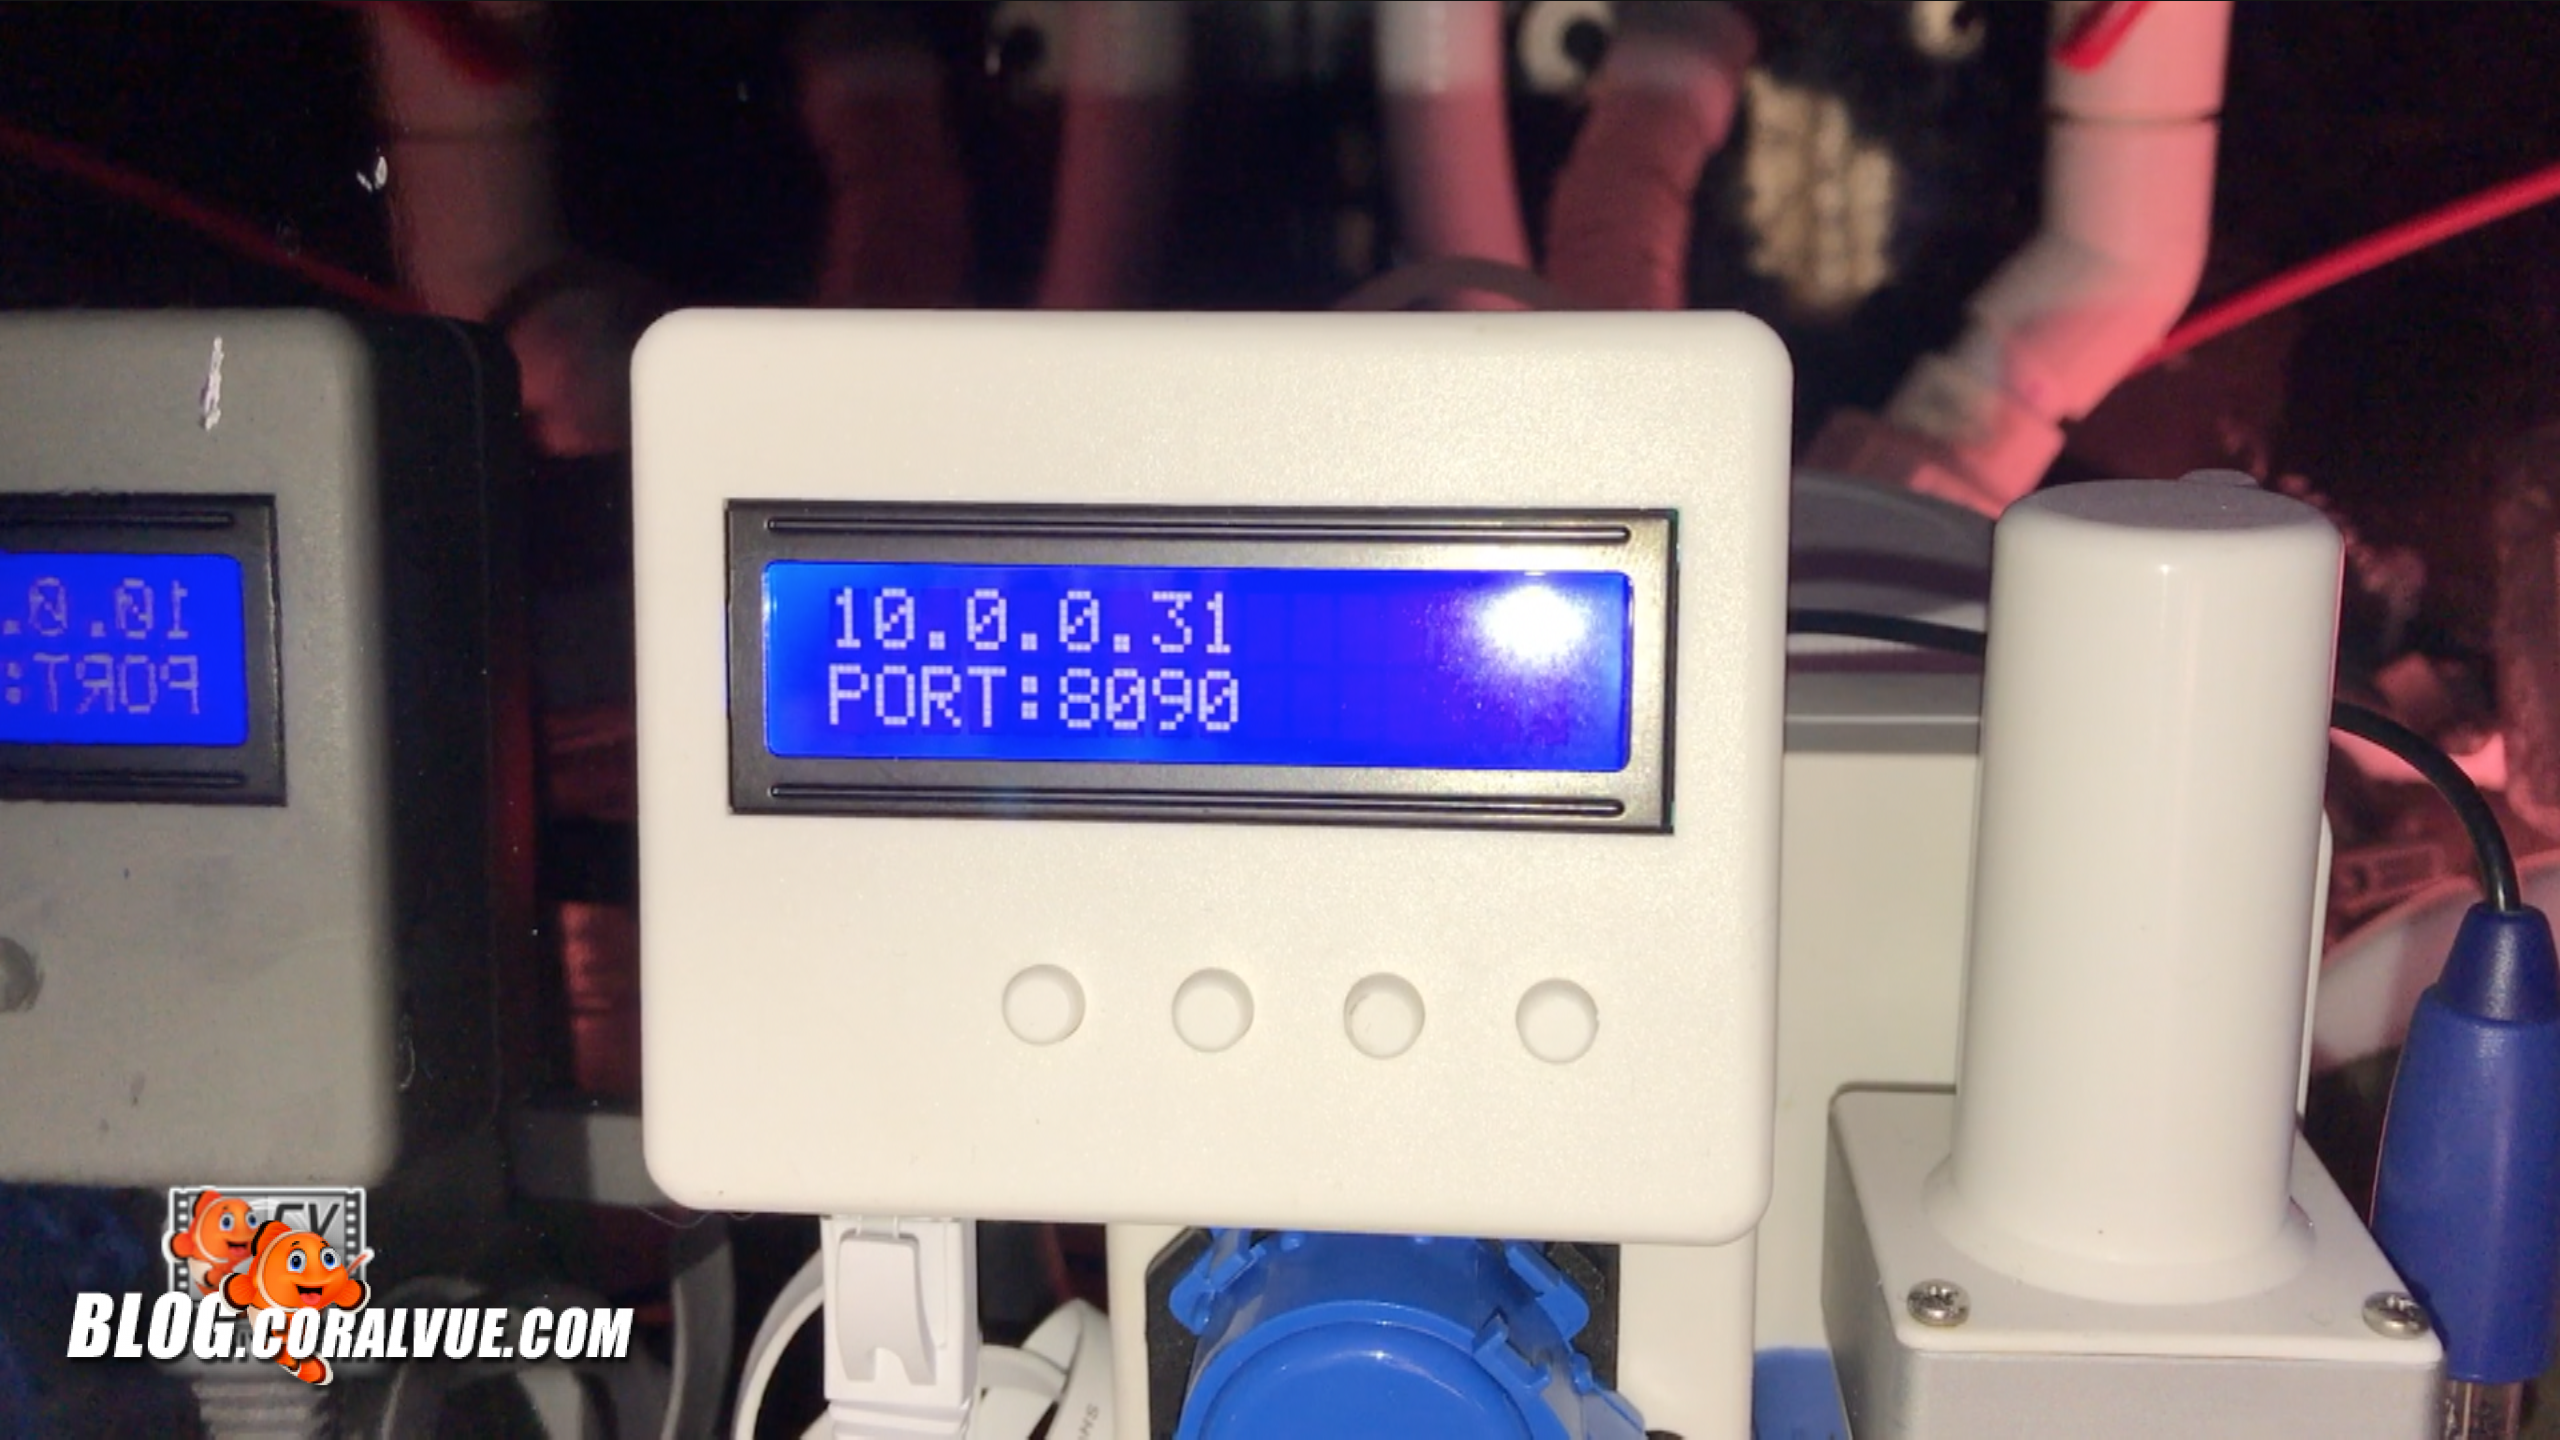
Please write down the IP and port number shown on the display and enter it on your computer or mobile device browser page.
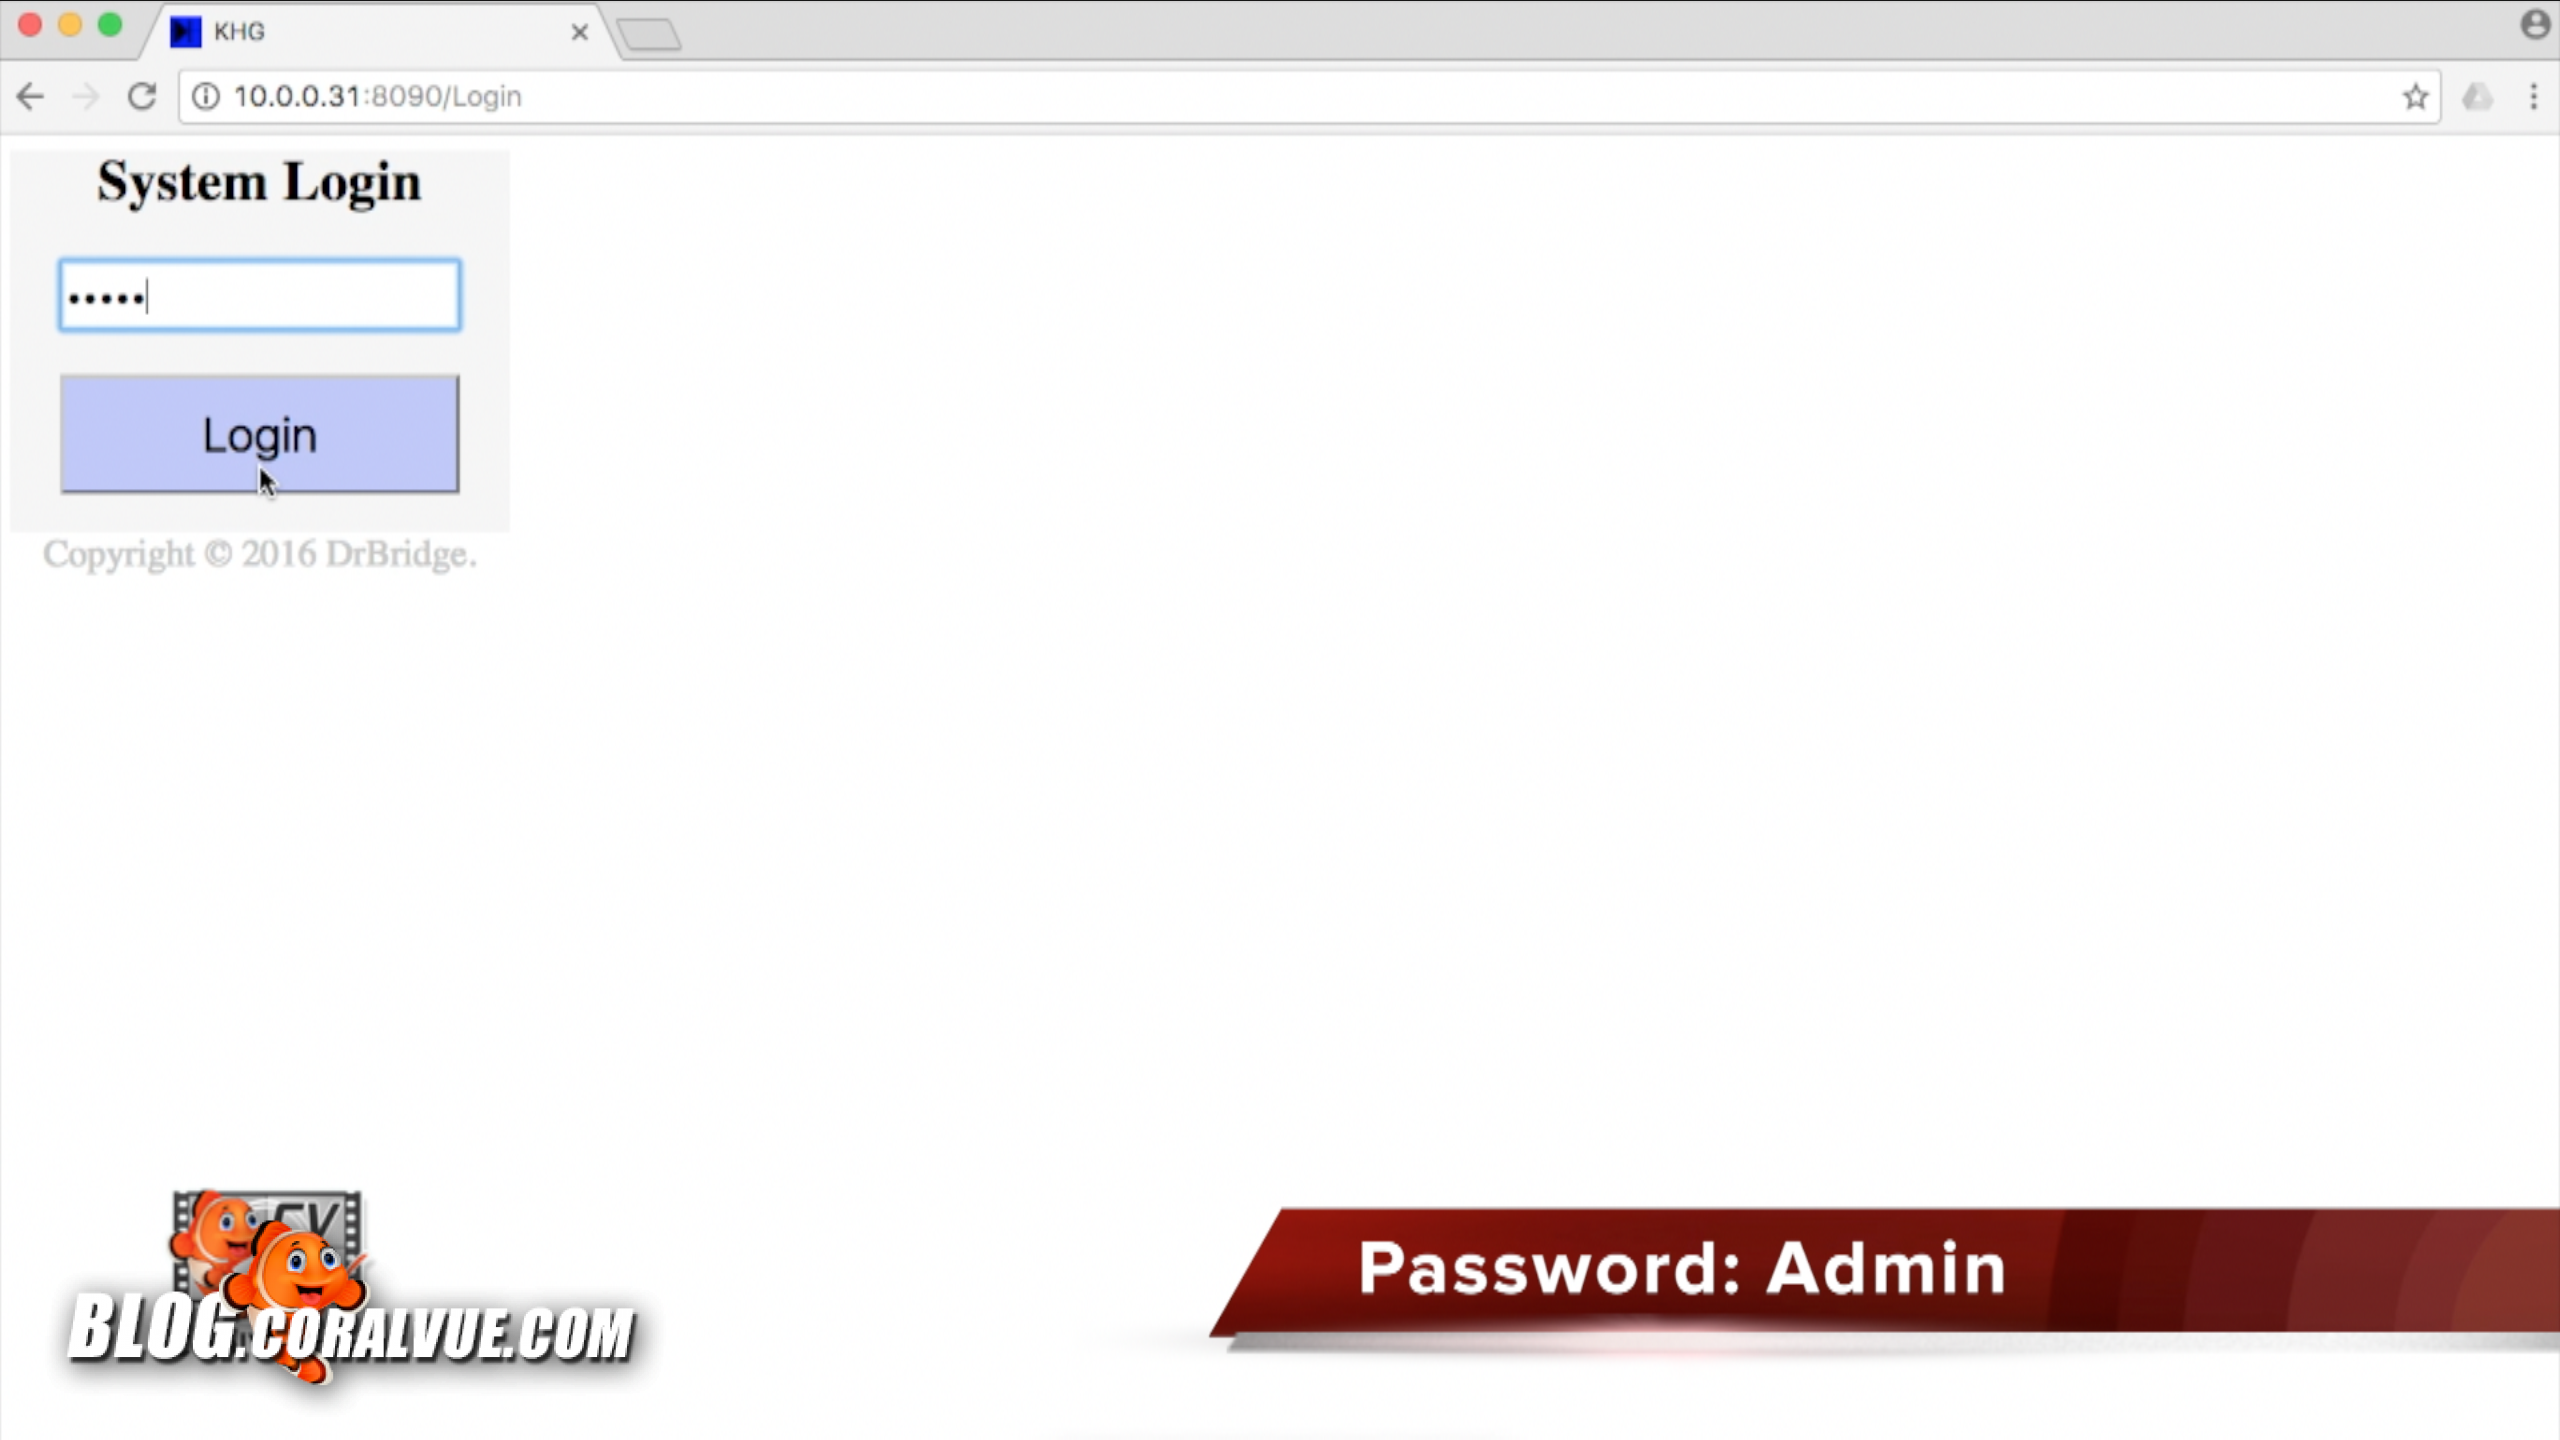
If the connection to the KH Guardian is successful, you will see a simple login page appear. Go ahead and type the password “Admin” with upper case A to login.
In this video we are going to cover basic configuration to get your unit working as soon as possible. For a more in depth description of each section, please refer to the User Guide which can be downloaded directly from CoralVue.com.
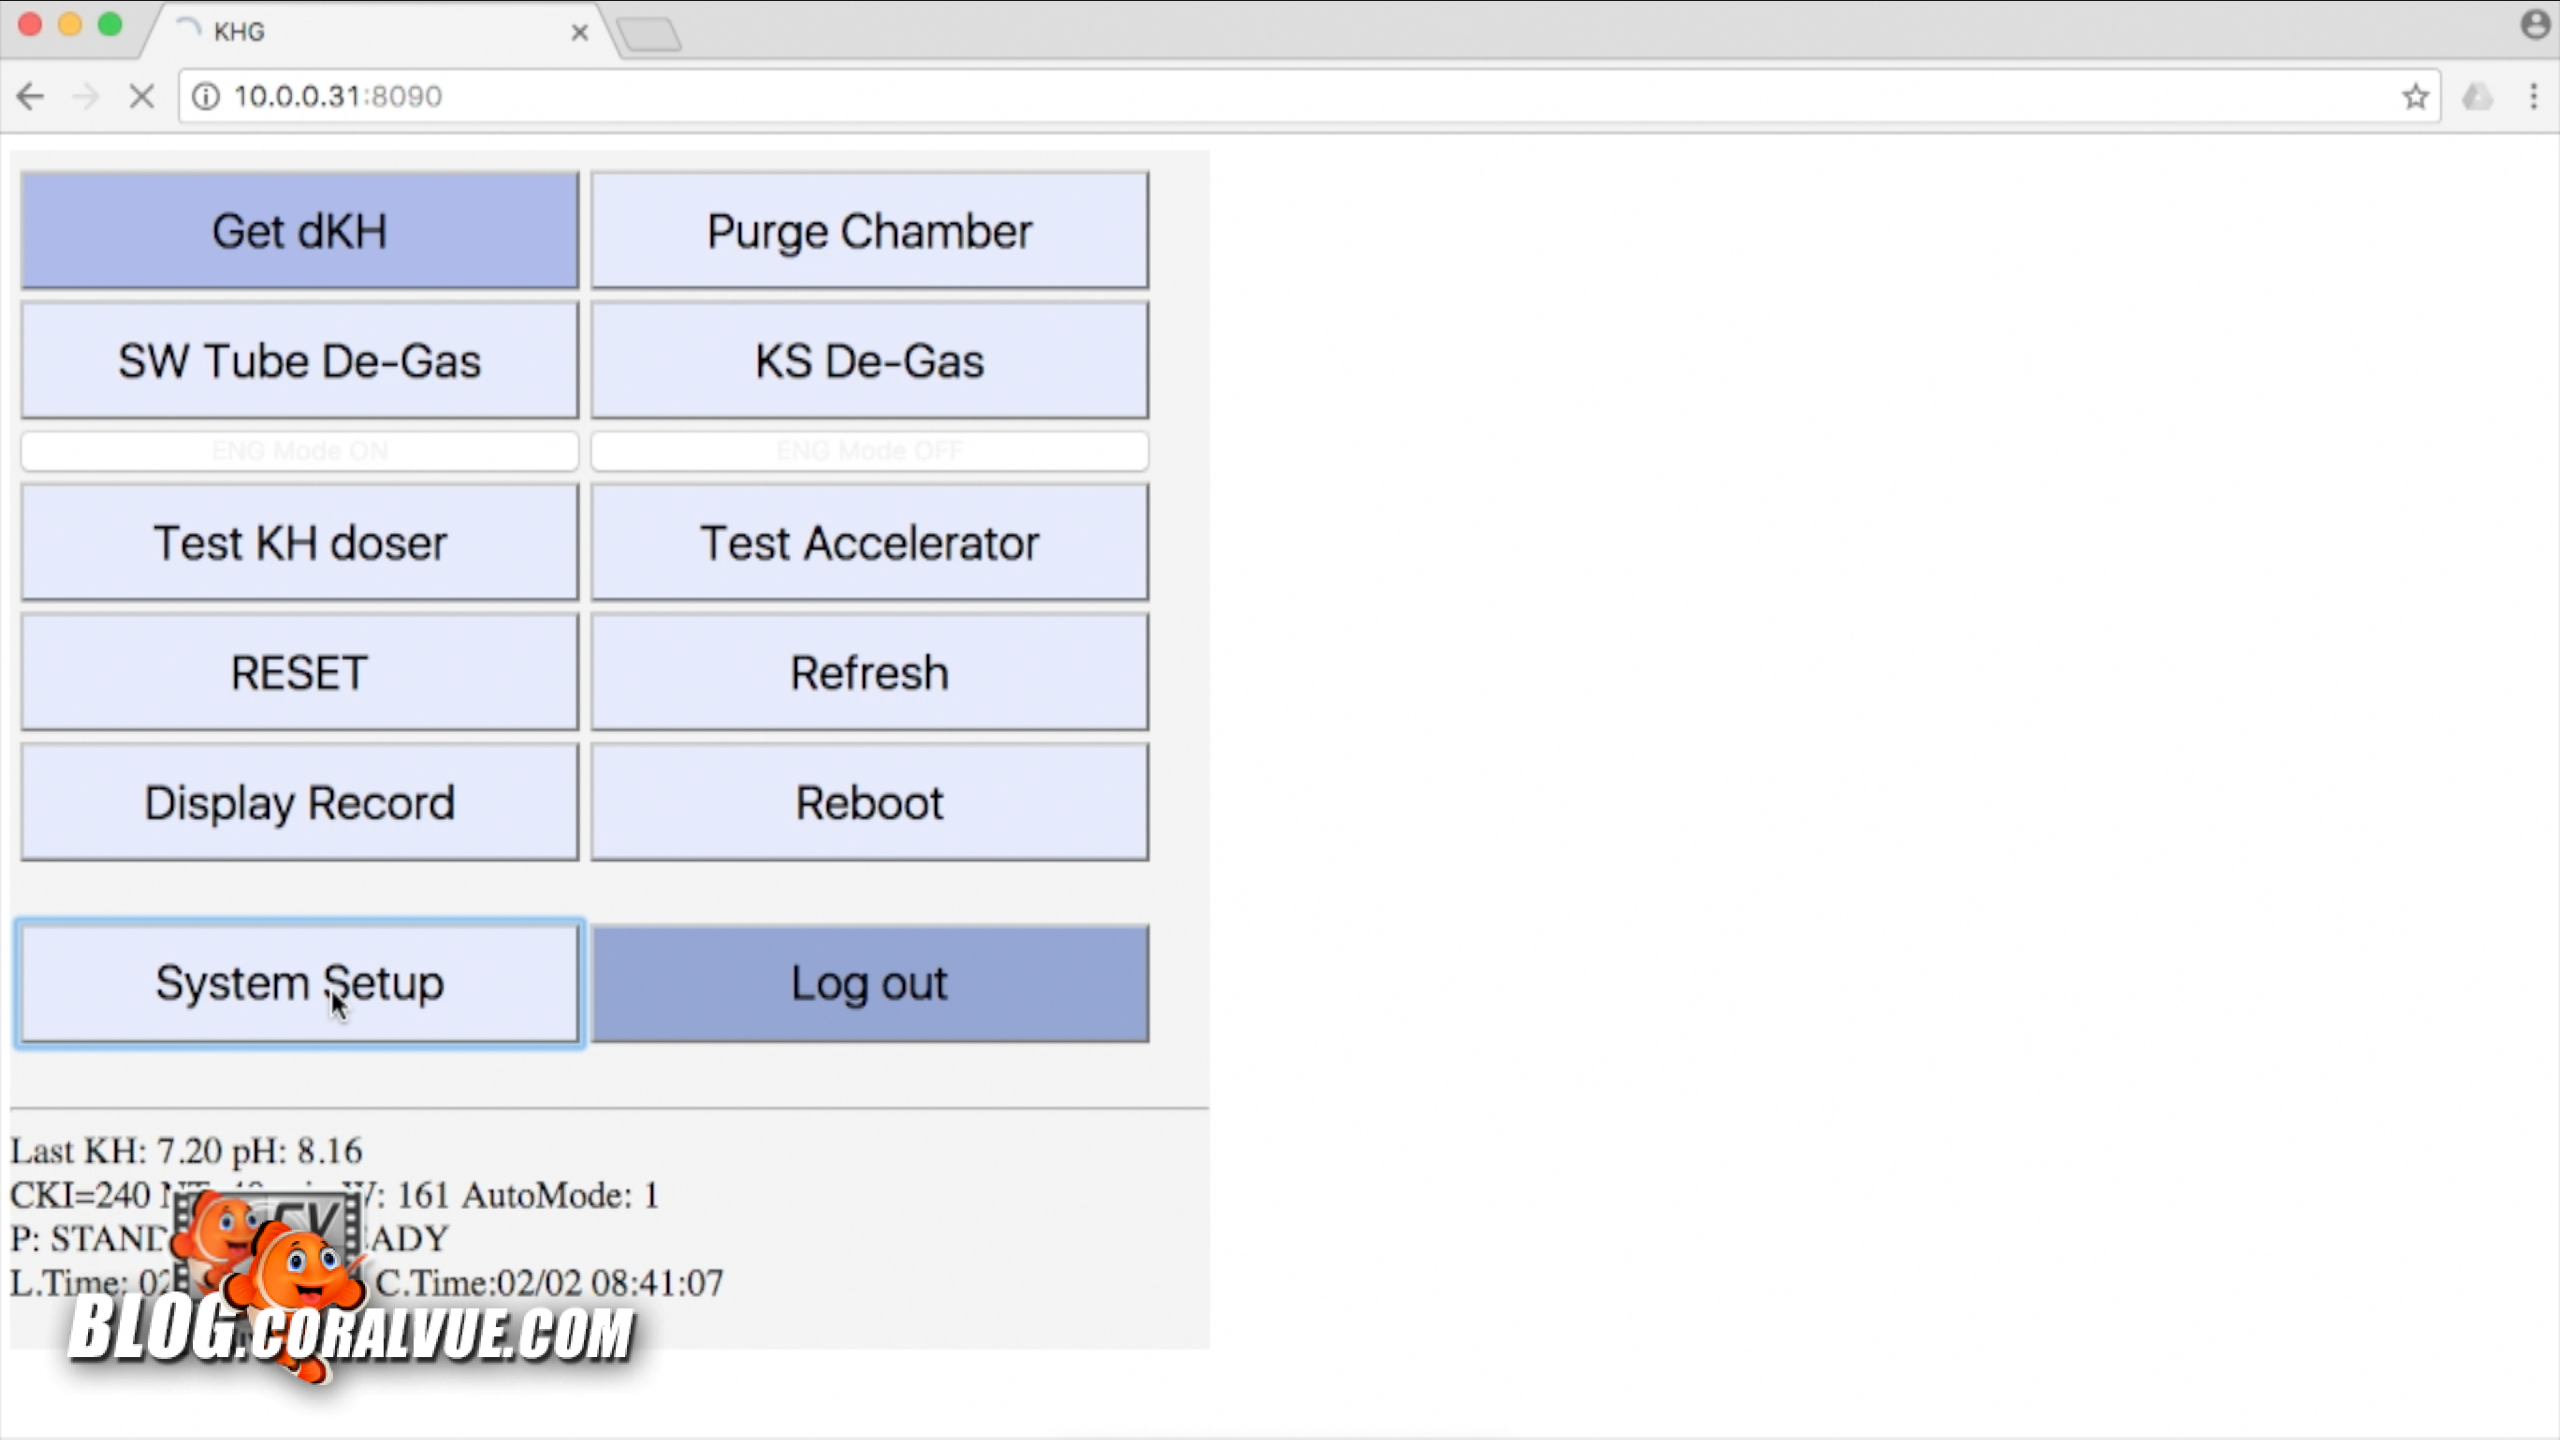
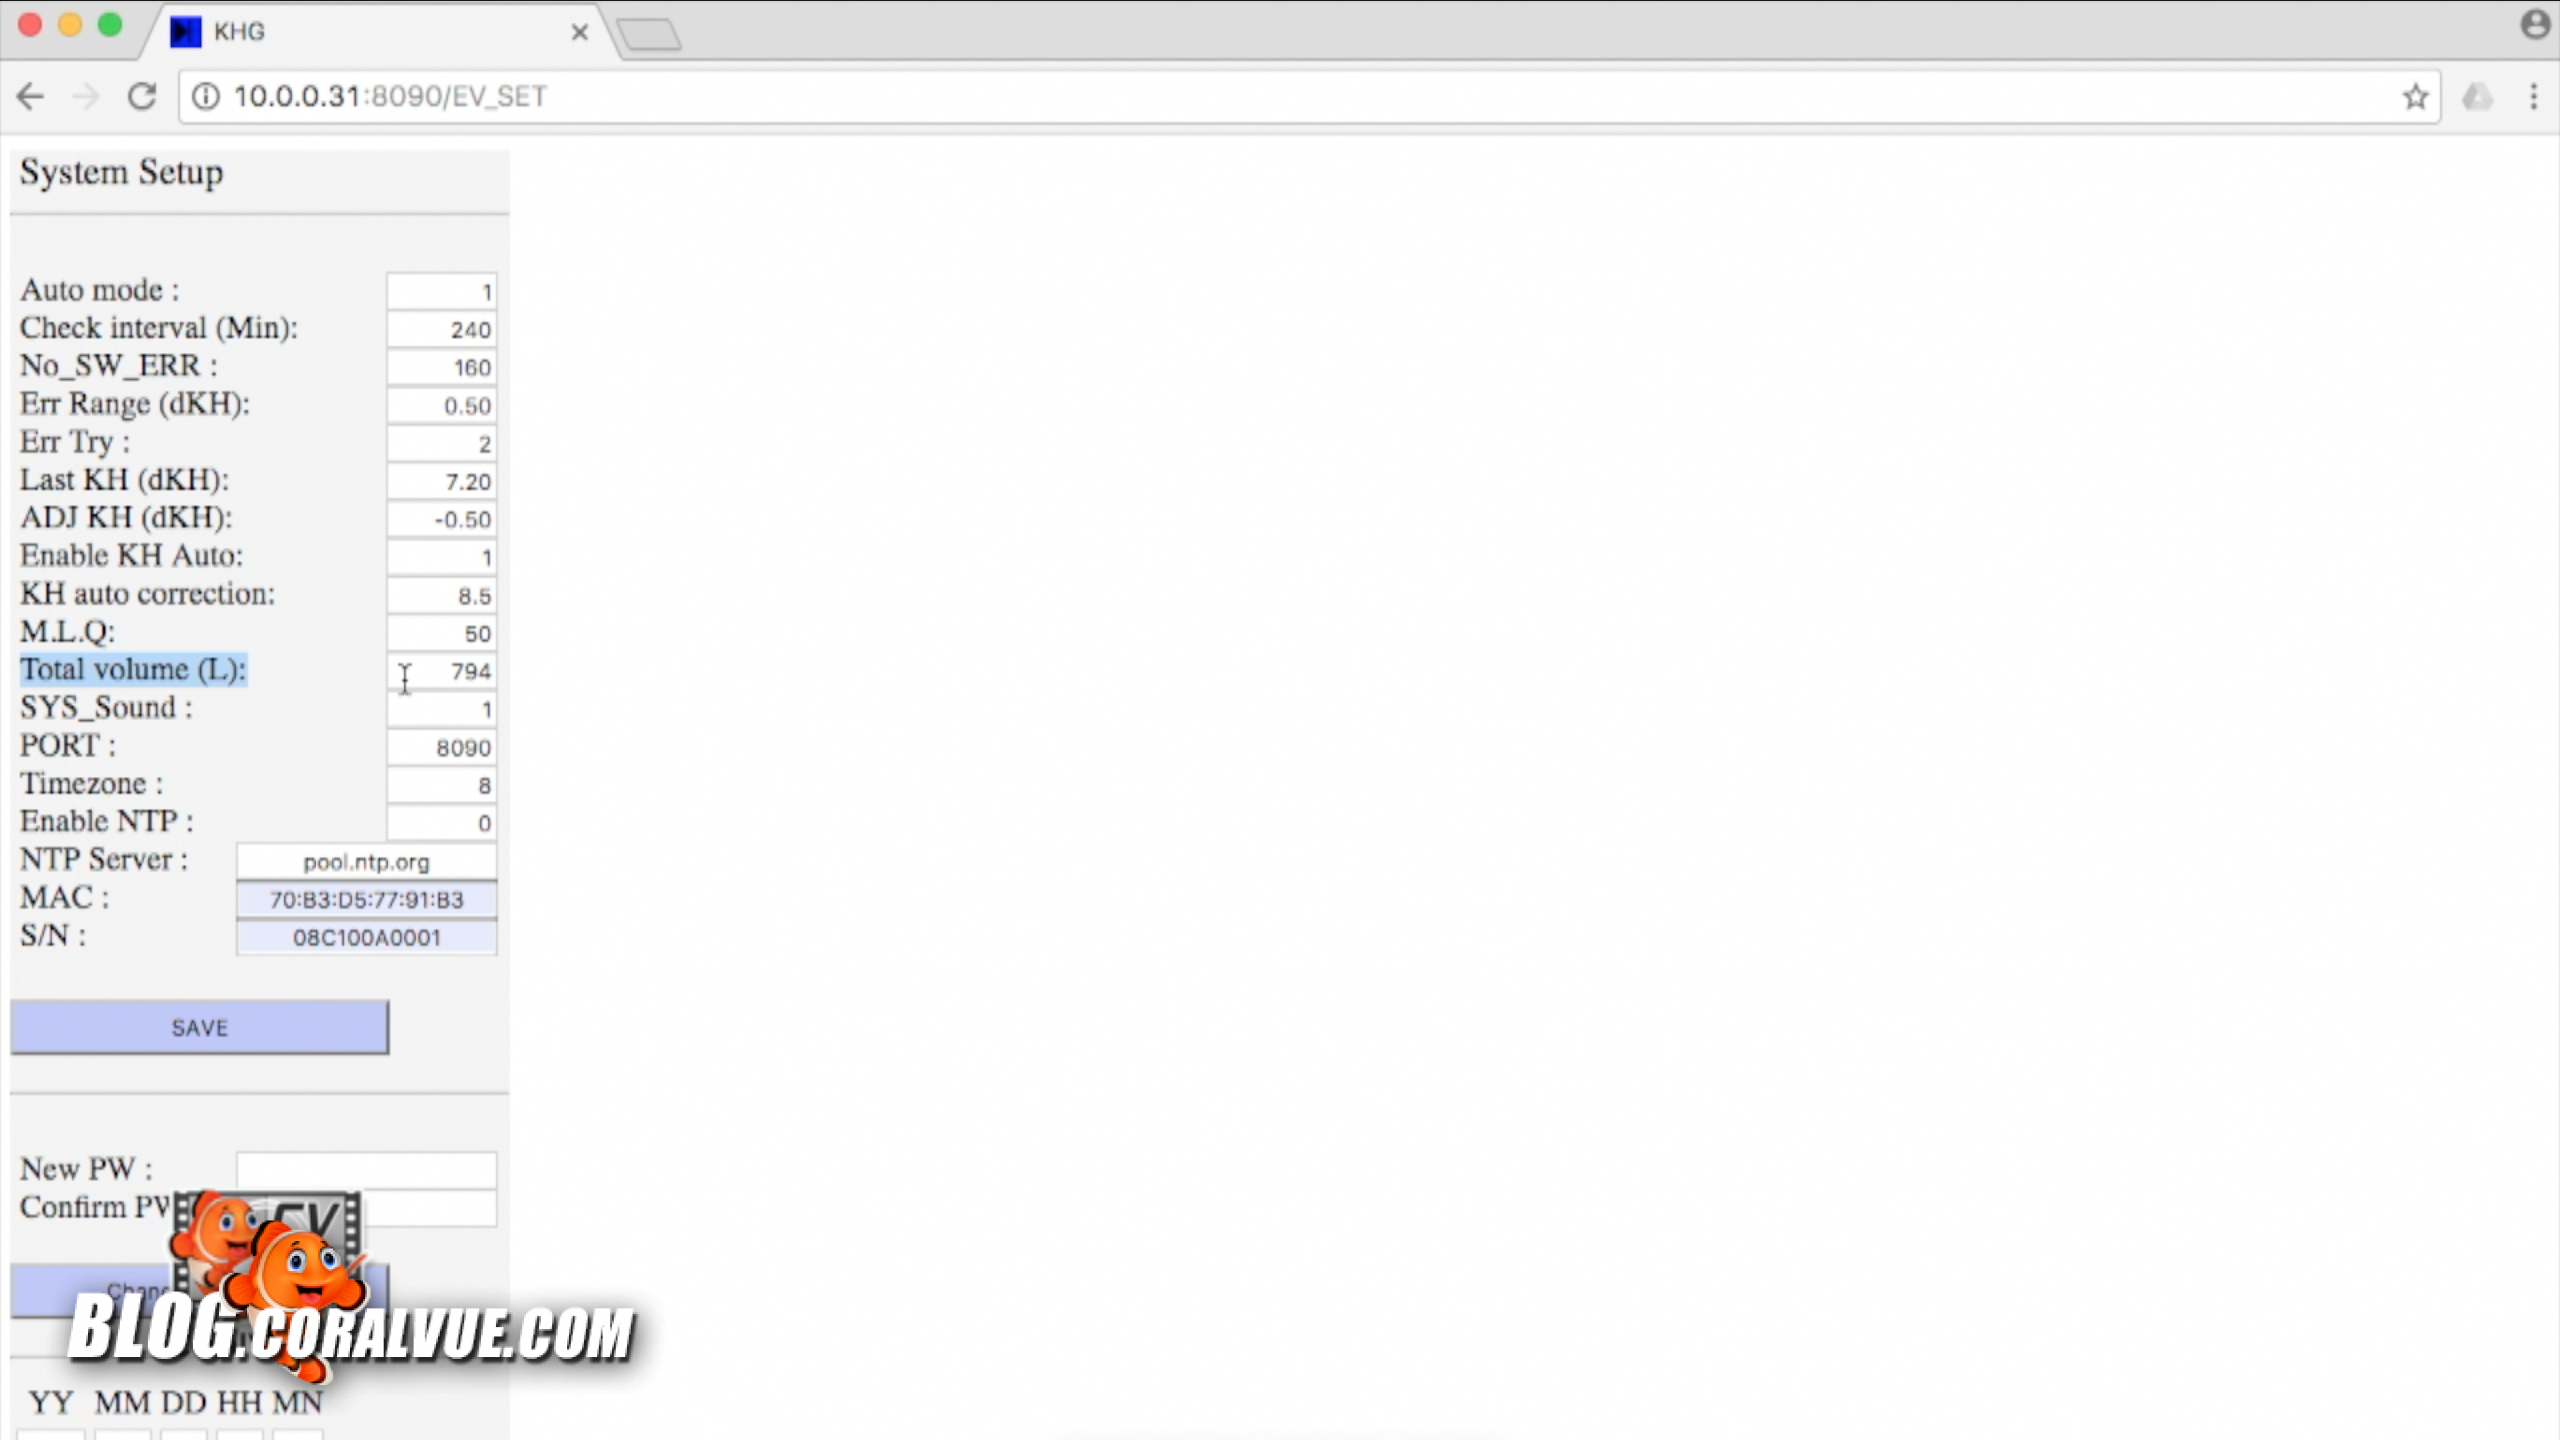
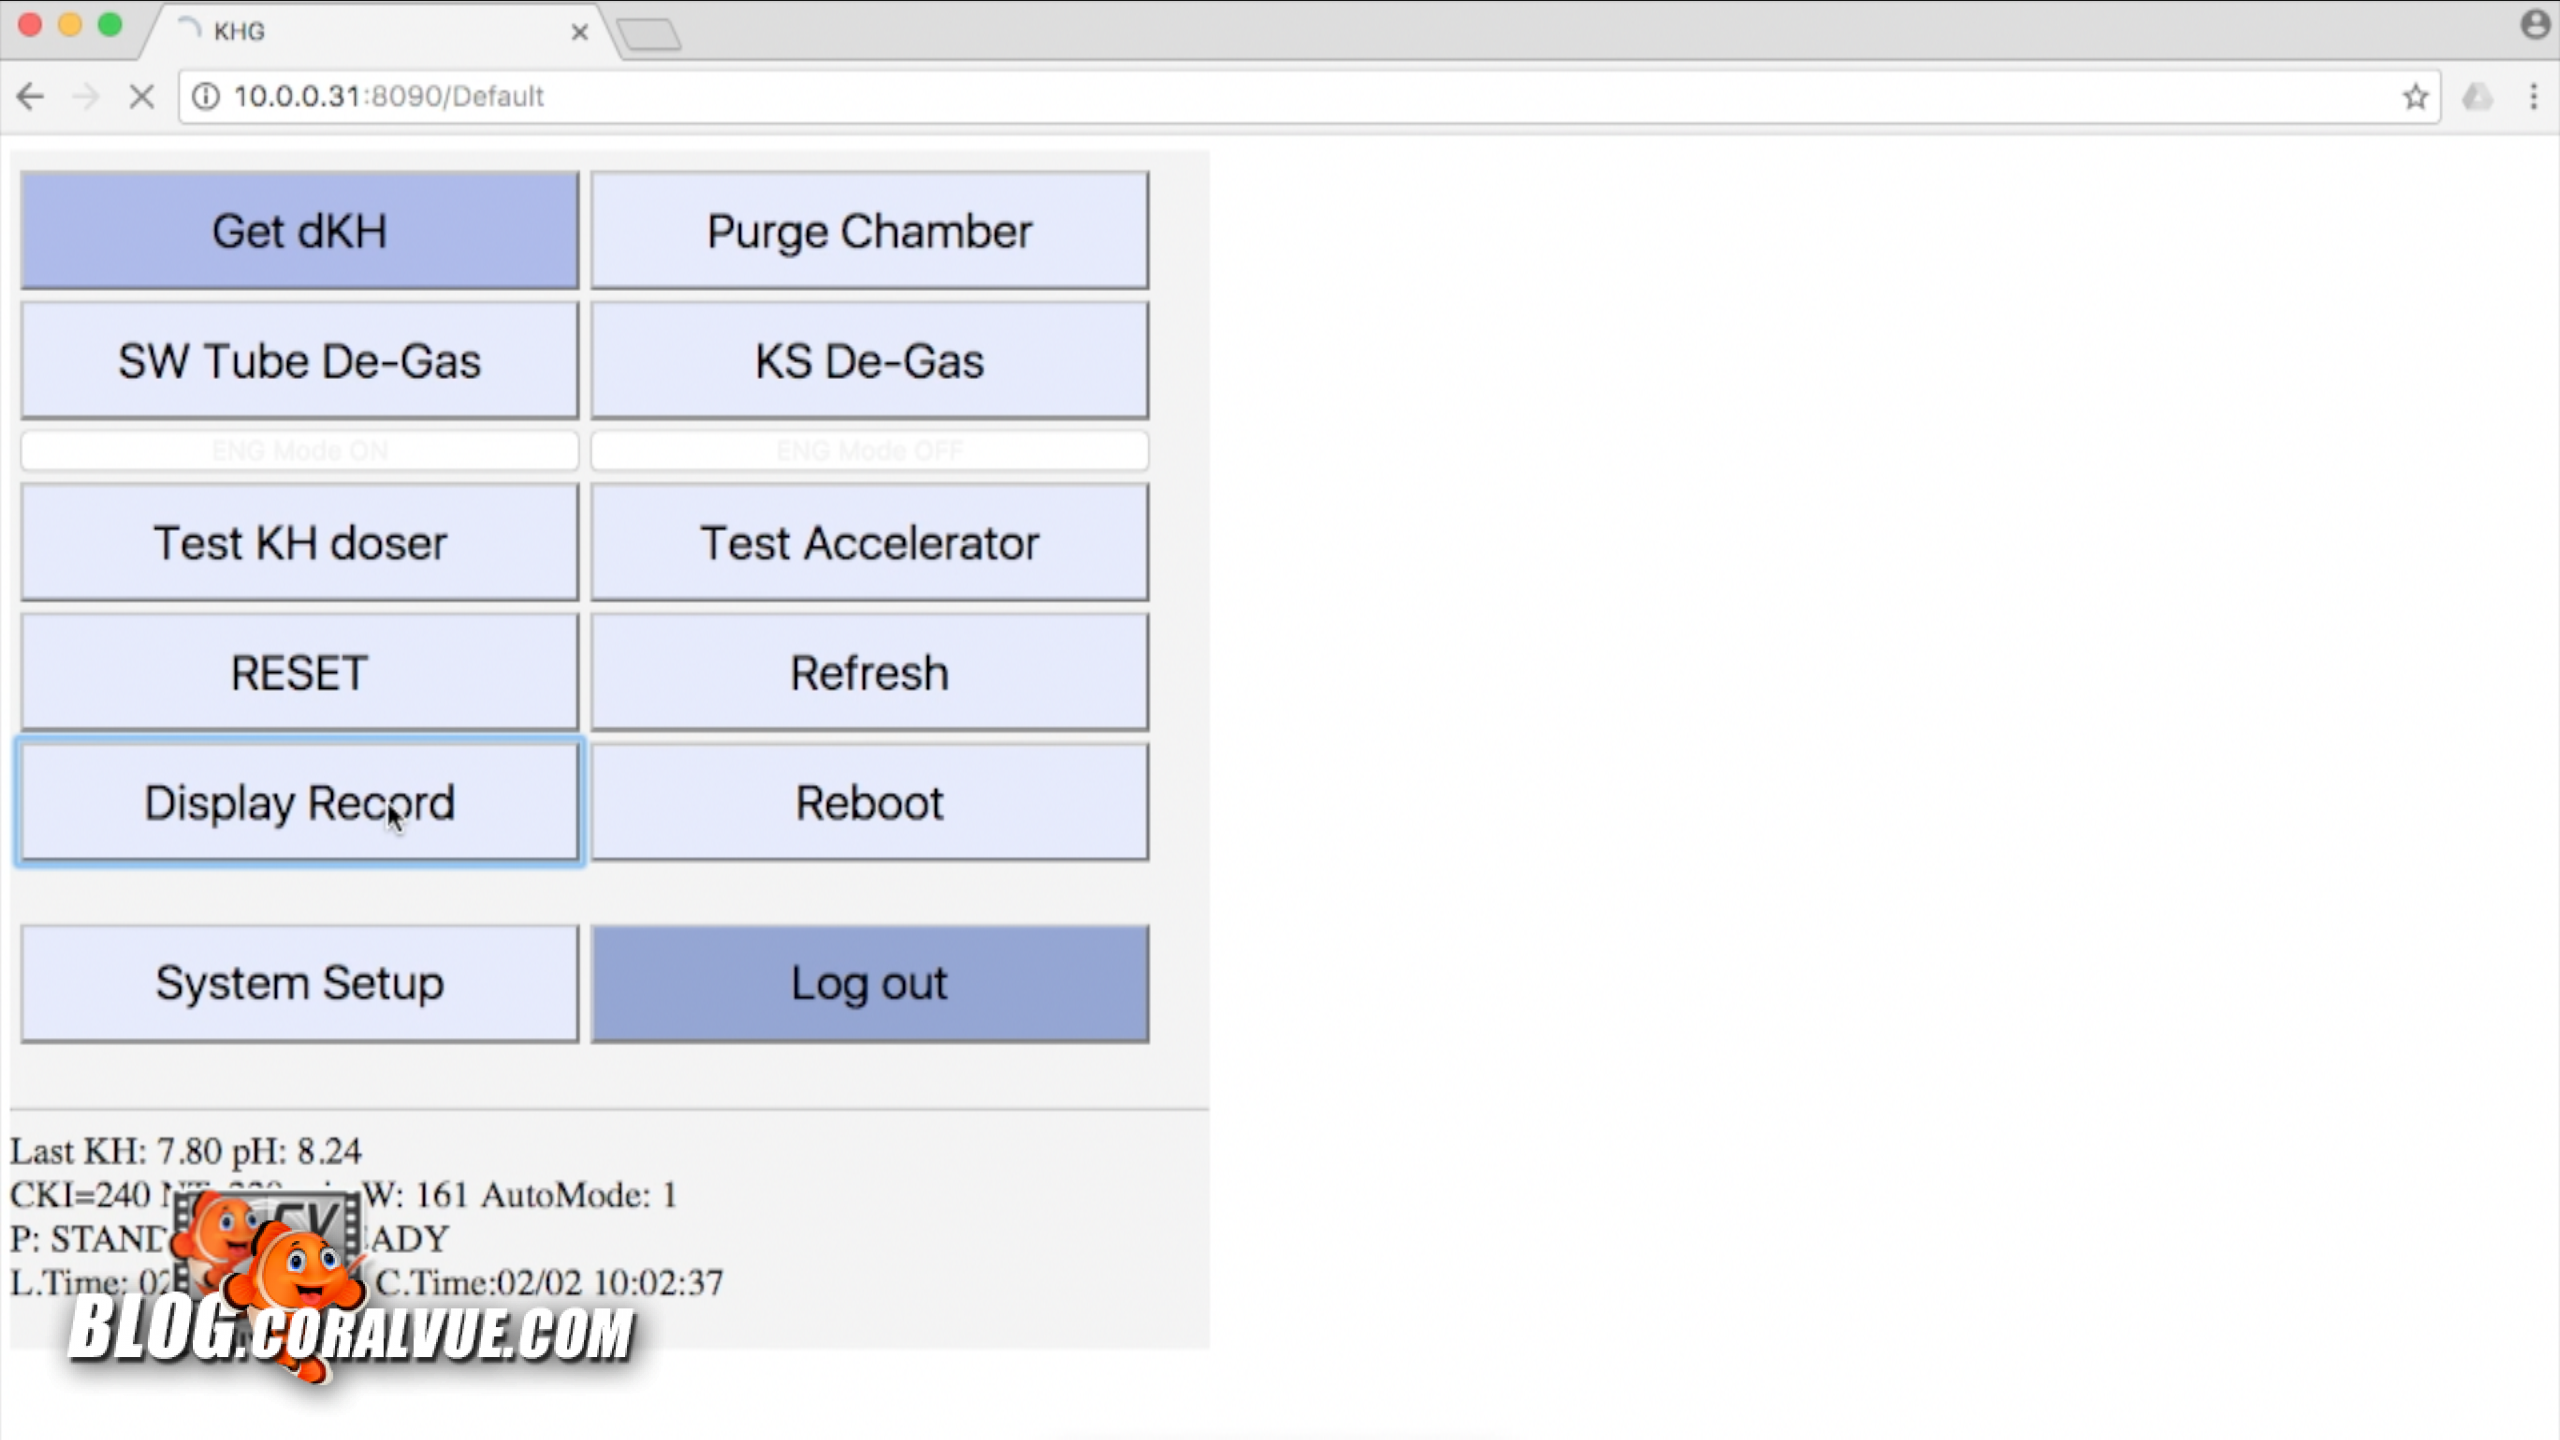
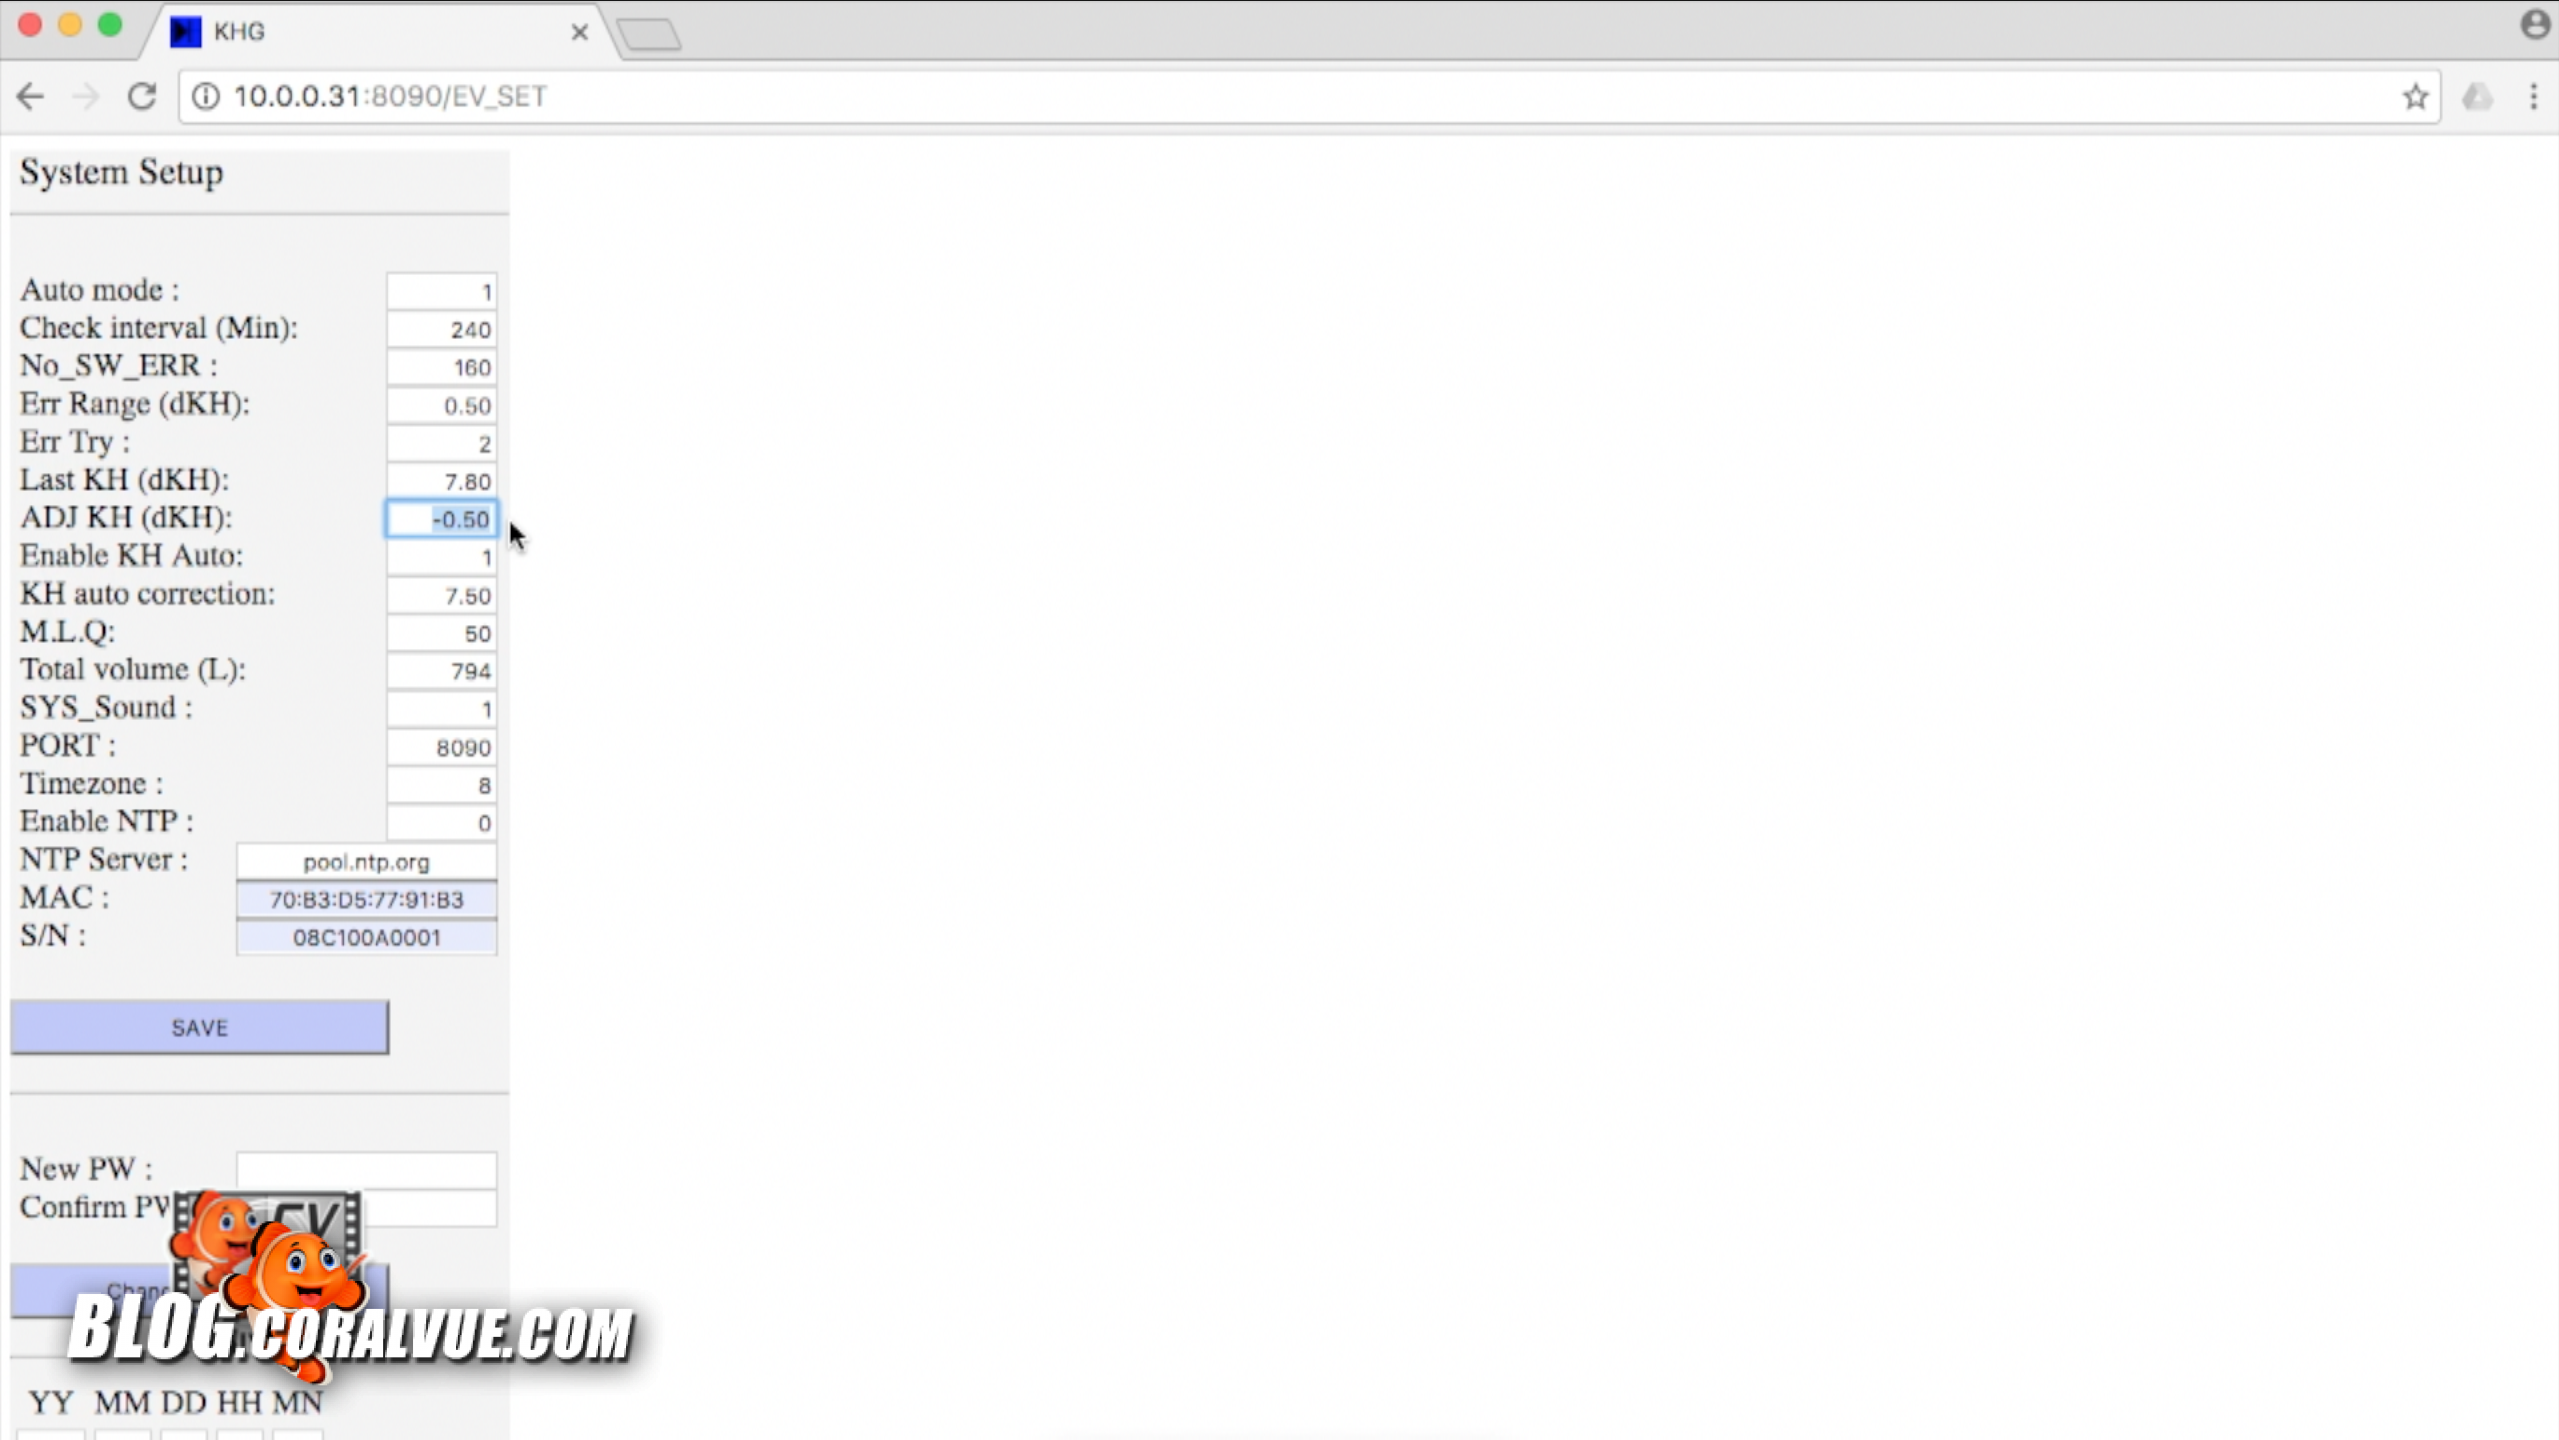
Once you have accessed the main control page, click on “System Setup.”
Under the system setup, find “Check Interval”. This field allows you to tell the unit how often it should run an alkalinity test. The unit can test as often as 30 minutes and up to once every four hours. Since changes in our tanks usually happen slowly, we recommend that you set the Check Interval to 240 minutes or once every 4 hours. This will allow any changes to fully take effect before testing and possibly adjusting again.
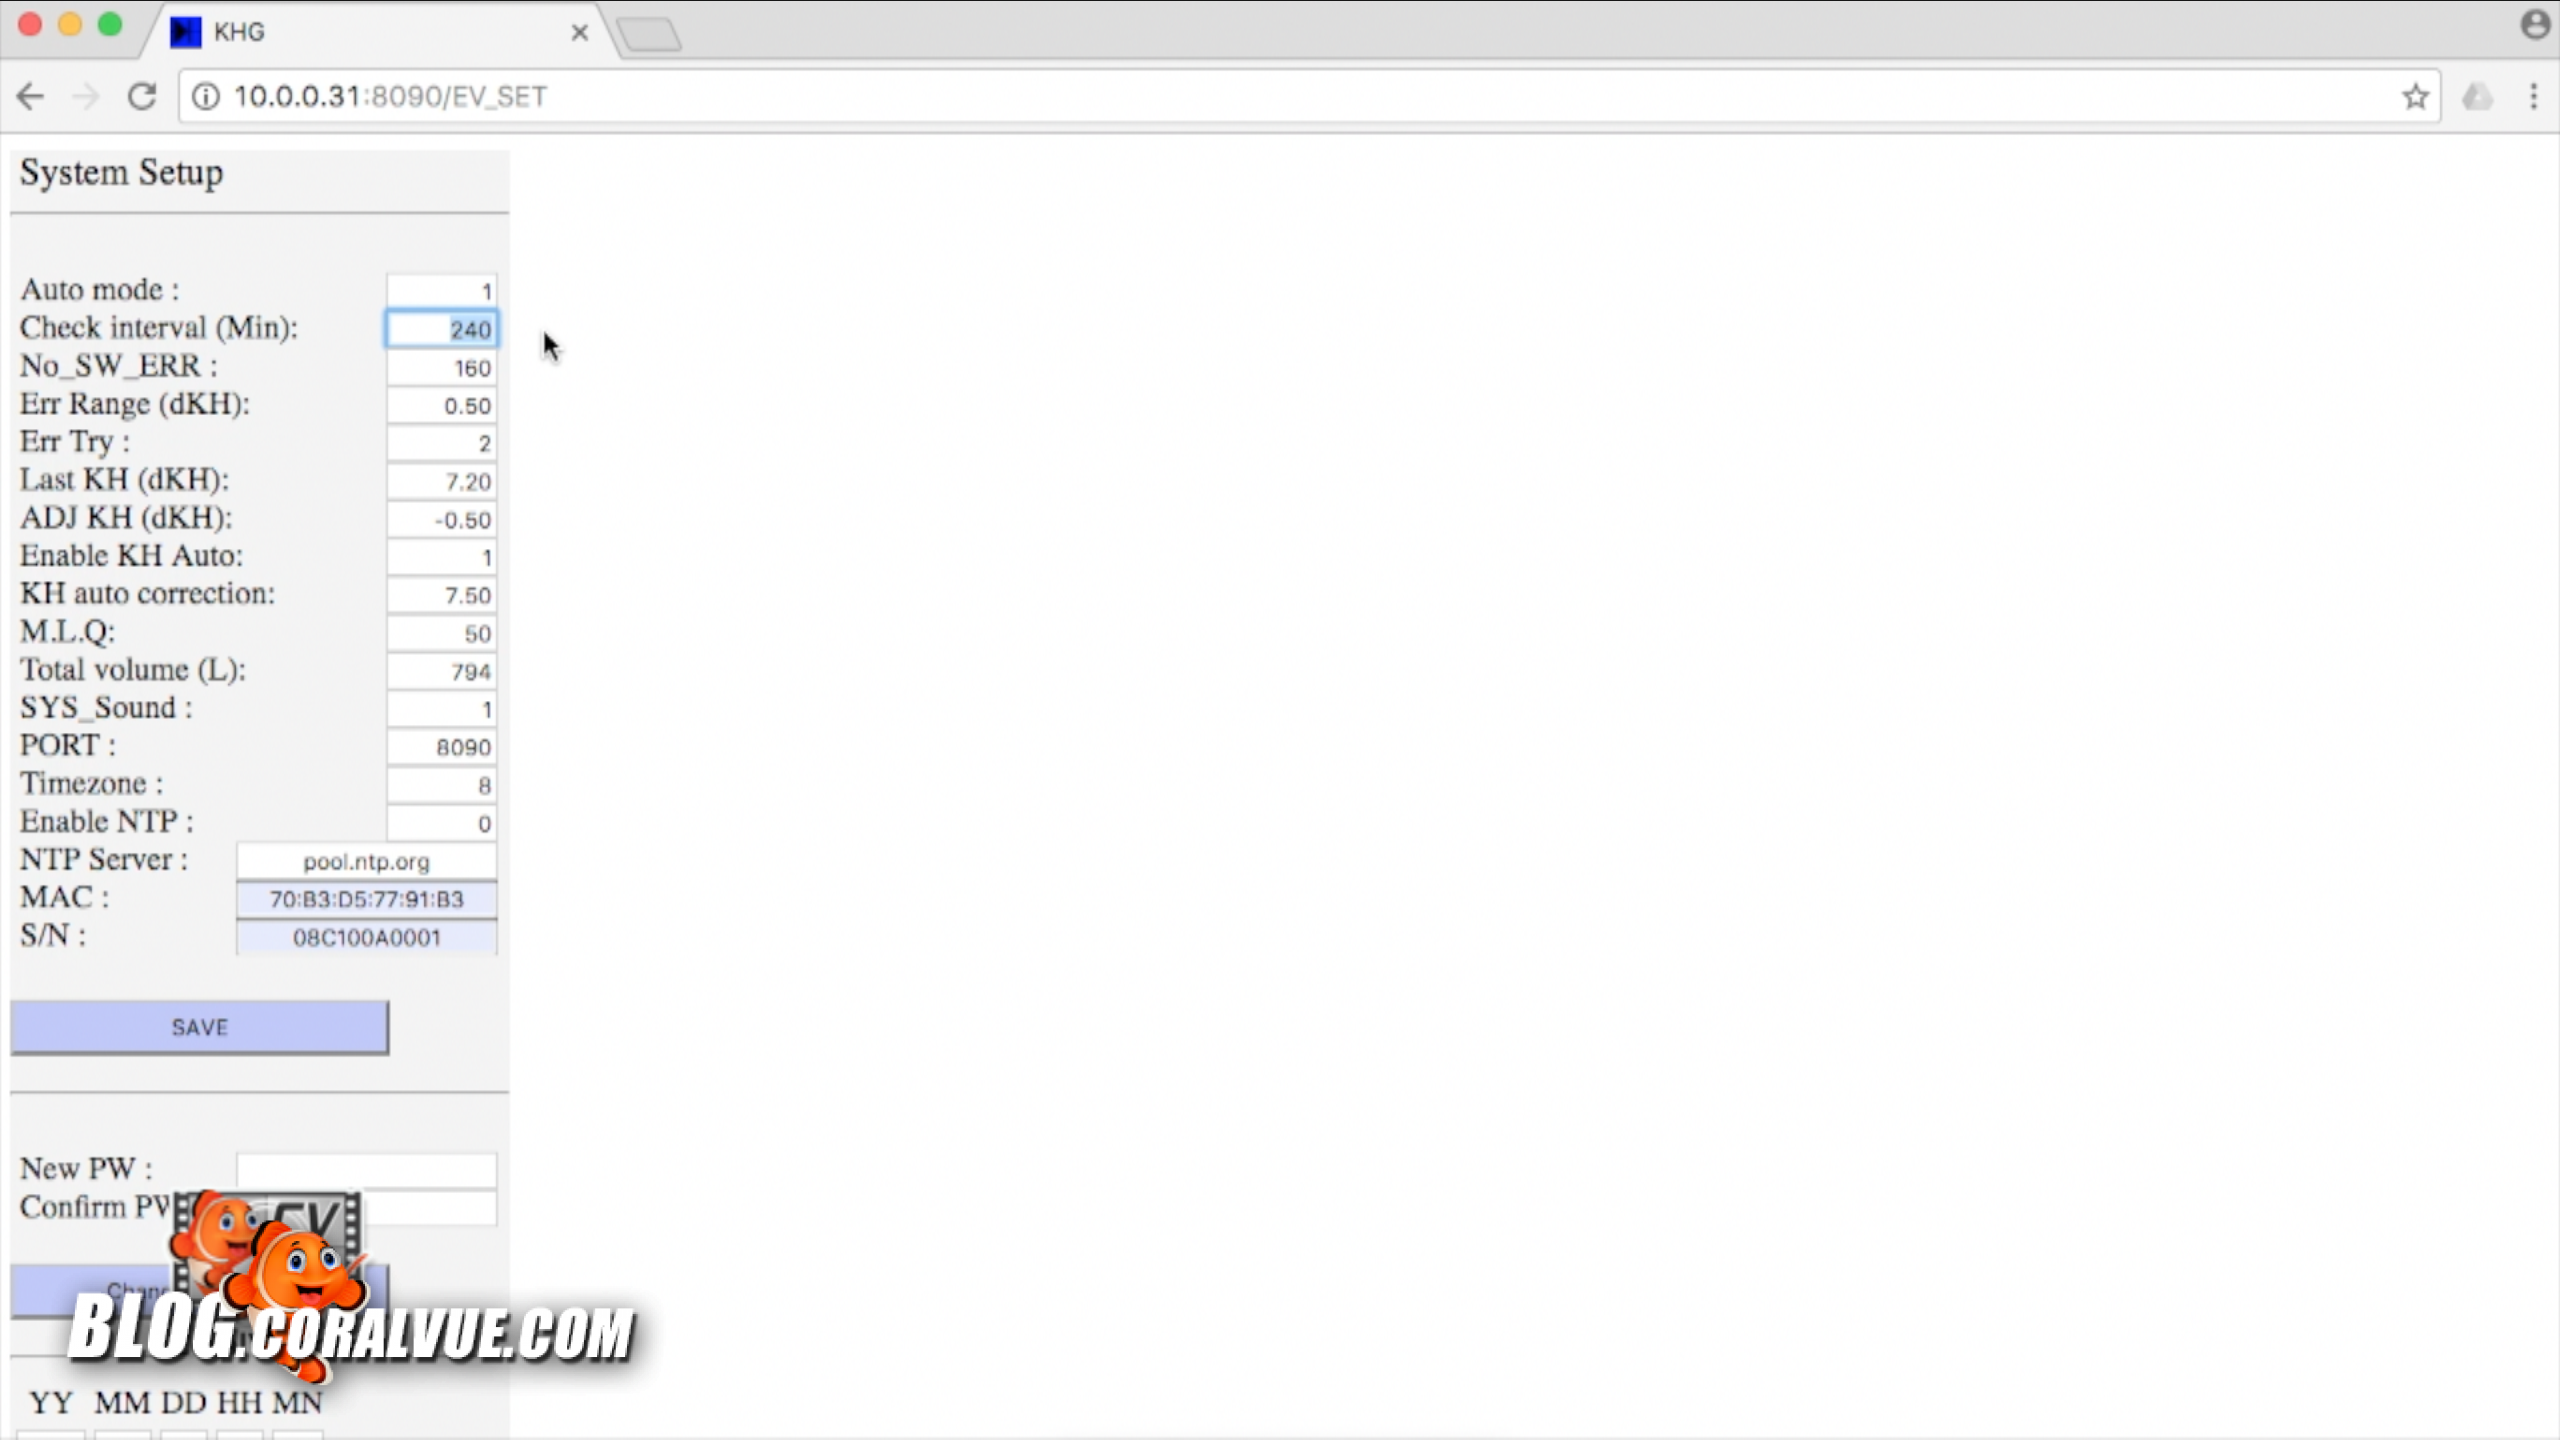
Make sure that “Enable KH Auto” is activated by entering a value of 1.

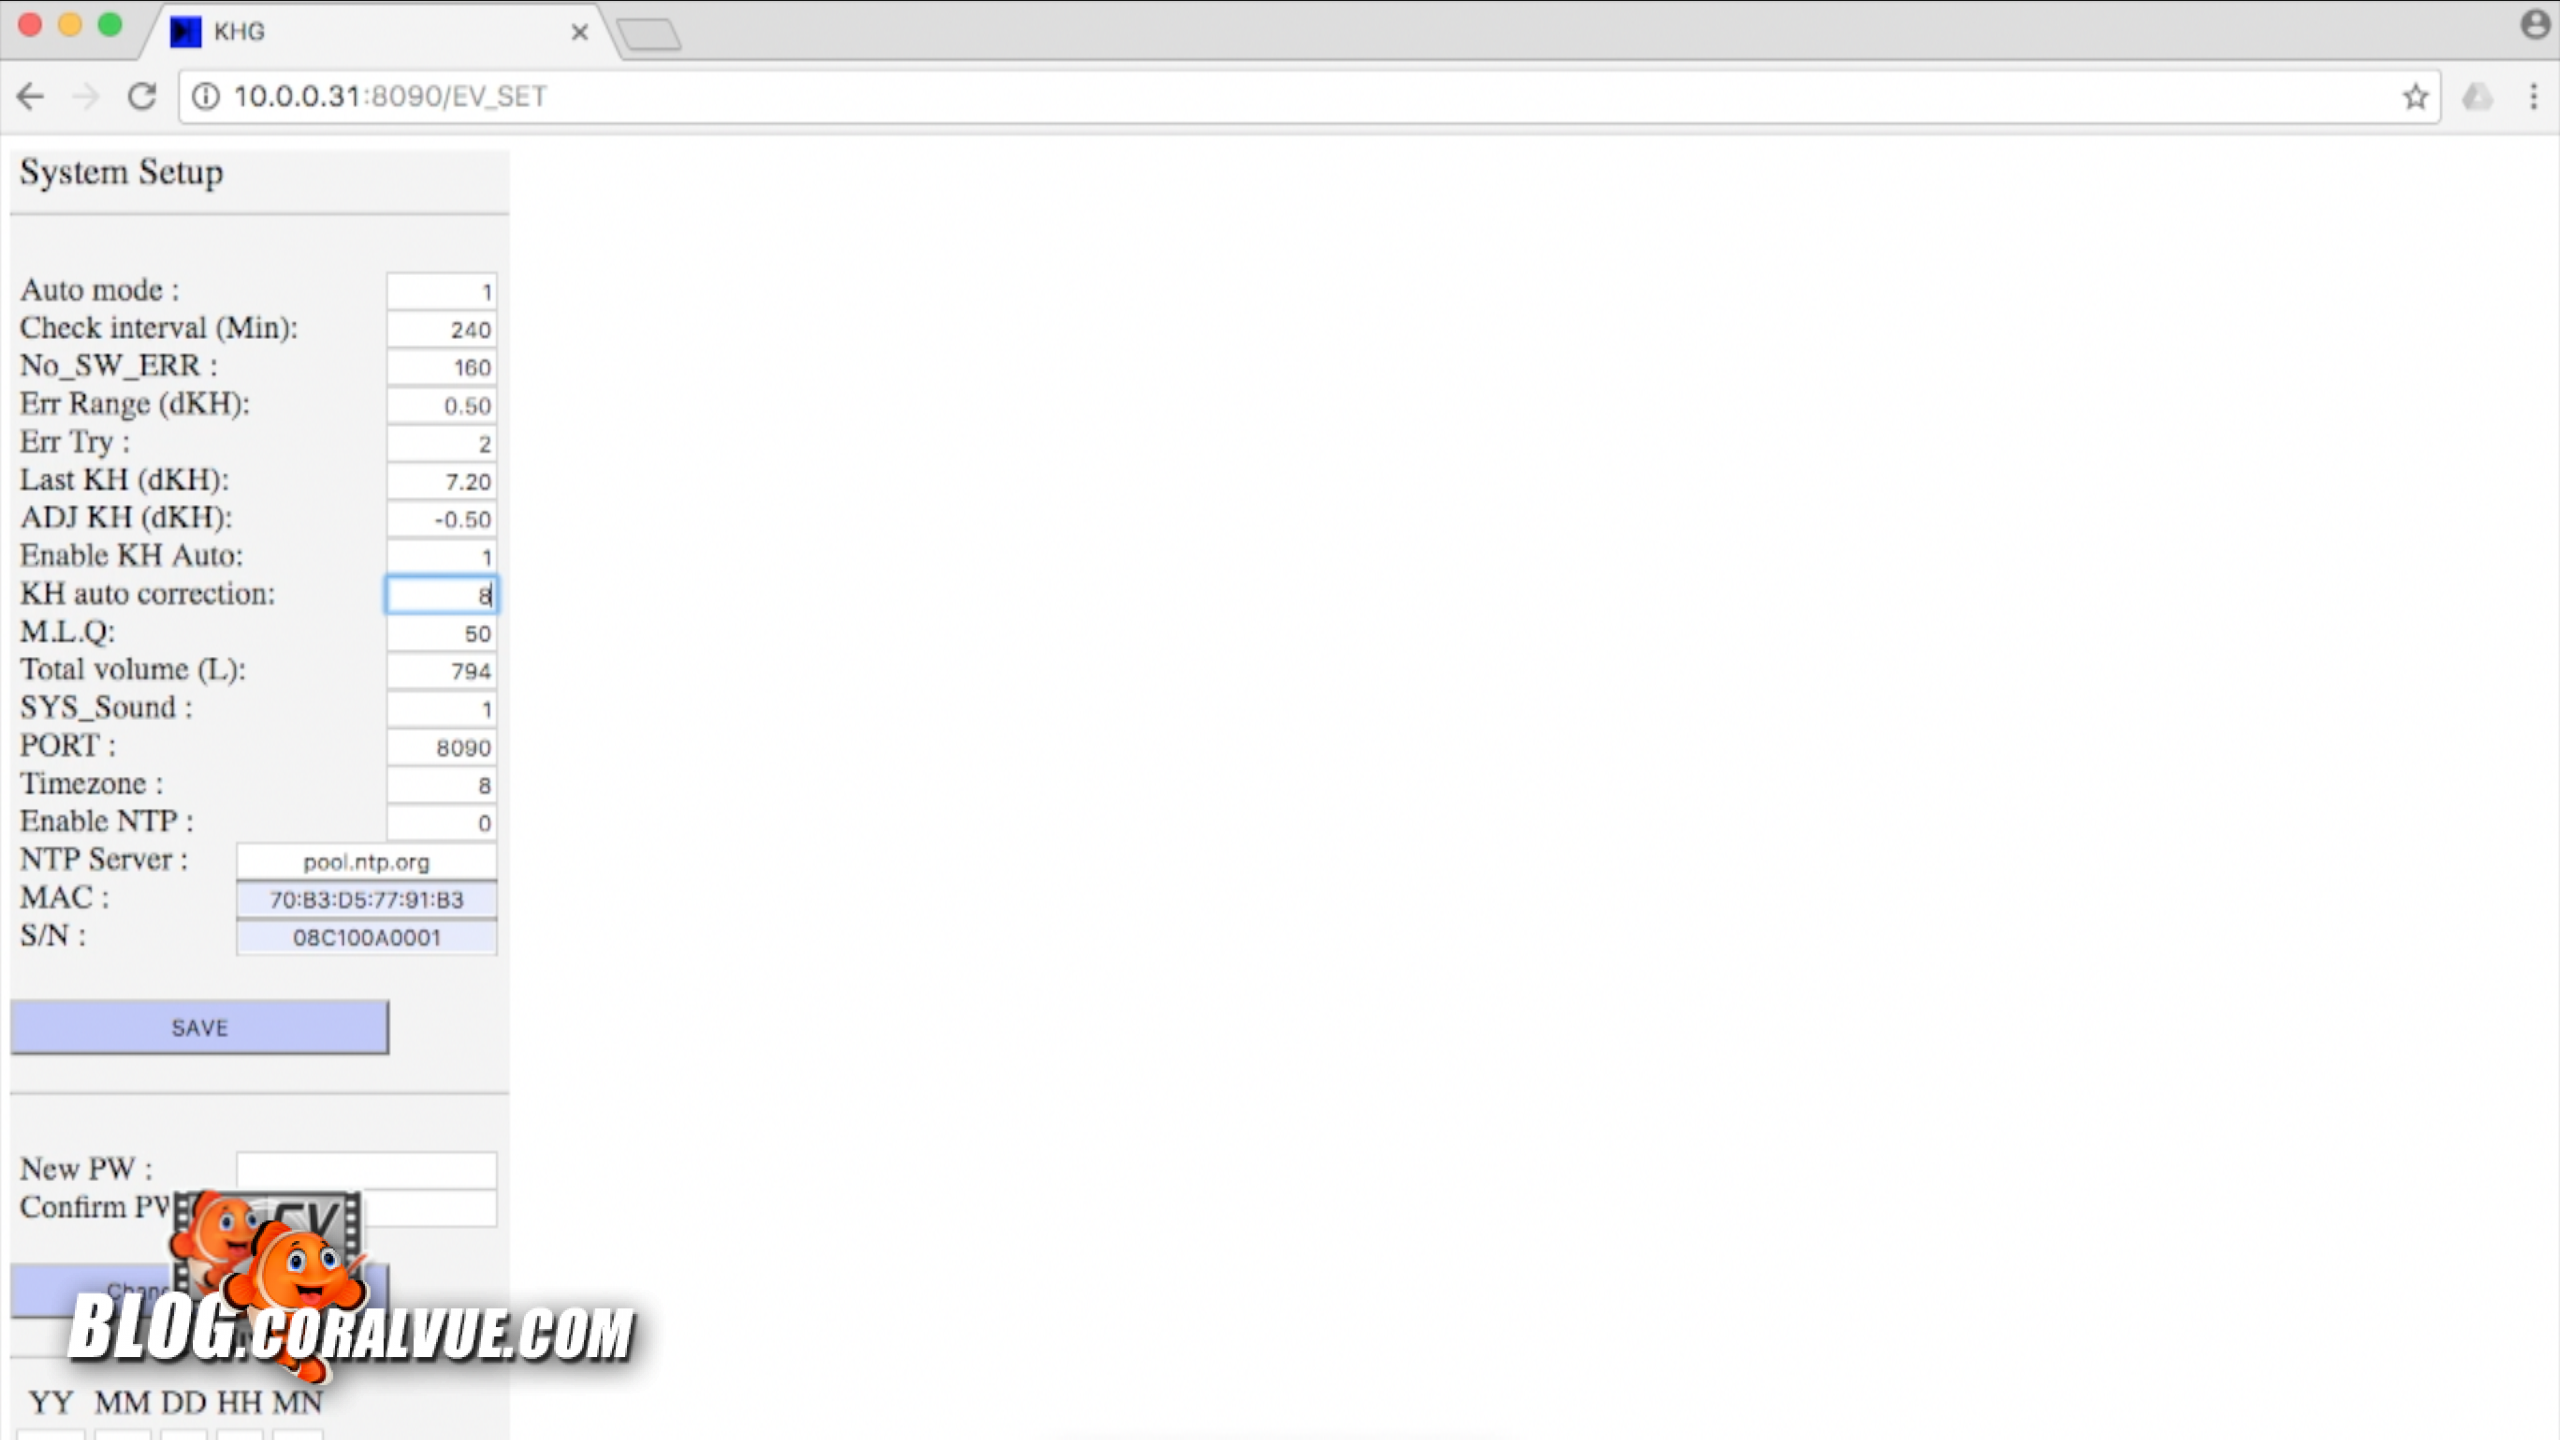
Now, look for “KH Auto Correction.” This is the value that should match the desired alkalinity level for your tank. If you keep your alkalinity at 8.5 dKH, then enter 8.5 here.
The next setting we need to adjust is “MLQ.” This is the maximum amount of sodium bicarbonate in milliliters that can be added to your tank at any given time. This is a safety feature to prevent the KH Guardian from dosing too much solution all at once and causing alkalinity to go up too fast.
To accurately determine this number, you will need to know how much alkalinity your tank consumes any given day and then compute the amount of sodium bicarbonate needed to raise your tanks dKH back to the desired level. Using the stock solution we created earlier in this video, it takes 4.7 milliliters to raise the alkalinity of 100L by .1 dKH.
For example, If you have a 200 gal tank:
- You must first convert gallons to liters. There are 3.78 liters in a gallon so 200 times 3.78 give us a total volume of 757 liters.
- Now 757 liters divided by 100 equals 7.57.
- Take that number and multiply it by 4.7 and you will know how many milliliters of sodium bicarbonate you need to raise your tank’s alkalinity by .1 dKH.
A 200 gallon will need 35.5 ml of sodium bicarbonate solution to raise the alkalinity level by .1
Using this example, we recommend setting the MQL value to no more than 50.
Next, find the Total Volume field. To ensure optimal performance, please try to be as accurate as you can be. This number tells the Unit the total water volume of your tank which it will use to compute sodium bicarbonate dosage. This number is in Liters. Now, don’t worry, We got you covered. 1 gallon of water equals 3.78 liters. So if you have a 150 gal tank, all you need to do is multiply 150 times 3.78 and that gives you your tank’s volume in liters. Enter that number into this field.
The last field we are looking for is Time Zone. Enter 7 for Easter Time, 8 for Central, 9 for Mountain and 10 for pacific.
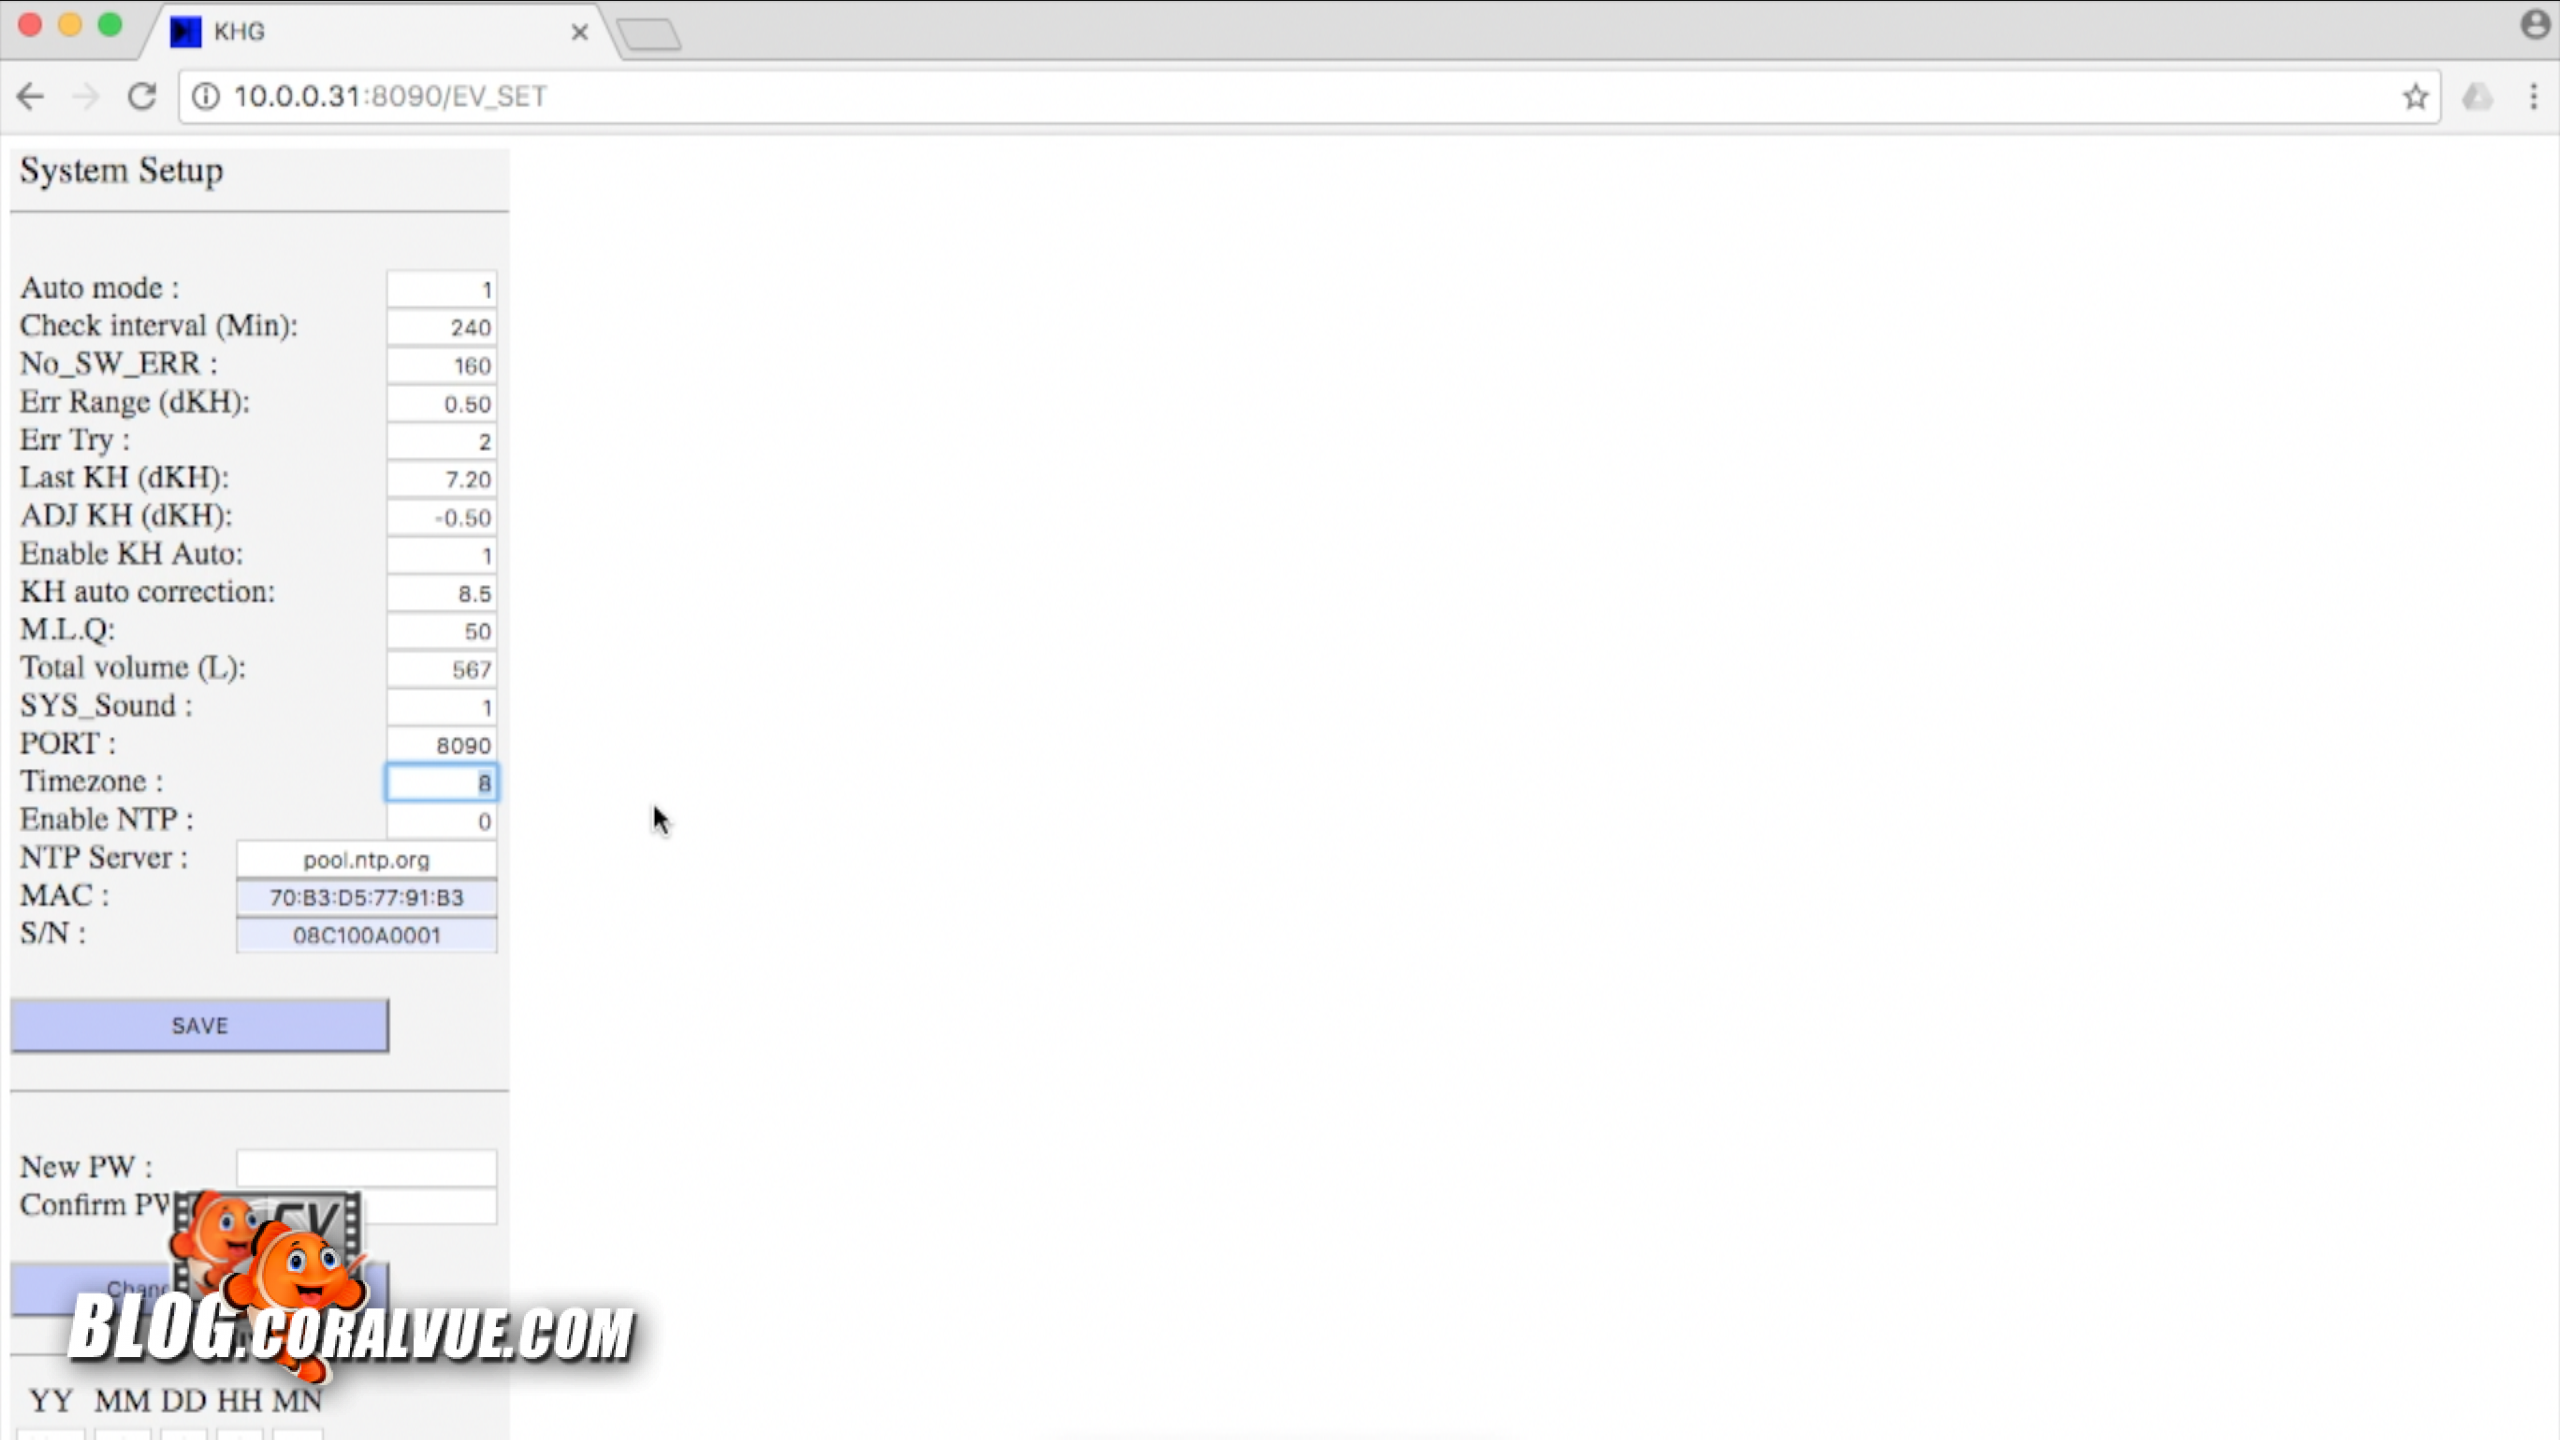
Click Save to store the data and reboot the unit.
We are almost ready to start using our KH Guardian. Once the unit has restarted, check the IP address assigned to it and enter that into a browser window to access the web interface. Login using the password “Admin” with upper case A.
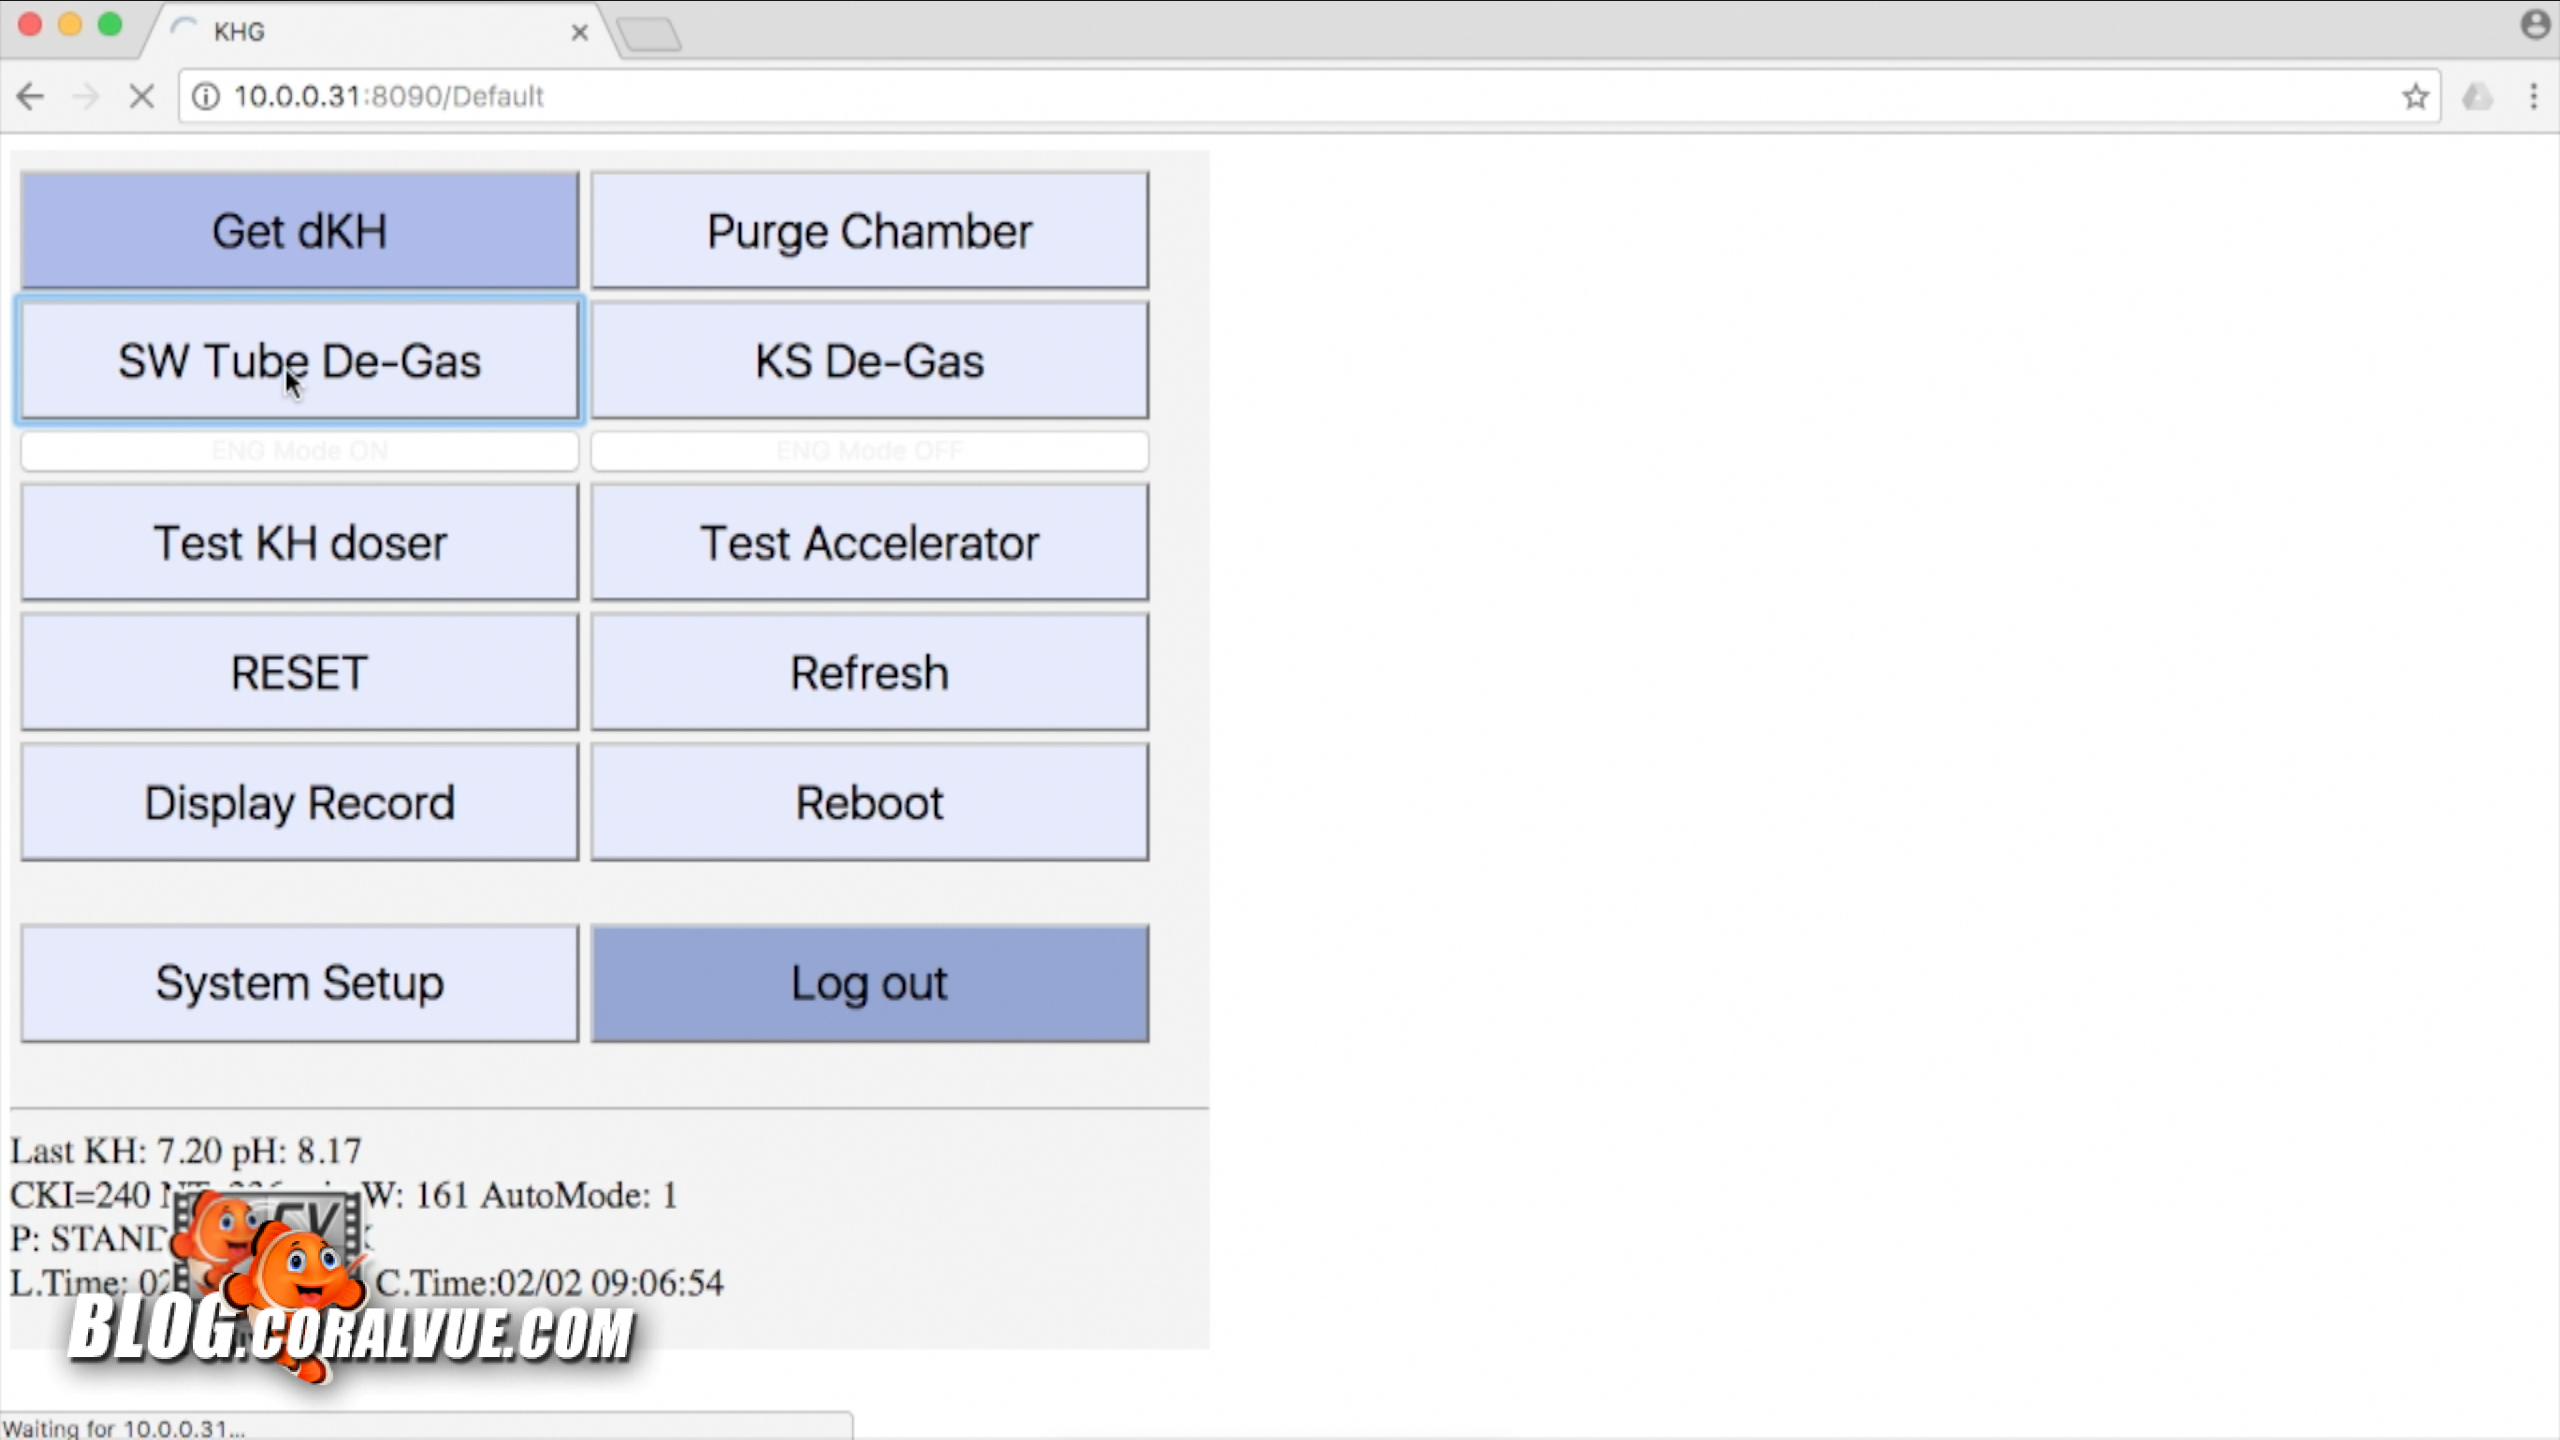
Before we can start using the unit, we need to purge air from the lines. First, click on the “SW Tube De-Gas” button. This will make the unit pull water from the tank into the testing chamber. You may have to do this several times until the LCD no longer shows S.W_ERR.
Next, prime the calibration fluid line. To do this, click on “KS De-Gas” button. As the machine primes the line, look into the observation window and check if the KH reagent solutions is dropping into the reactor chamber. Once you see drops begin to fall into the reaction chamber, press the “RESET” button to stop.
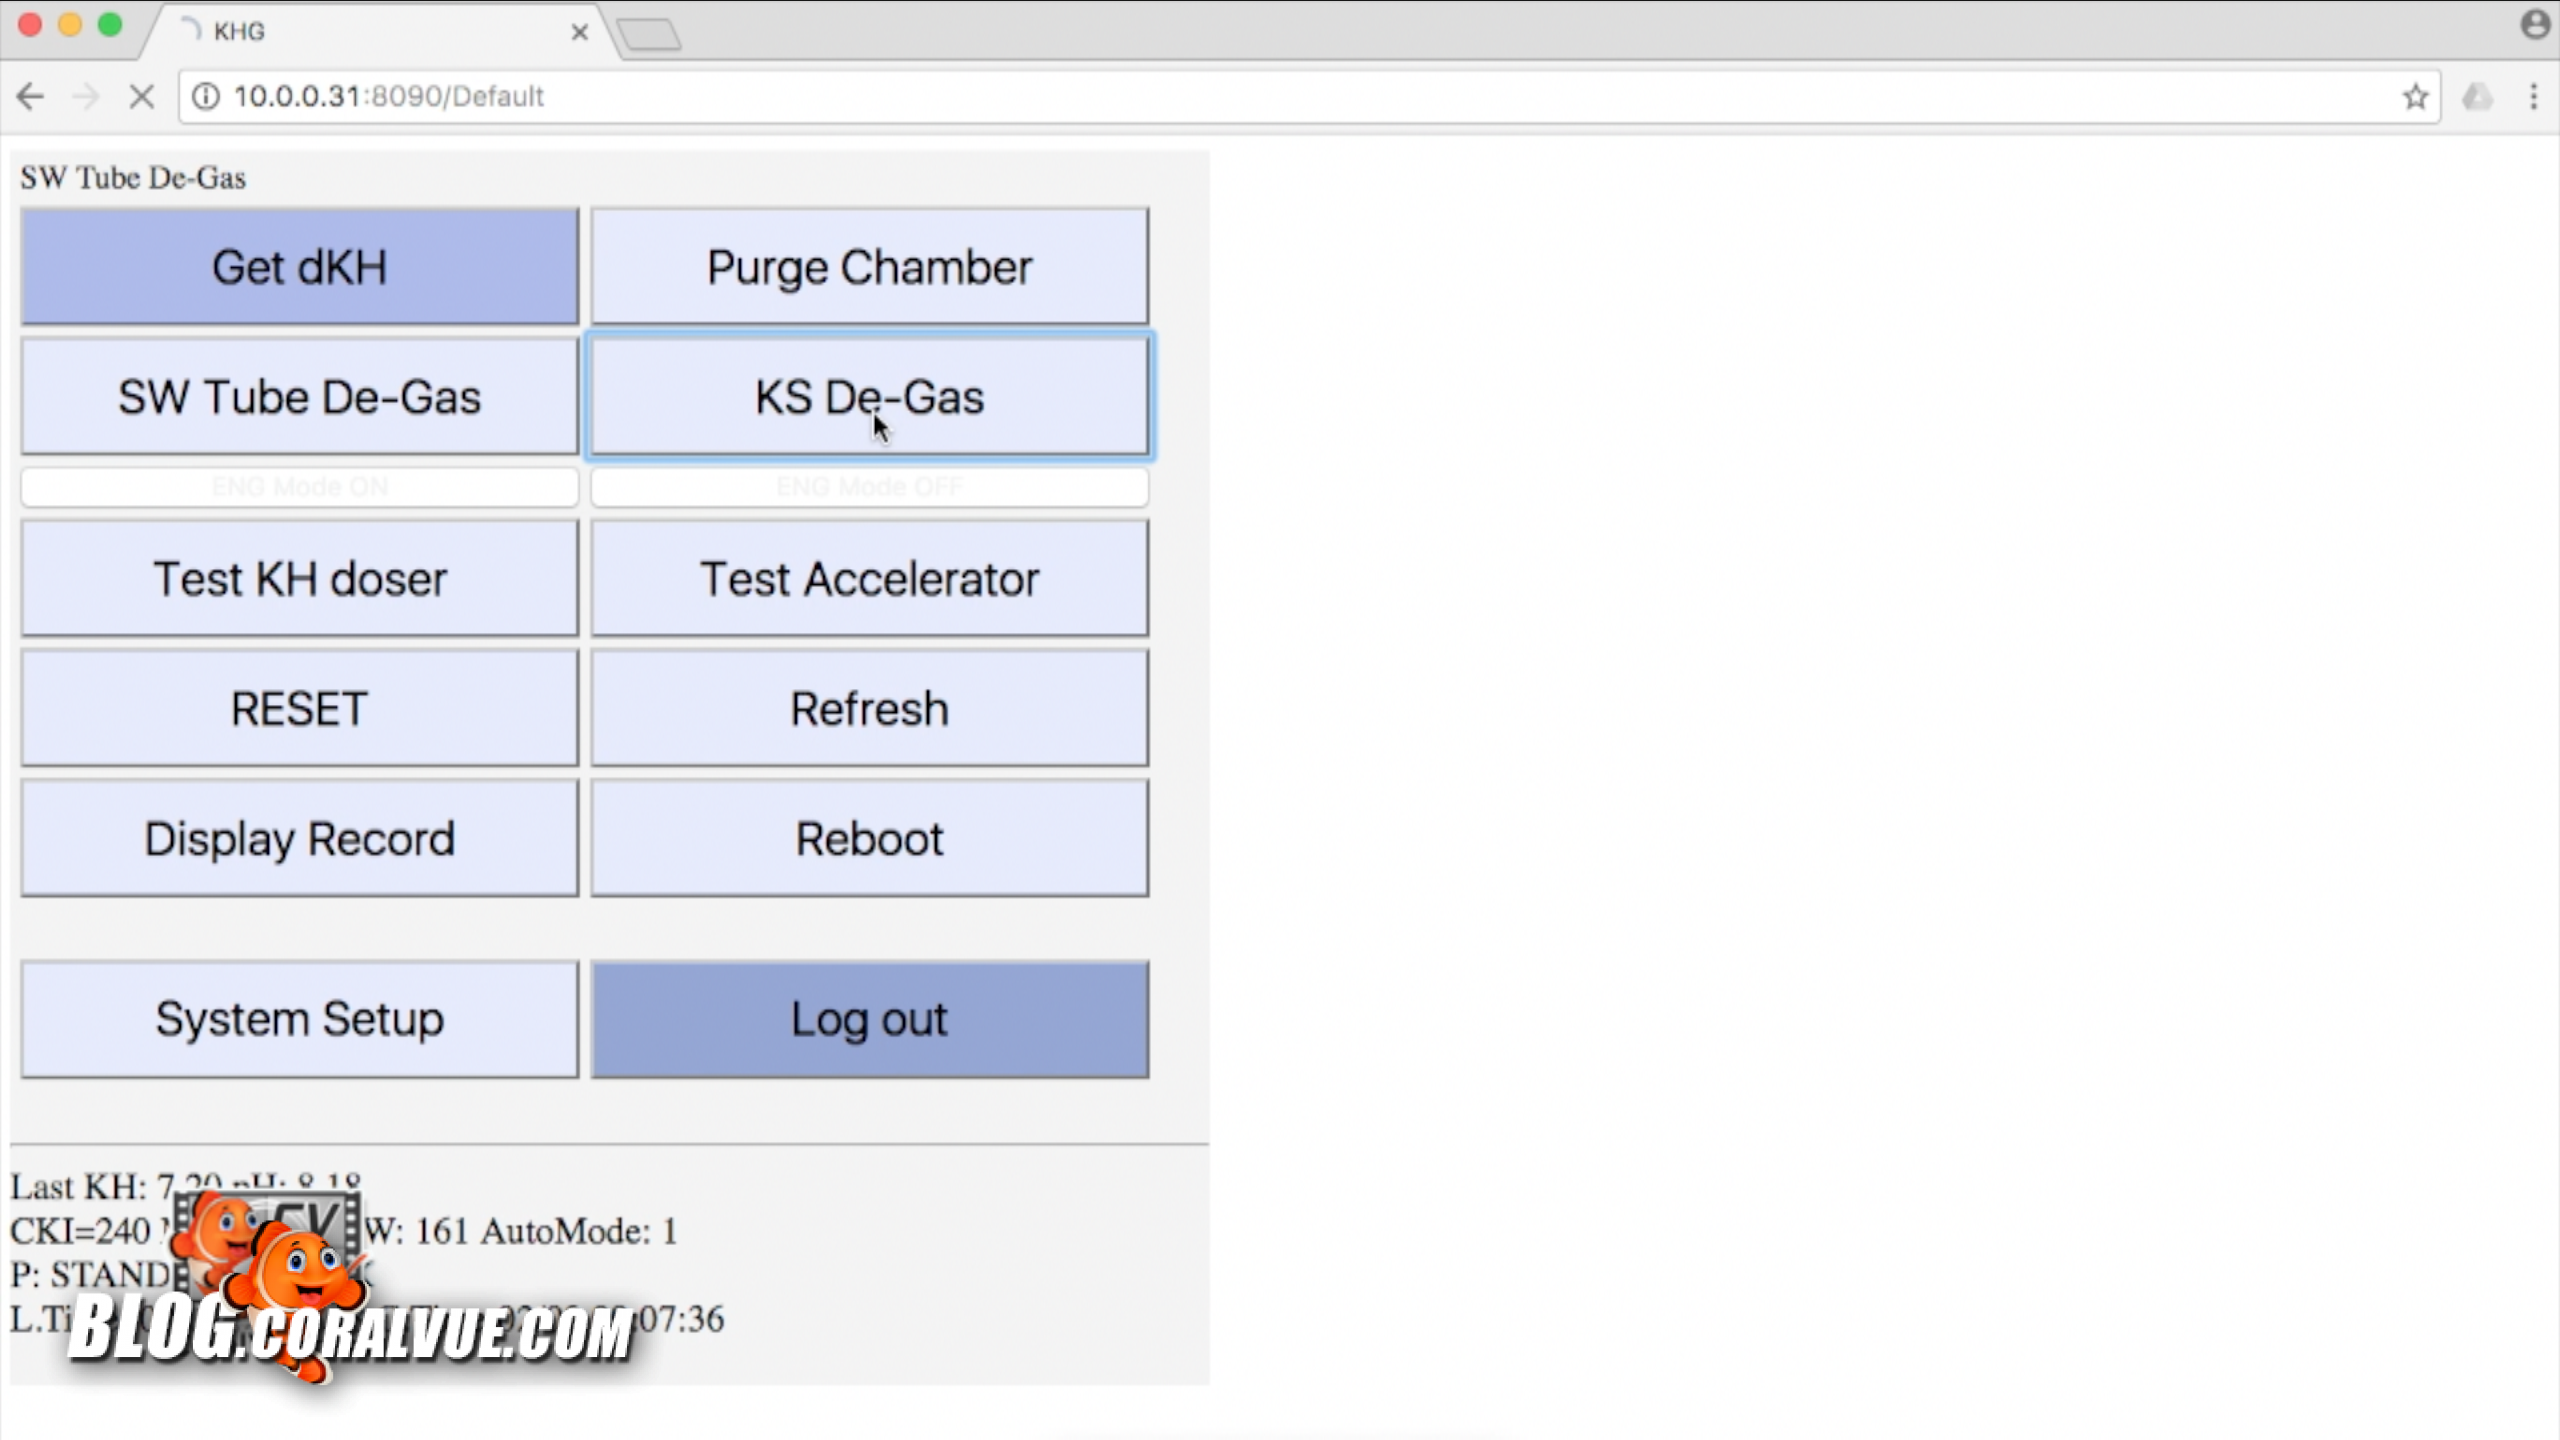
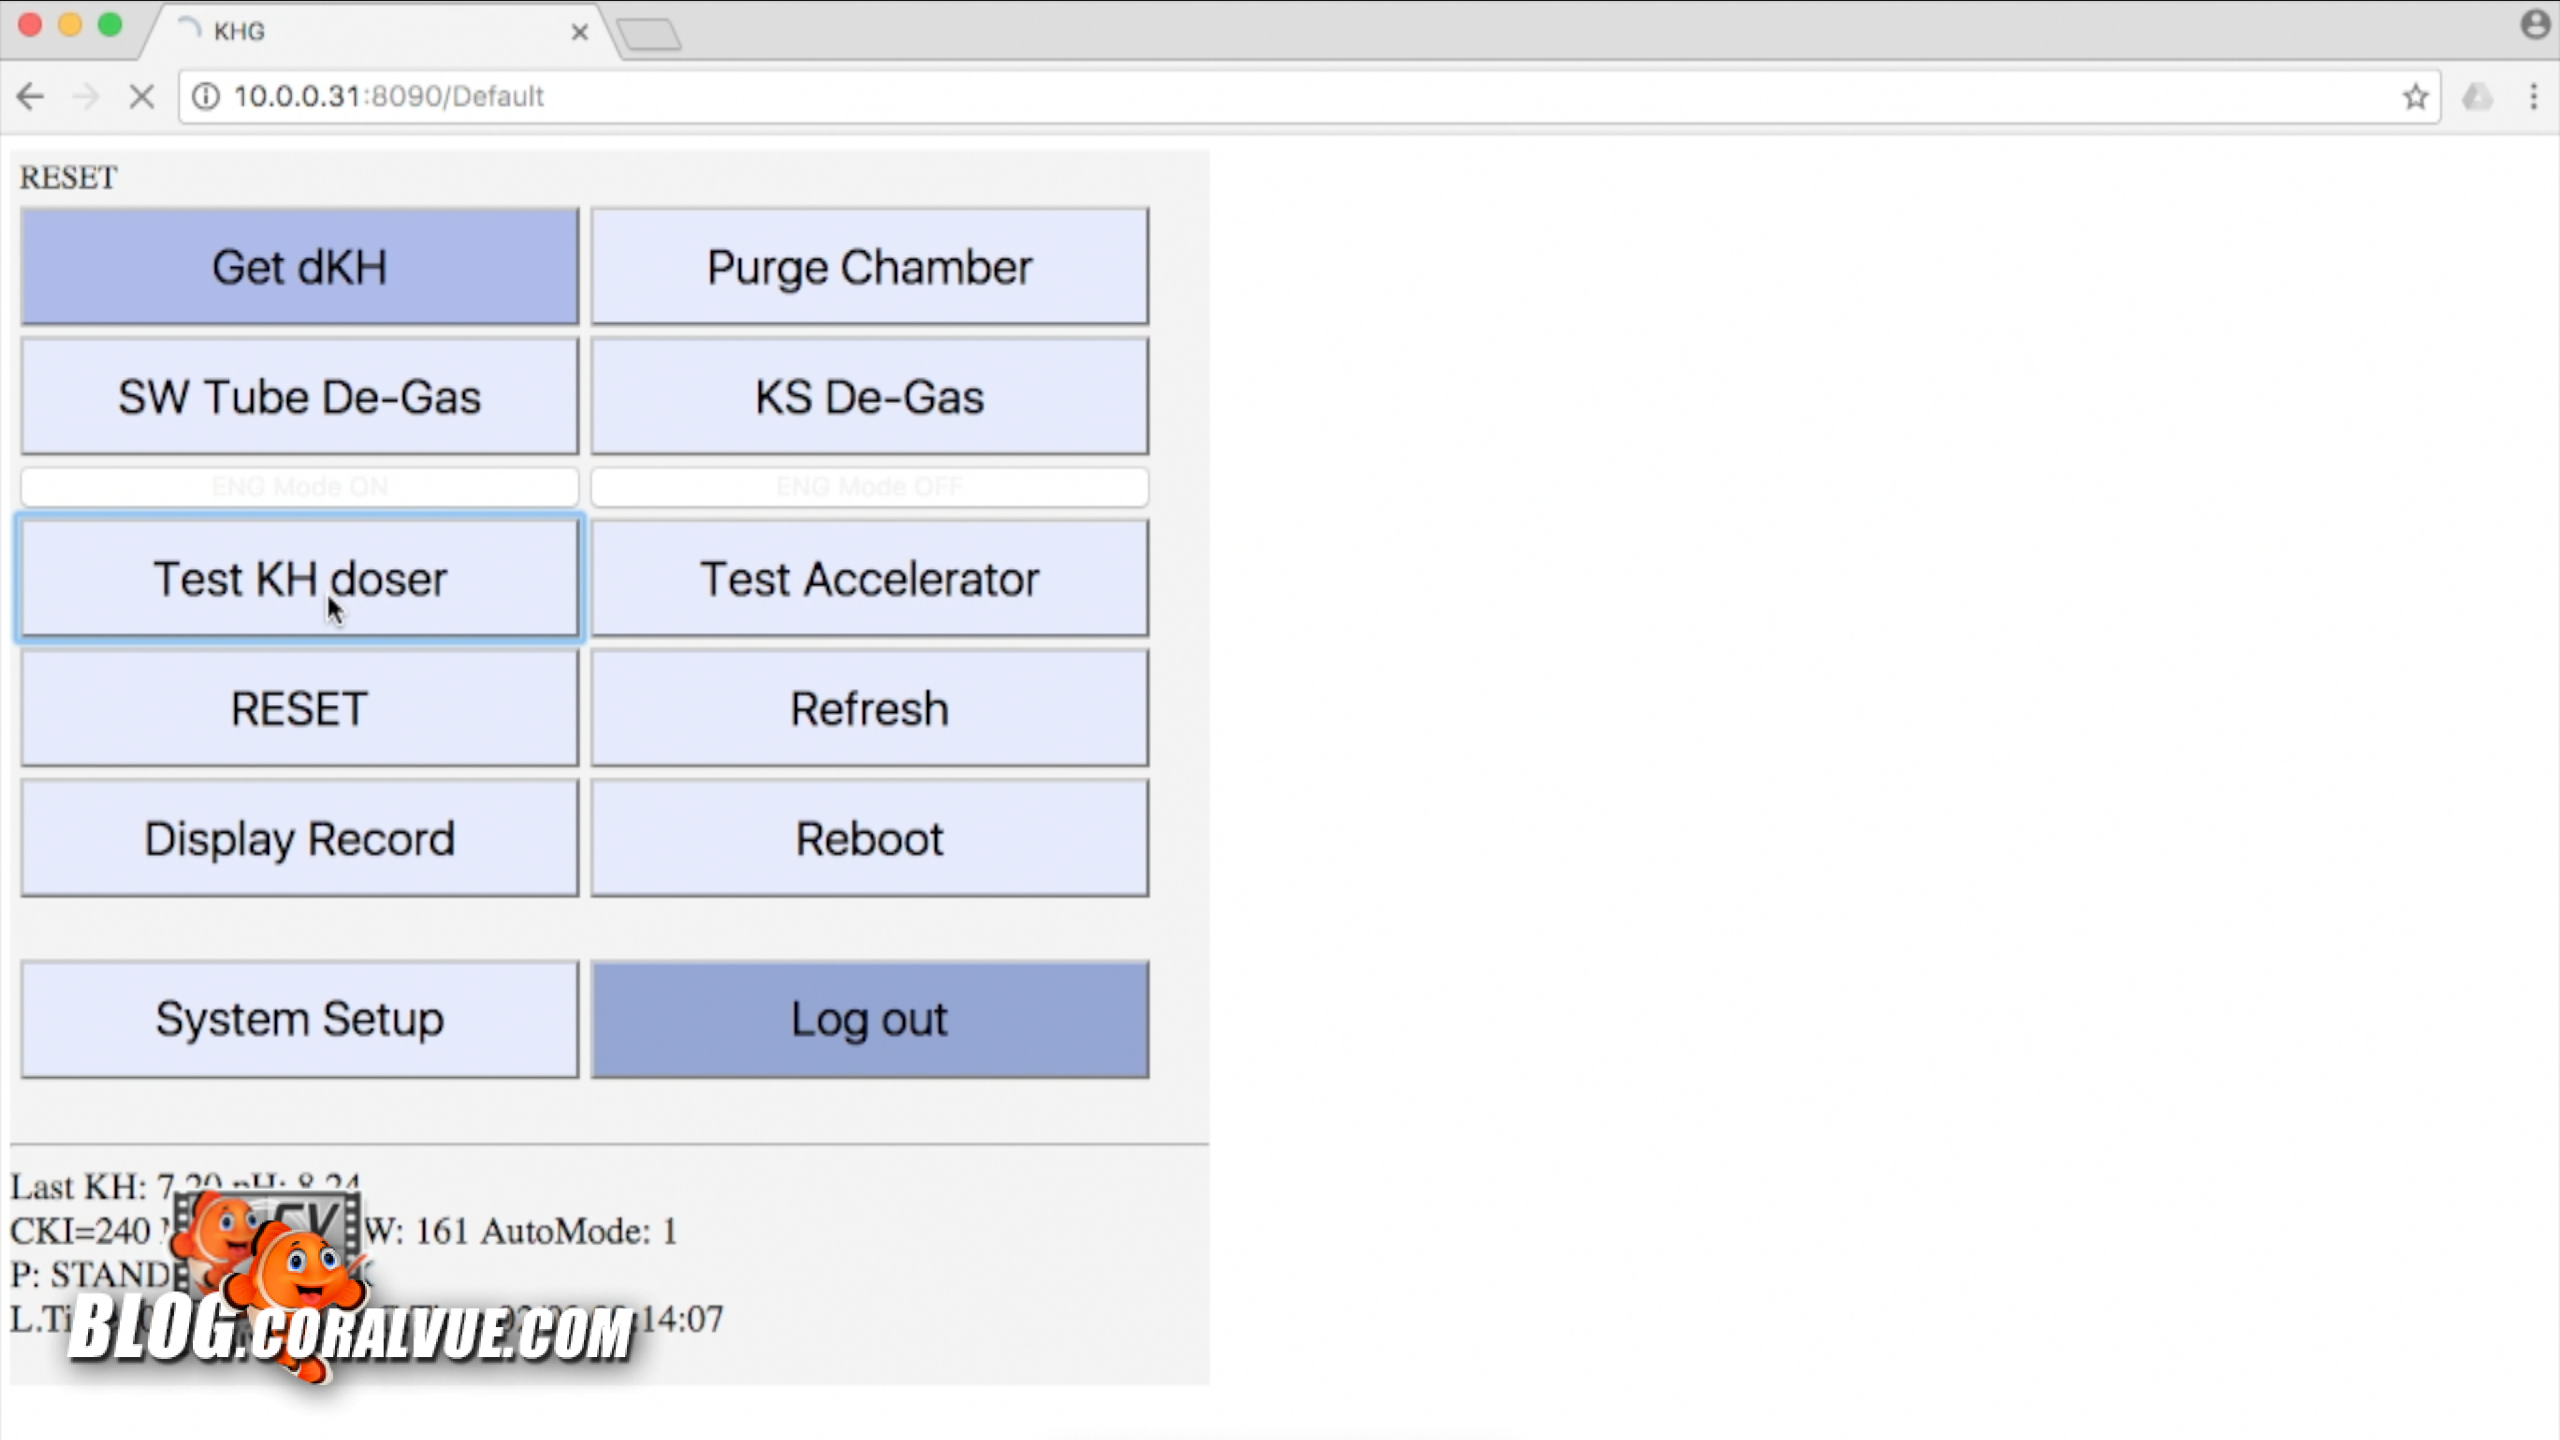
Last, we need to prime the Sodium Bicarbonate line. To do this, press the “Test KH doser” button. The unit will start to draw solution and add it to the tank. You may need to repeat this several times until you see solution flowing from the SS OUT line.
Finally, go ahead and click on the “RESET” button. At this time, all error warnings will be removed from your web page and the LCD on the unit should display STANDBY followed by a number which is the number of minutes until the next text.
Testing the KH Guardian
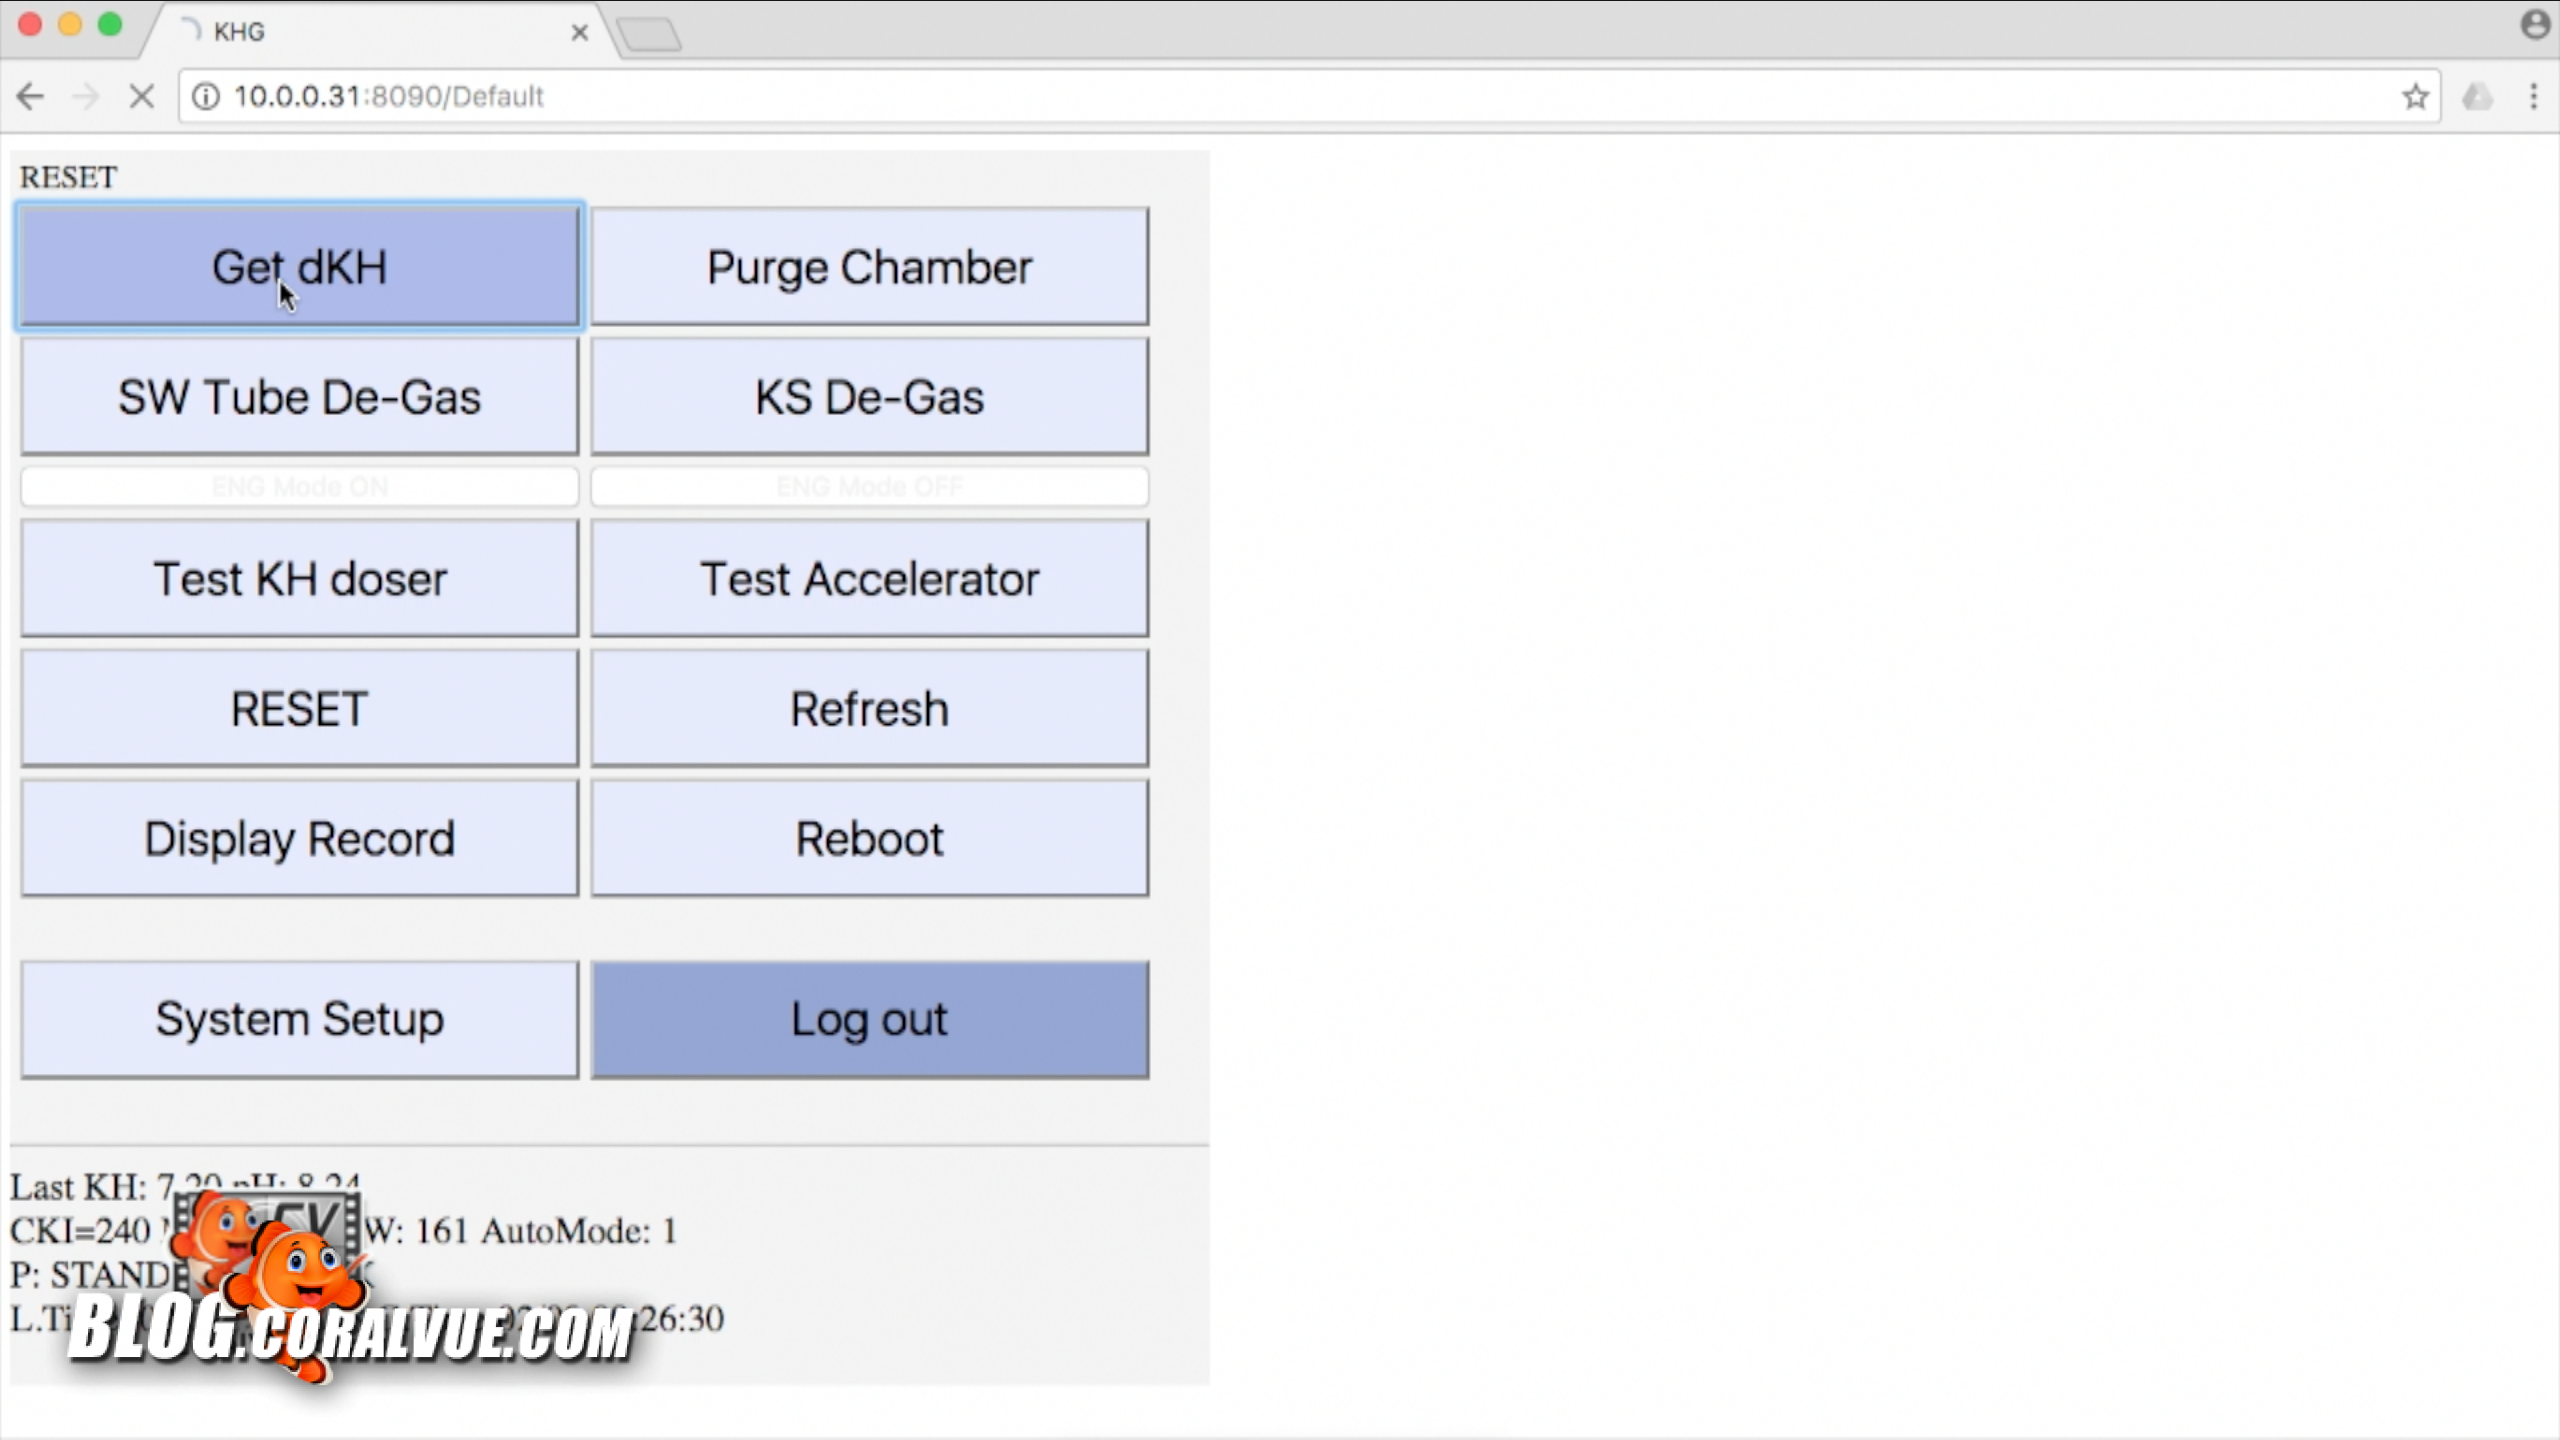
Now we are ready to test the unit and get our first KH reading. As with any equipment, it needs to break in so we recommend to manually run 5 tests first to ensure optimal performance and accuracy. To do this, just click “Get dKH” on your unit’s main web interface screen. The unit will beep and begin the testing process. It may take up to 7 minutes for the unit to run a single test. Once the test is completely manually repeat the process to ensure that the unit breaks in correctly. It is normal for the unit to reboot after each test.
Reading the KH Guardian
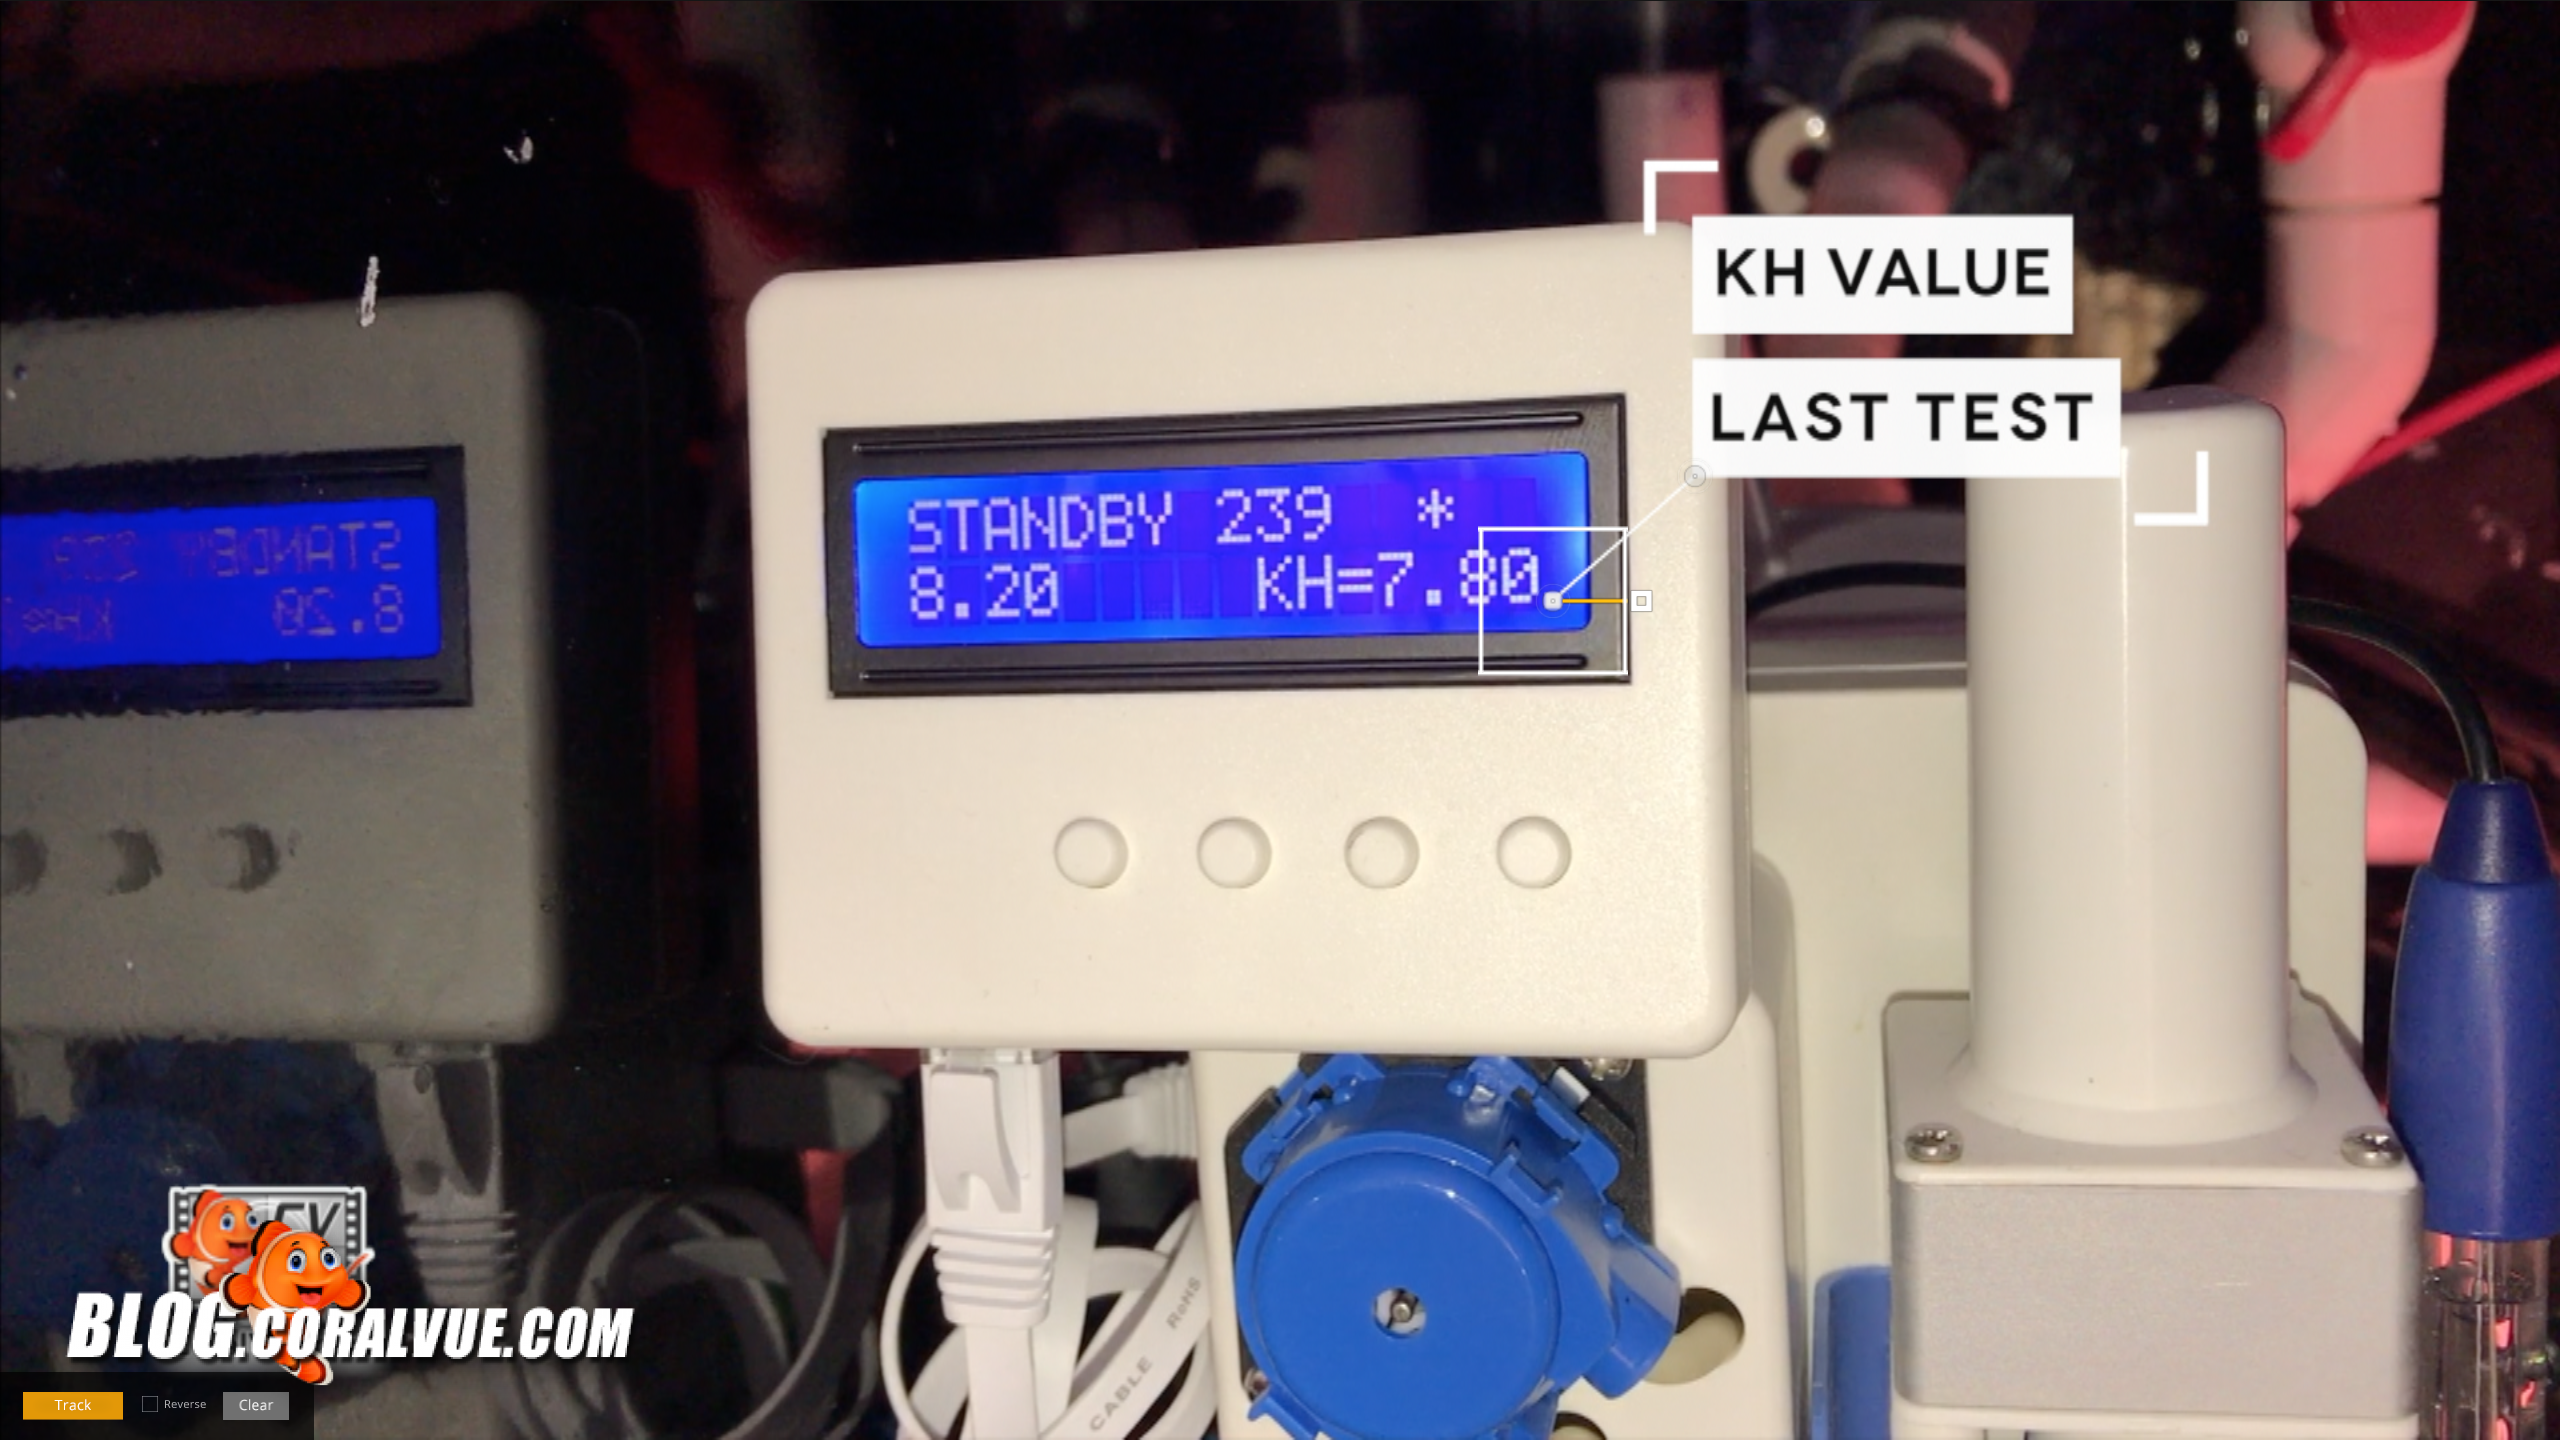
Reading the results of the KH guardian is super simple. The easiest way to do so is to read the LCD screen. You can find the value of the last test on the lower right hand corner. On the left corner you will see the pH value of your salt water at the time of testing.
You can also access this information by connecting to your KH Guardian via it’s web interface. At the bottom of the main screen look for “Last KH.”
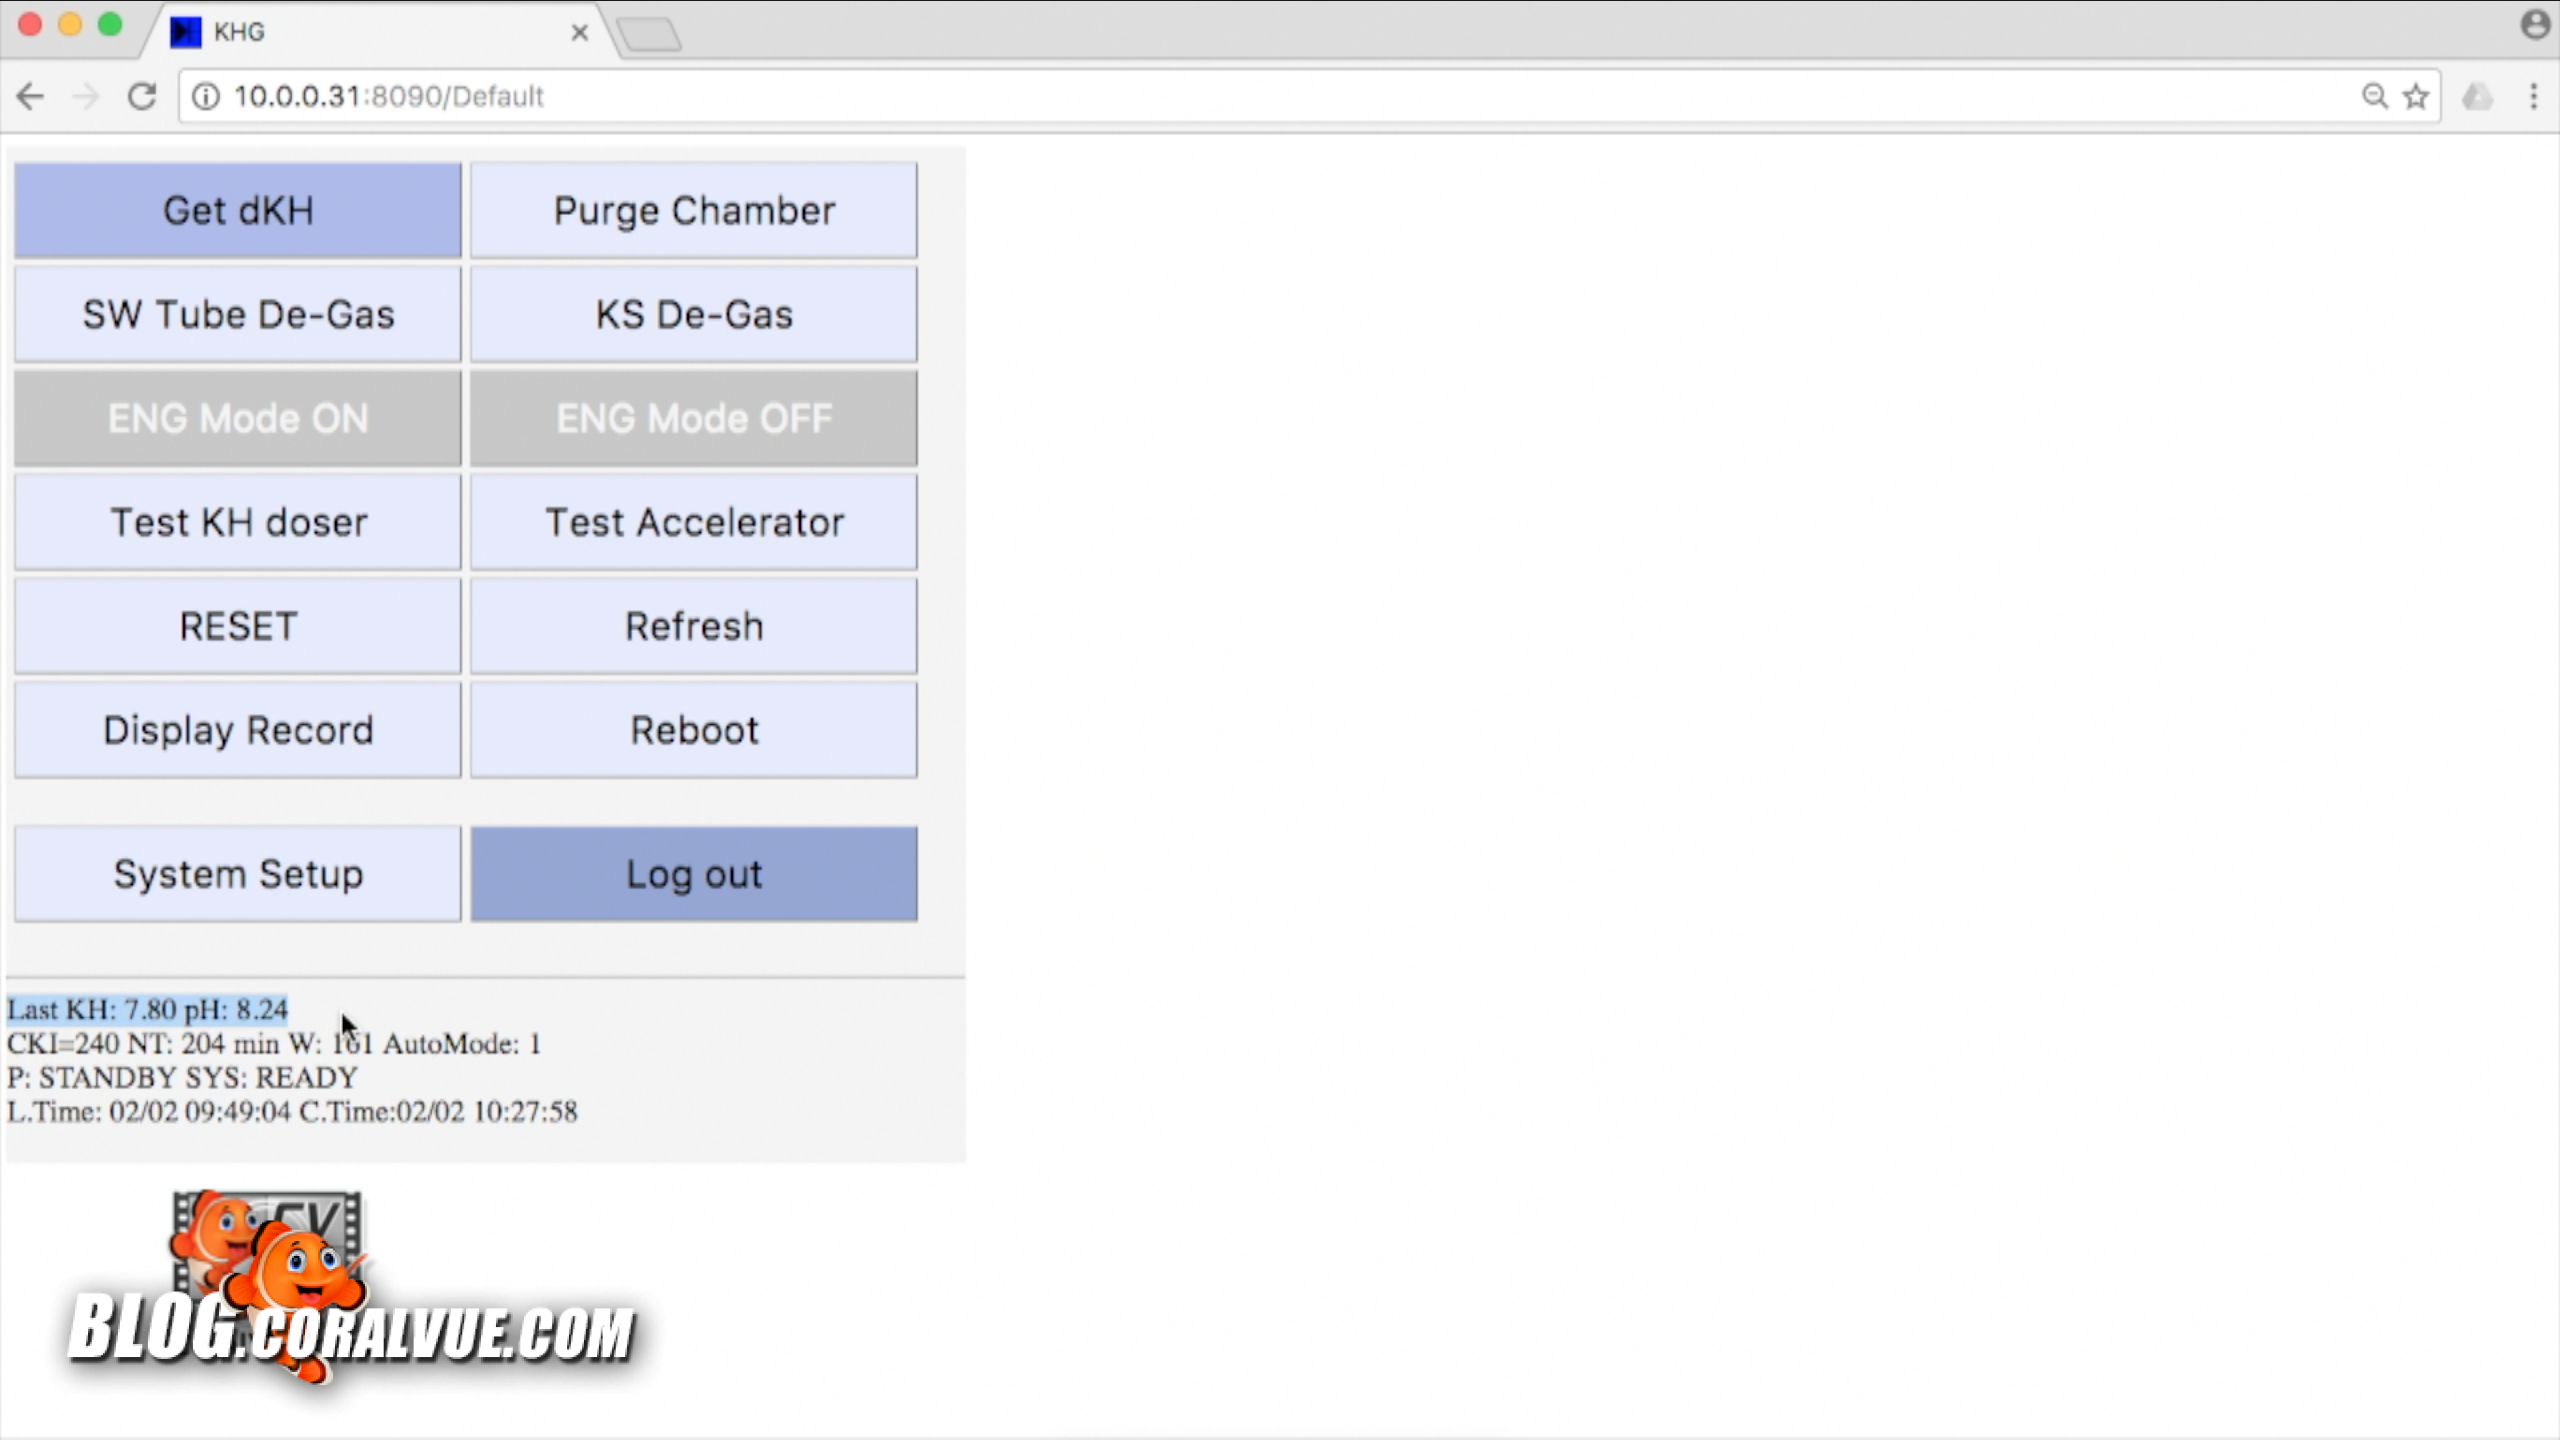
If you want more detailed information about this section including an explanation of what the other data displayed means, please refer to the KHG User Manual which can be downloaded from our website at coralvue.com.
Accessing Historical Data
To access a table of running historical data, head over to your KH Guardian web interface and click on “Display Record”. This area will show you every single test result along with other pertinent data such as the time it took to draw water from the tank. This information is handy in assessing the life of the 500 micro Check Valves. As the number gets higher, it means that it is taking longer for the unit to draw in water which could be caused by a clogged check valve.
Calibrating your KH Guardian
Sometimes you will notice that while the KH Guardian is very precise, meaning it is giving you consistent readings, it may not be accurate as compared to other test kits. If this is the case, you can make adjustments to the readings to reduce the deviation between the two different testing methods. To make this adjustment, access the KH Guardian’s web interface and click on the “System Setup” button. Now look for “ADJ KH” and enter the difference in KH value. For example: If the KH Guardian is reading 8.9 dKH but other test kits are telling you that the alkalinity is 8.5, you would enter -.4 as the value.
Frequently Asked Questions
Can the KHG sustain the full alkalinity needs of a system?
Yes to some extent. The KH Guardian is meant to make small precise adjustment and not really meant to supplement alkalinity in bulk. So, while the KH Guardian may be sufficient for a small 60 gal system depending on demand, it will not be enough to maintain the needs of larger systems with high demand.
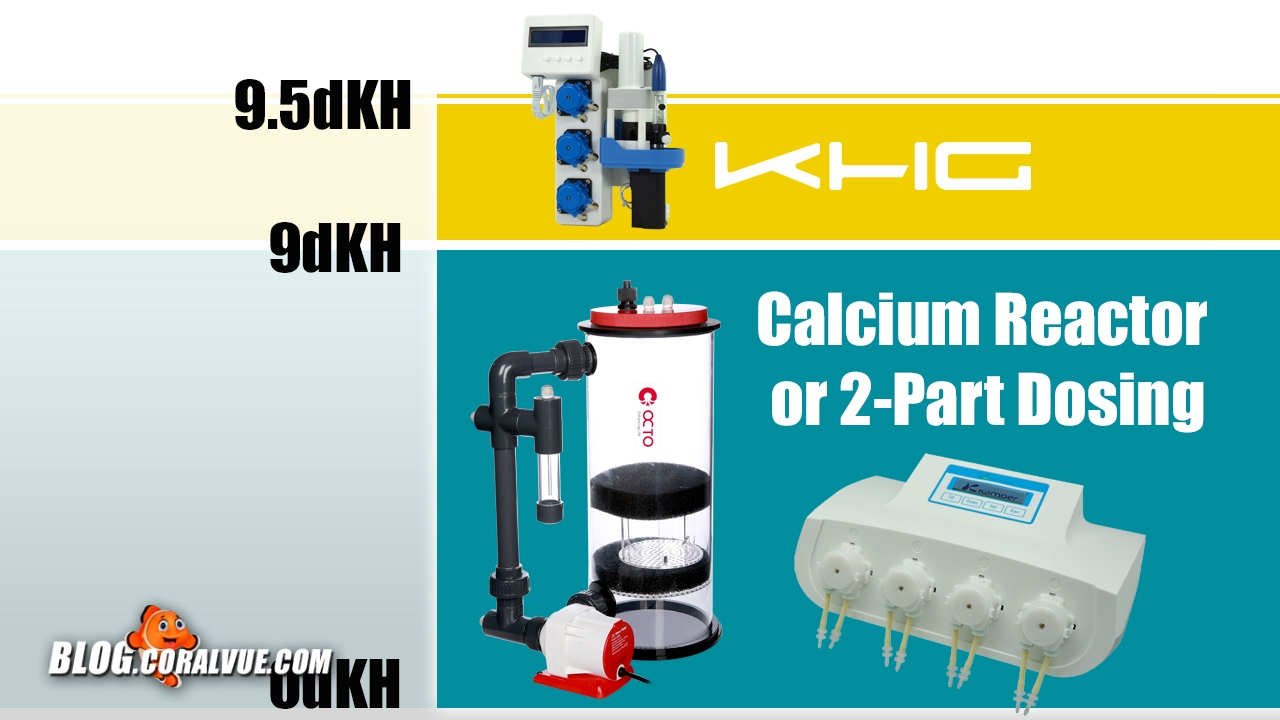
Does the KH Guardian replace my current supplementing setup?
Not necessarily. You can still continue to use your current setup such as 2-part or Calcium Reactor and use the KH Guardian to fine tune your levels. Let me give you an example. If you currently keep your system at 9.5 dKH, then you can adjust your regimen to keep your system at a slightly lower dKH of 9 and allow the KHG to supplement the remaining .5dKH ensuring long term stability.
How often should I calibrate and replace the pH probe?
We recommend you calibrate the probe once every 4 to 6 months and replace it once every 12 to 18 months.
Can I use something other than Sodium Bicarbonate for dosing solution?
No. The KH Guardian is programmed to the specific concentration of a Sodium Bicornate solution made of 65g of Sodium Bicarbonate to 1L of RODI water. Other solutions out on the market may differ in concentration and may bring undesirable results.
Where can I obtain Sodium Bicarbonate?
You may already have it. It is commonly known as Baking Soda. As long as it is food grade level, you can use any Baking Soda such as Arm & Hammer. You can also find a more pure version at your favorite online retail store.